Automate Experiments with Ephys Copilot
Ephys Copilot is still in Early Beta!
This is an internal document for Steinmetz Lab members to reference.
Please contact Dan or Kenneth if you would like to try it out.
Overview
1. Launch Pinpoint
Double-click the Pinpoint icon on the desktop to launch the application.

Wait until you see the brain in the middle of the screen. The app may take a while to open if it is updating. You may need to switch to it if other windows are in front.
2. Create dummy probes for visualization
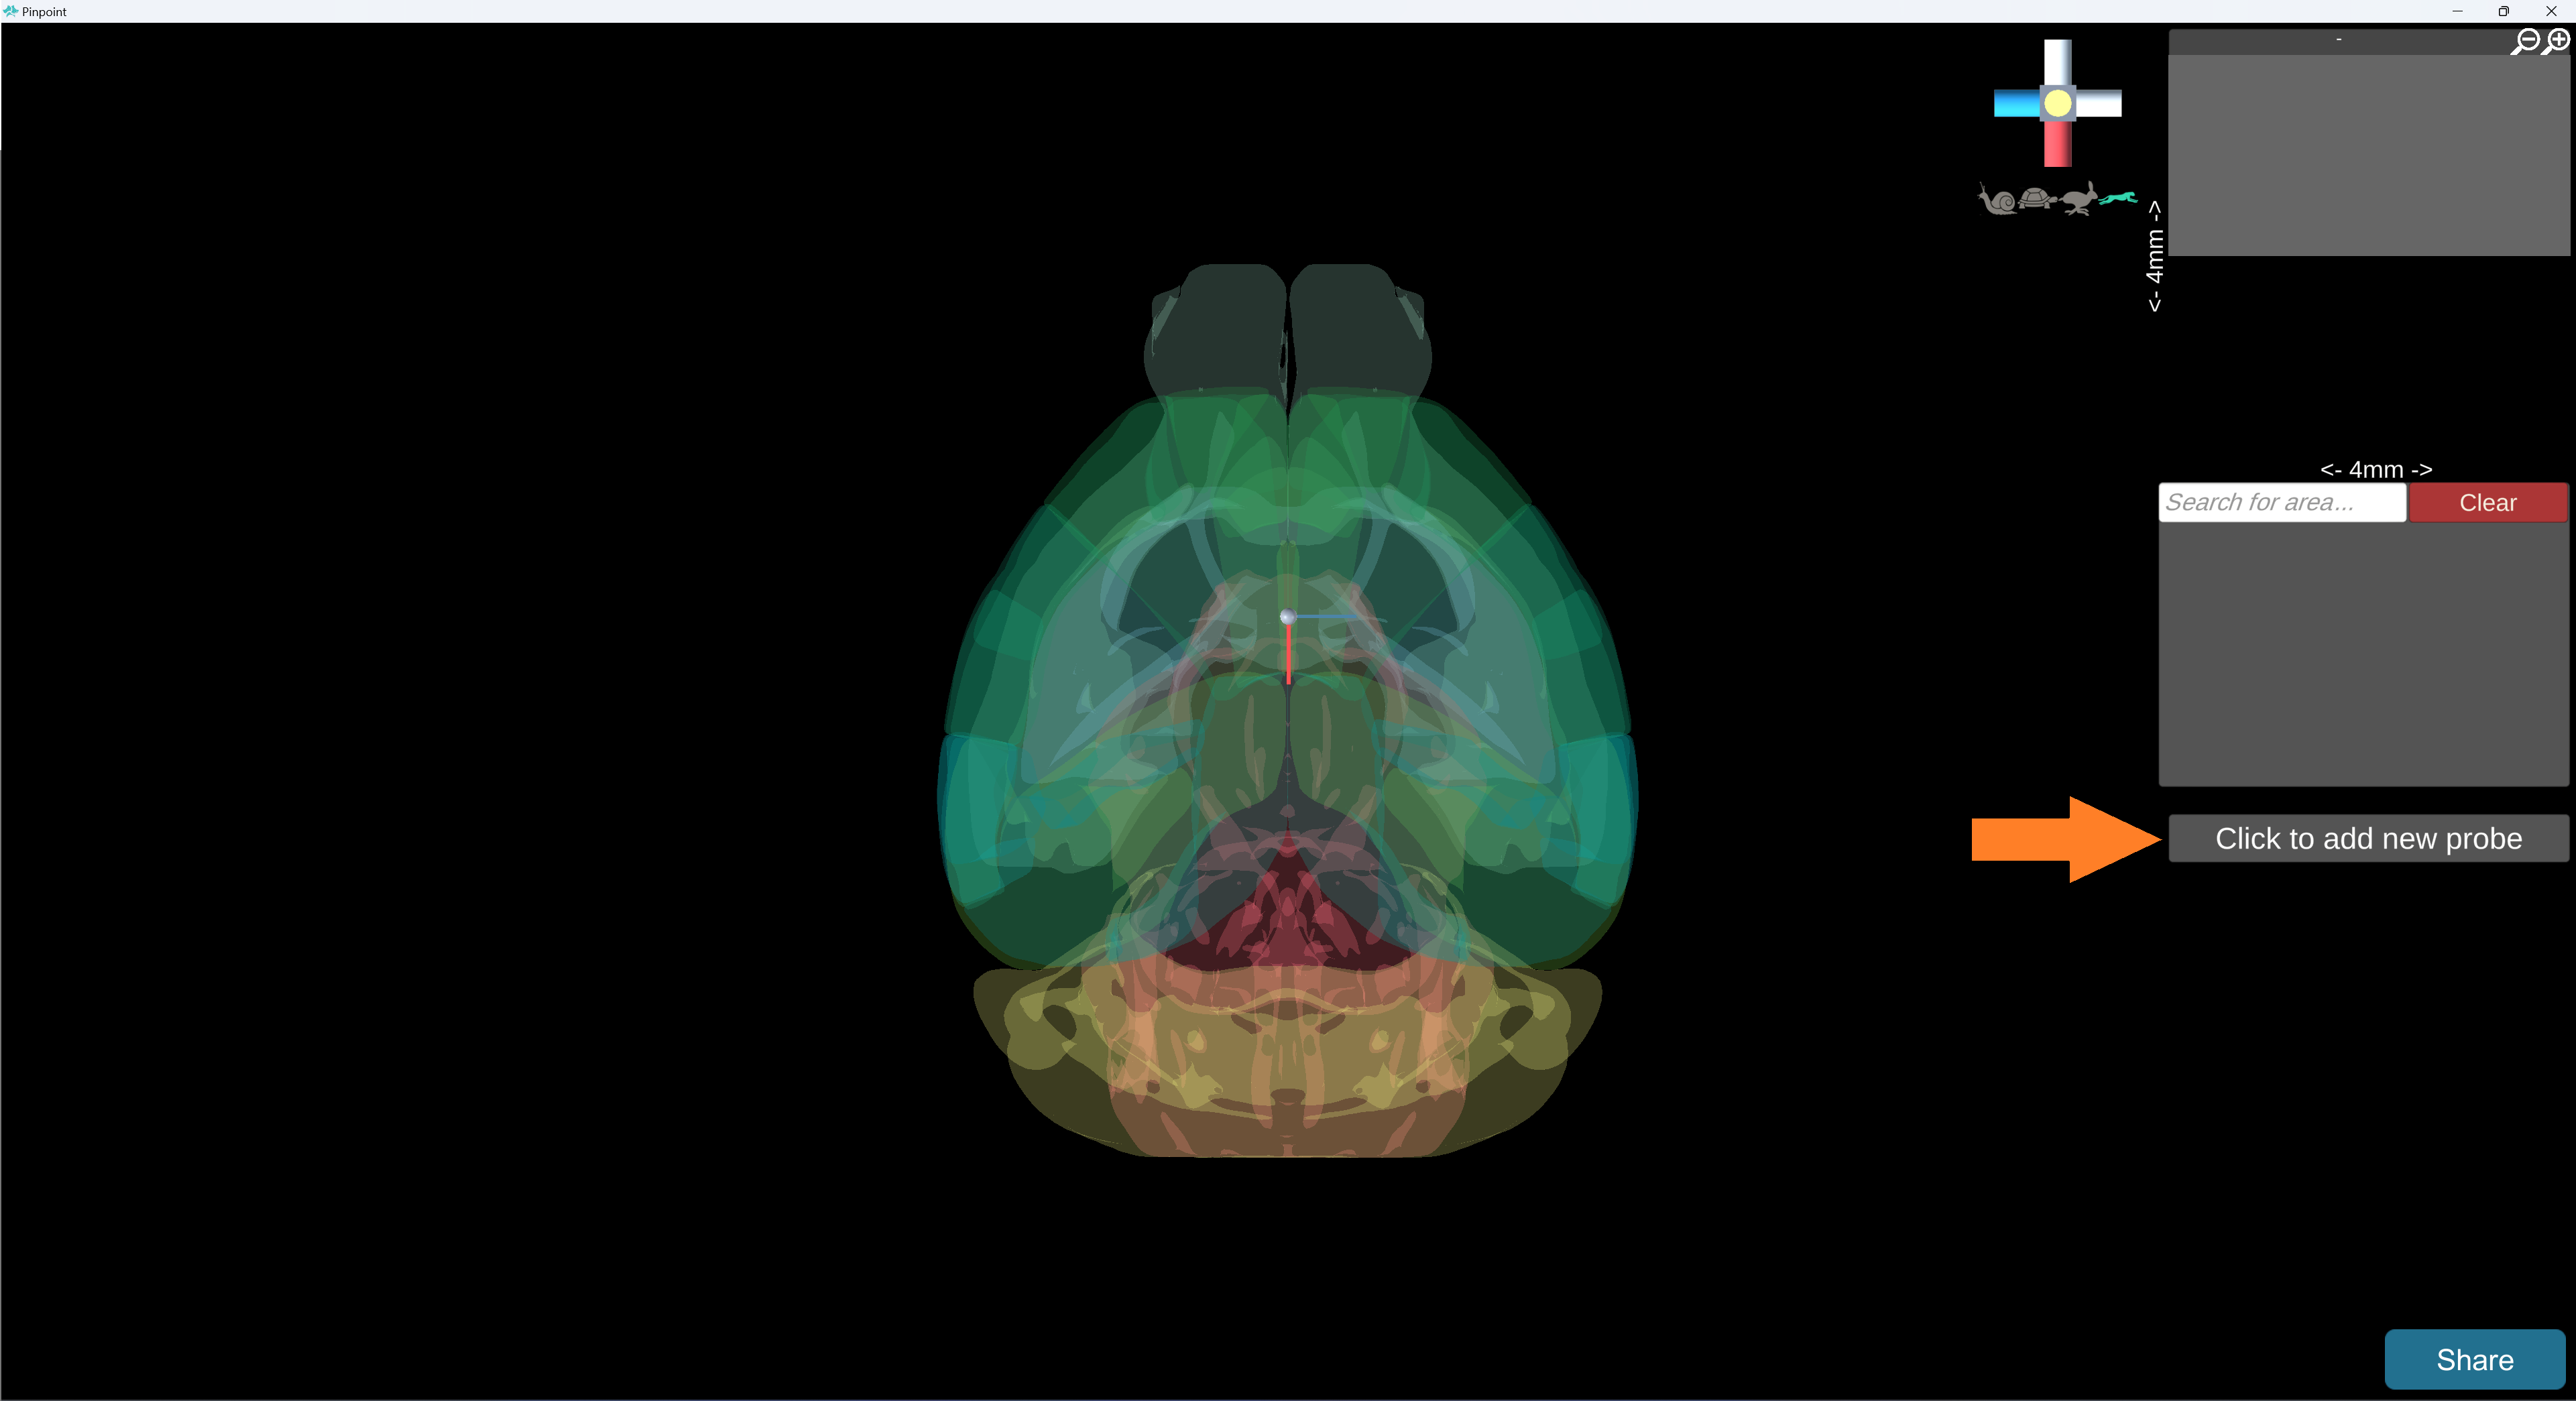
Click the “Add new probe” button in the top right corner of the screen:
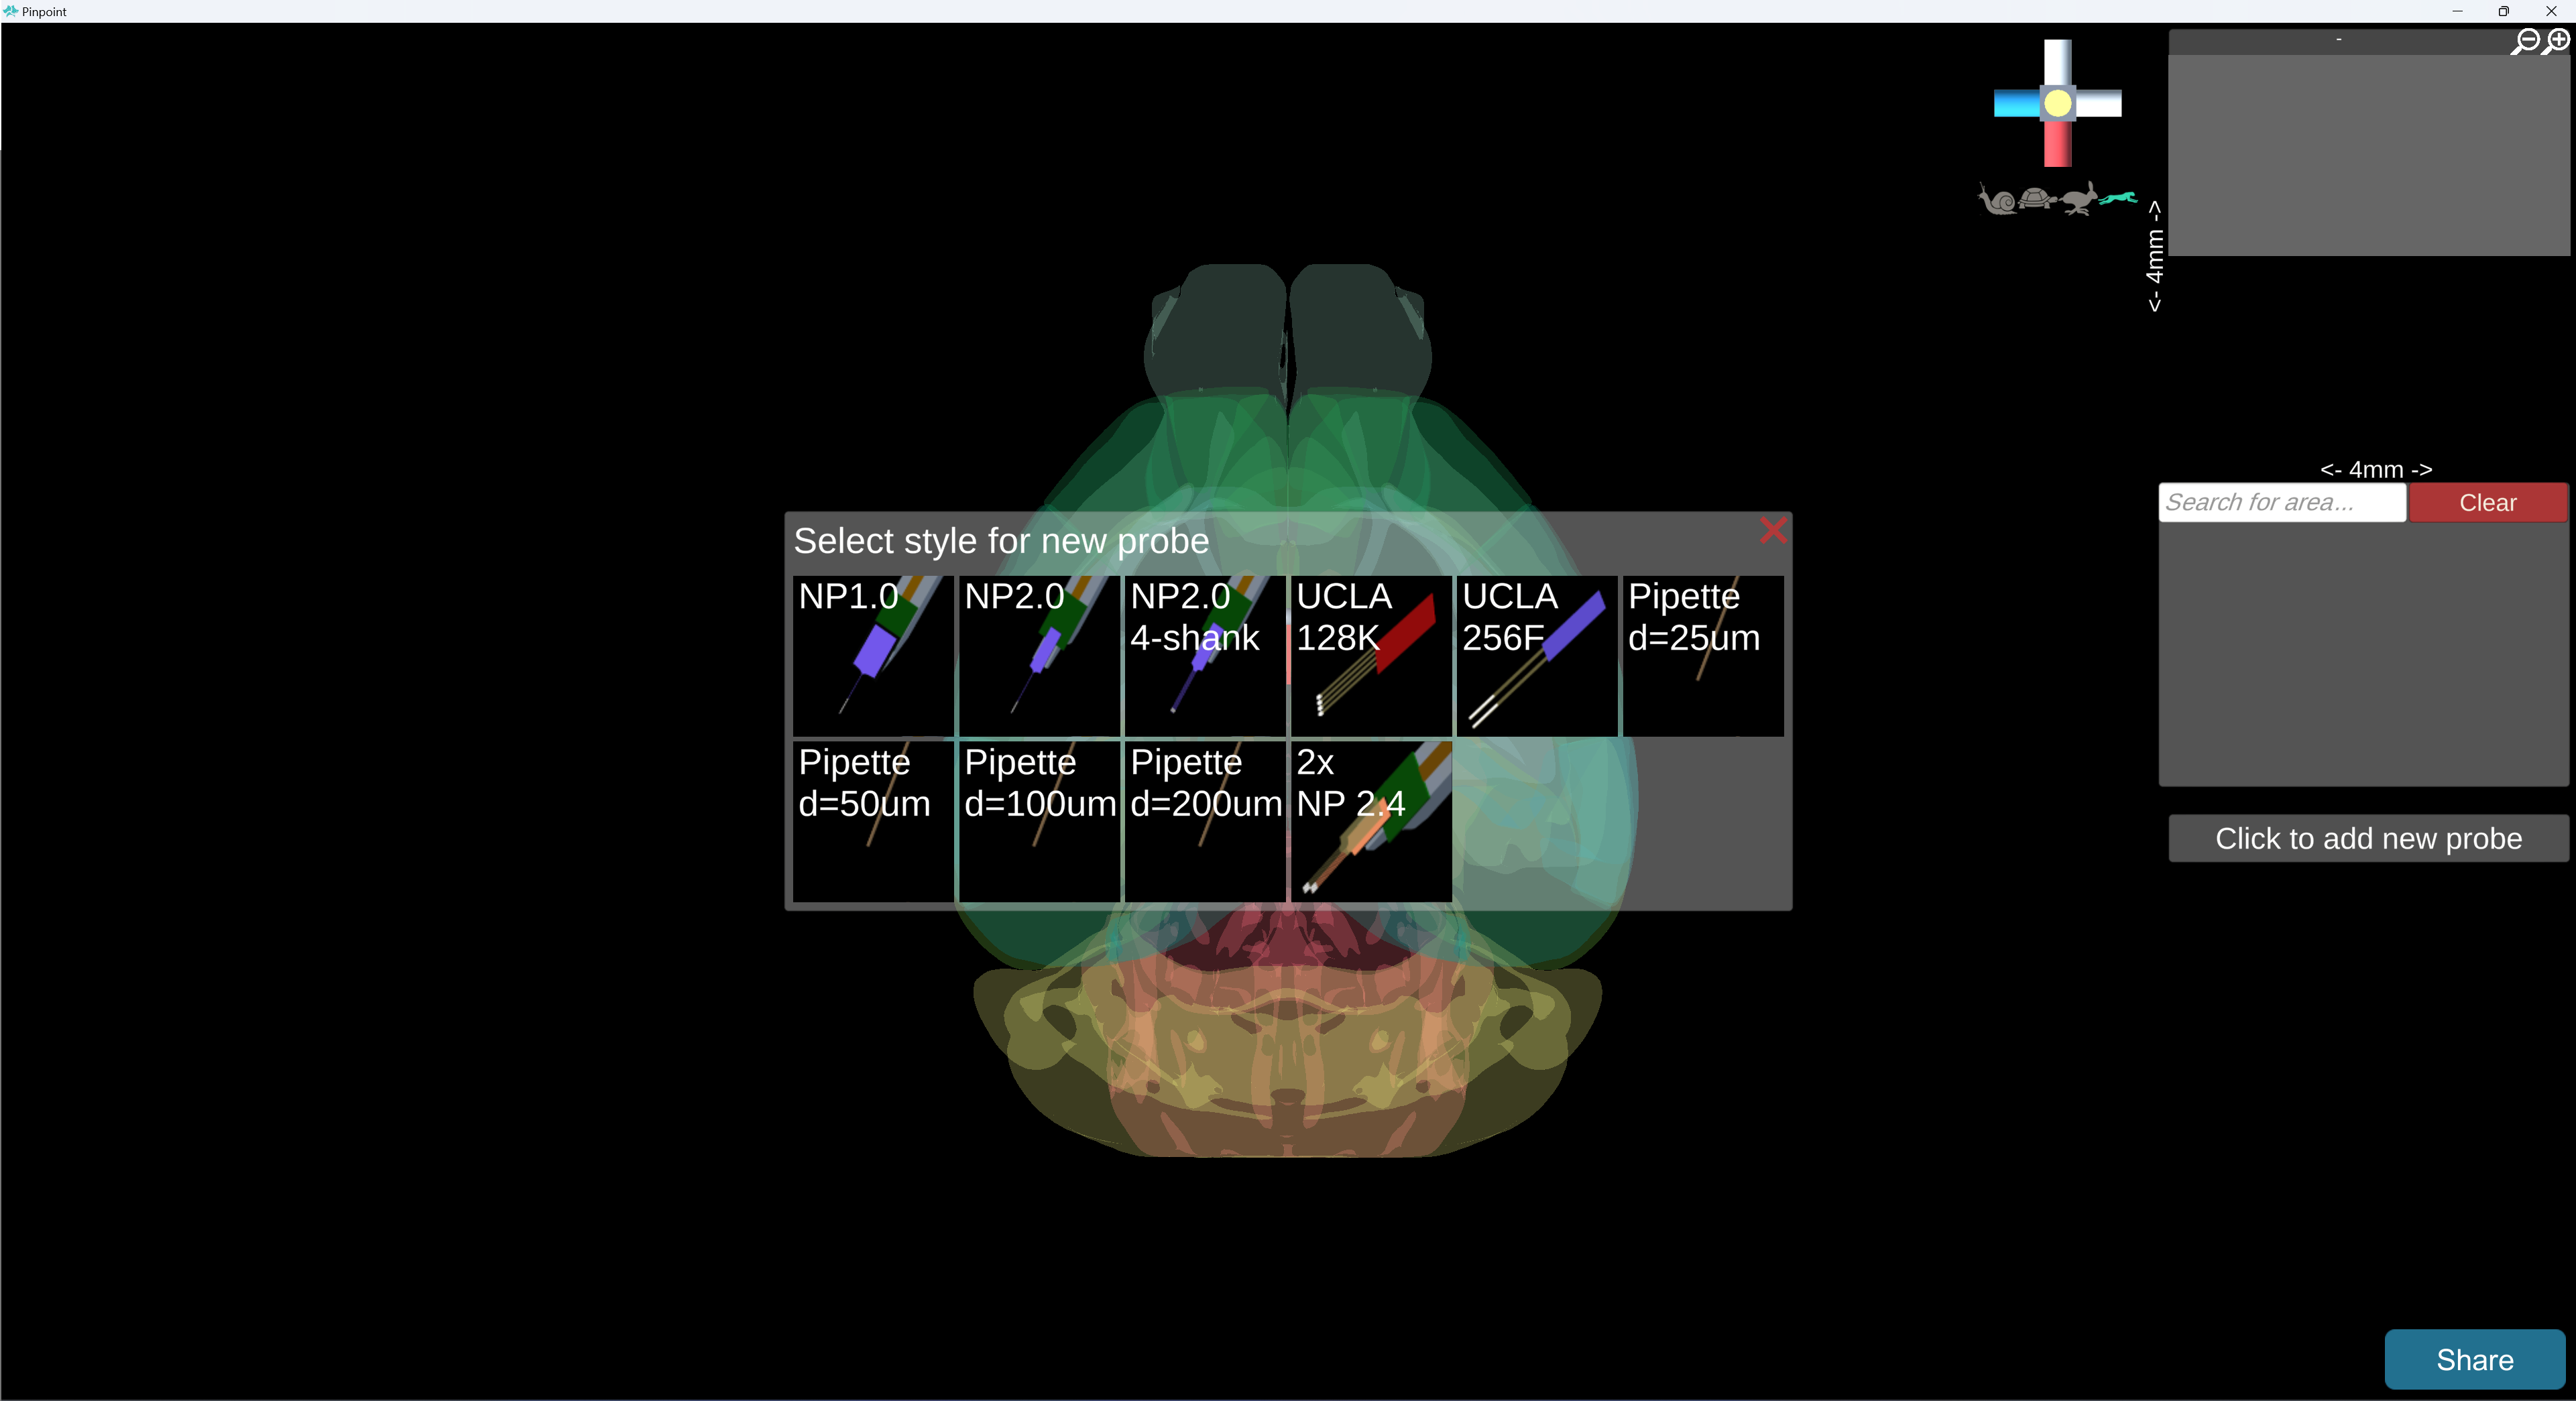
Select the type of probe you want to create:
Set your probe’s angles using the text boxes to match your manipulator’s angles:
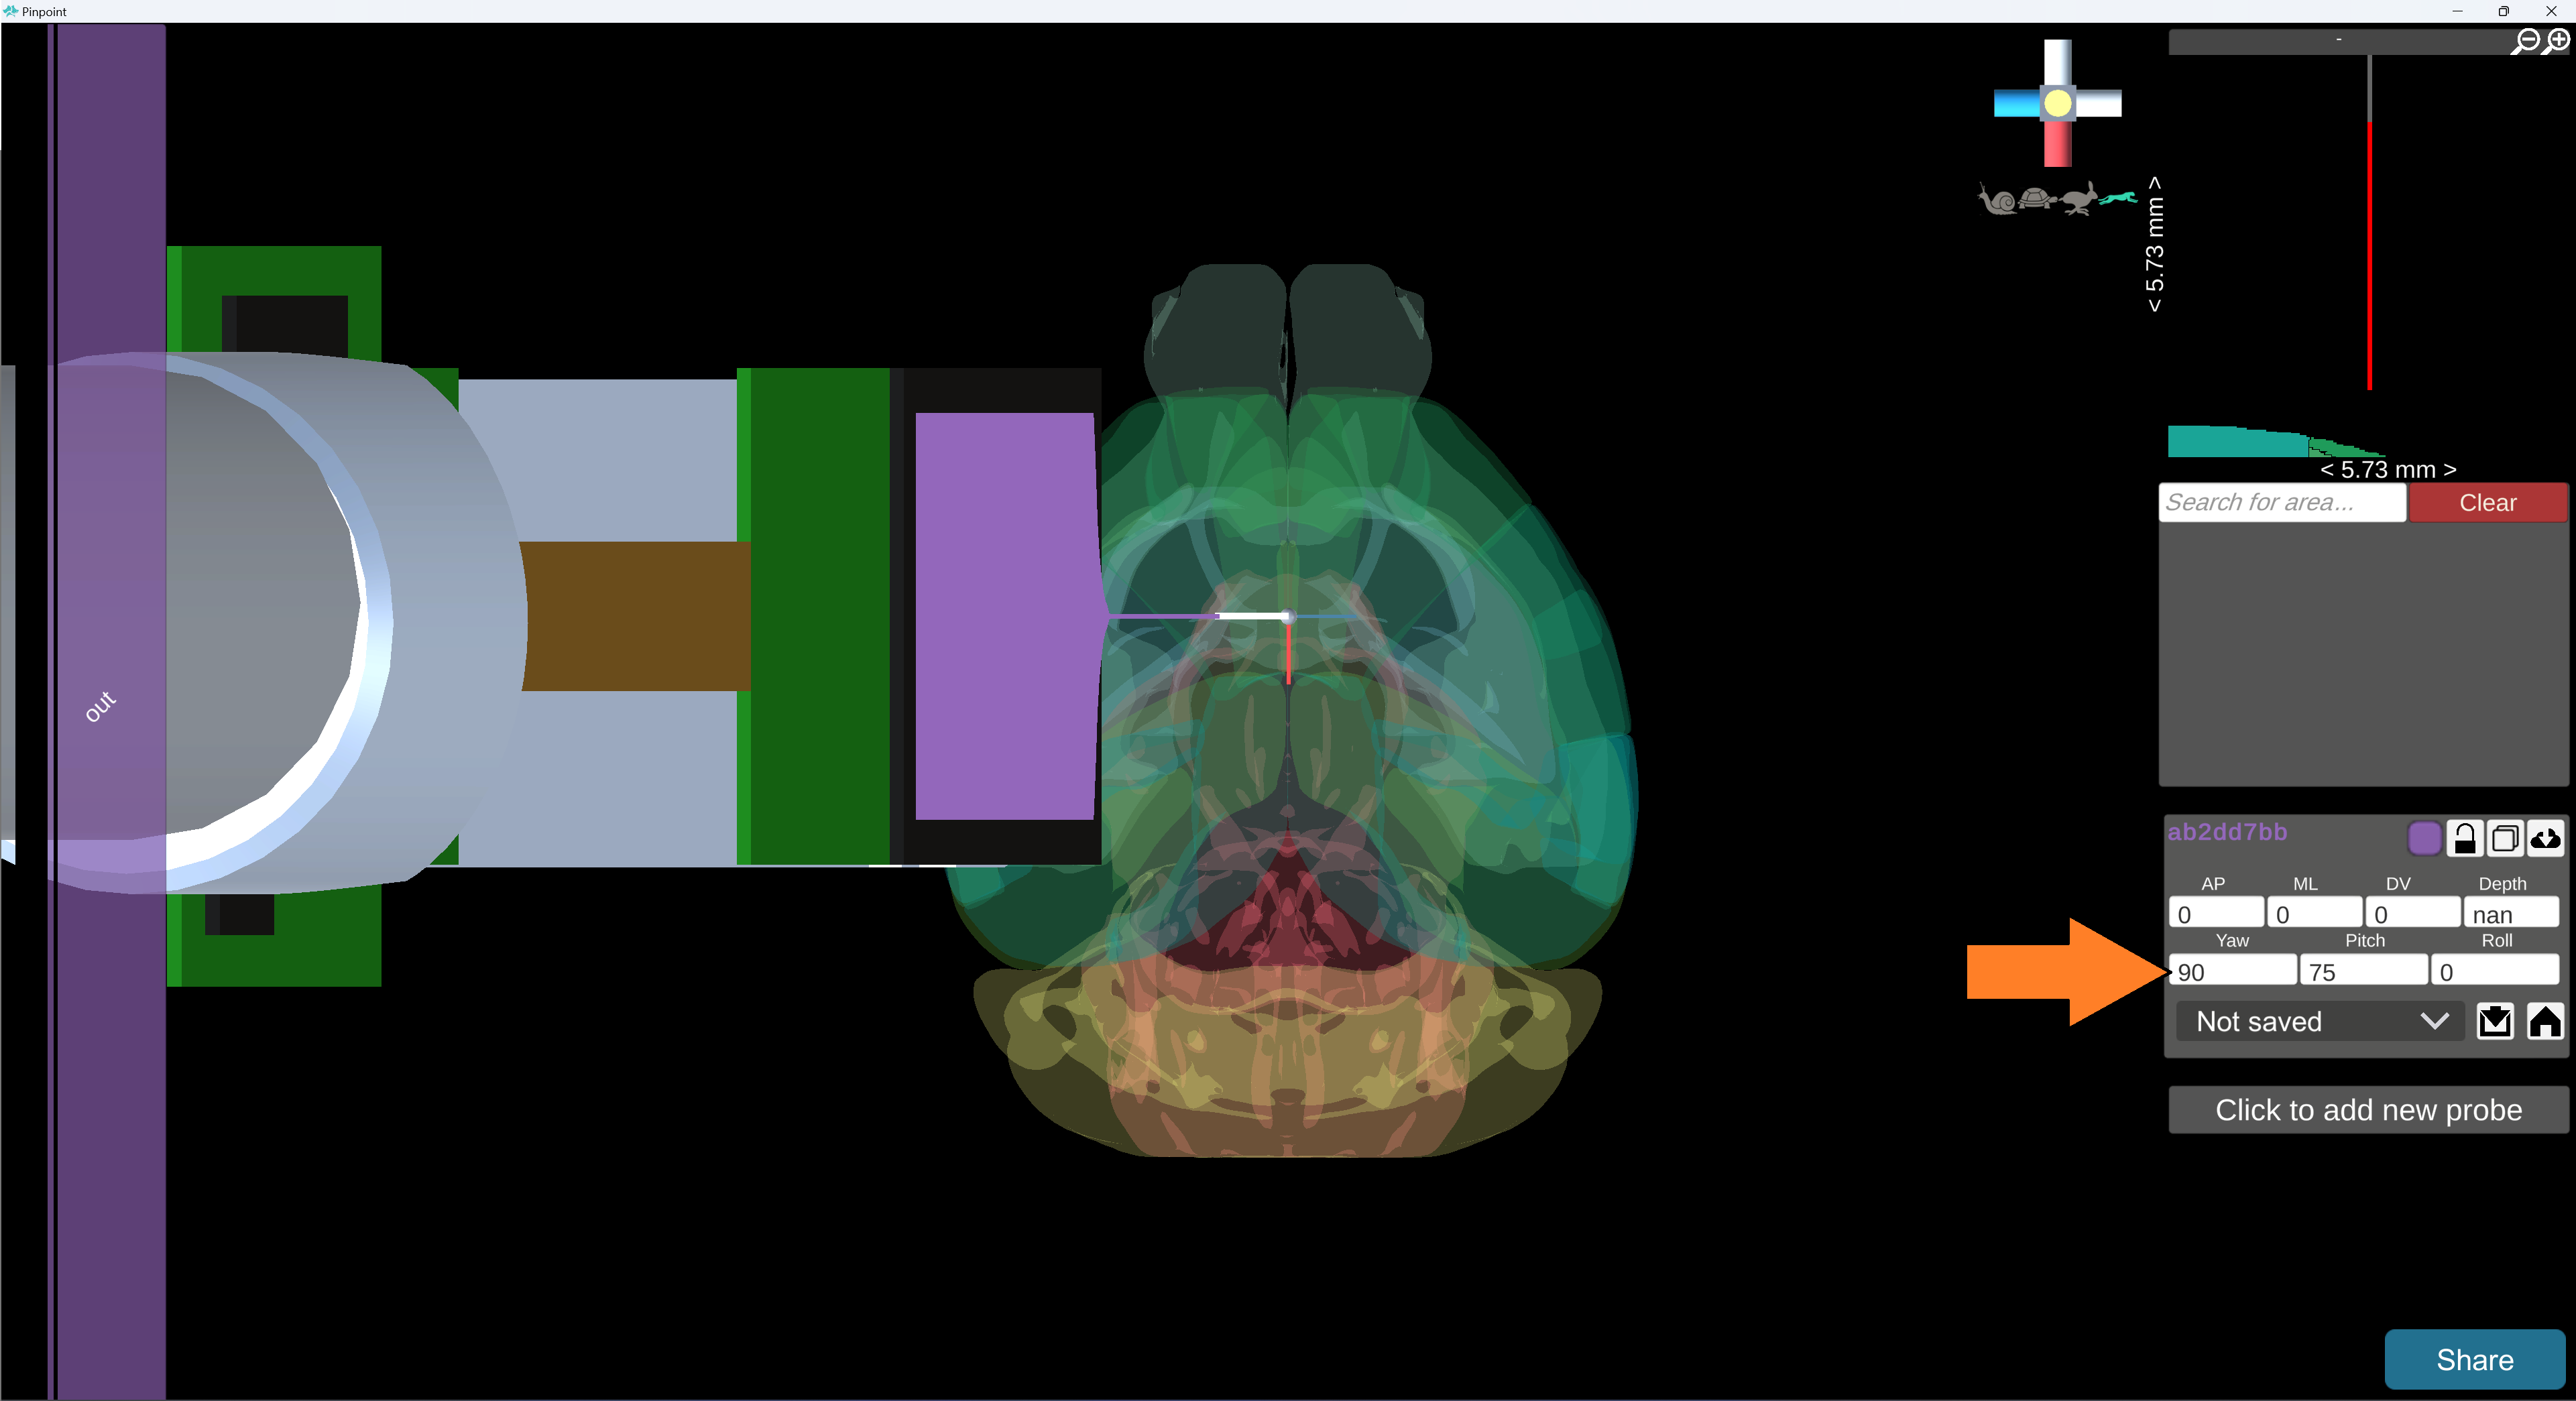
Angles of 0, 0, 0 represent a probe that is parallel to the ground, pointing anteriorly, and probe’s circuitry is facing dorsally. A pitch of 90 degrees would point the probe straight down.
Repeat steps 1 - 3 for each manipulator you will be using.
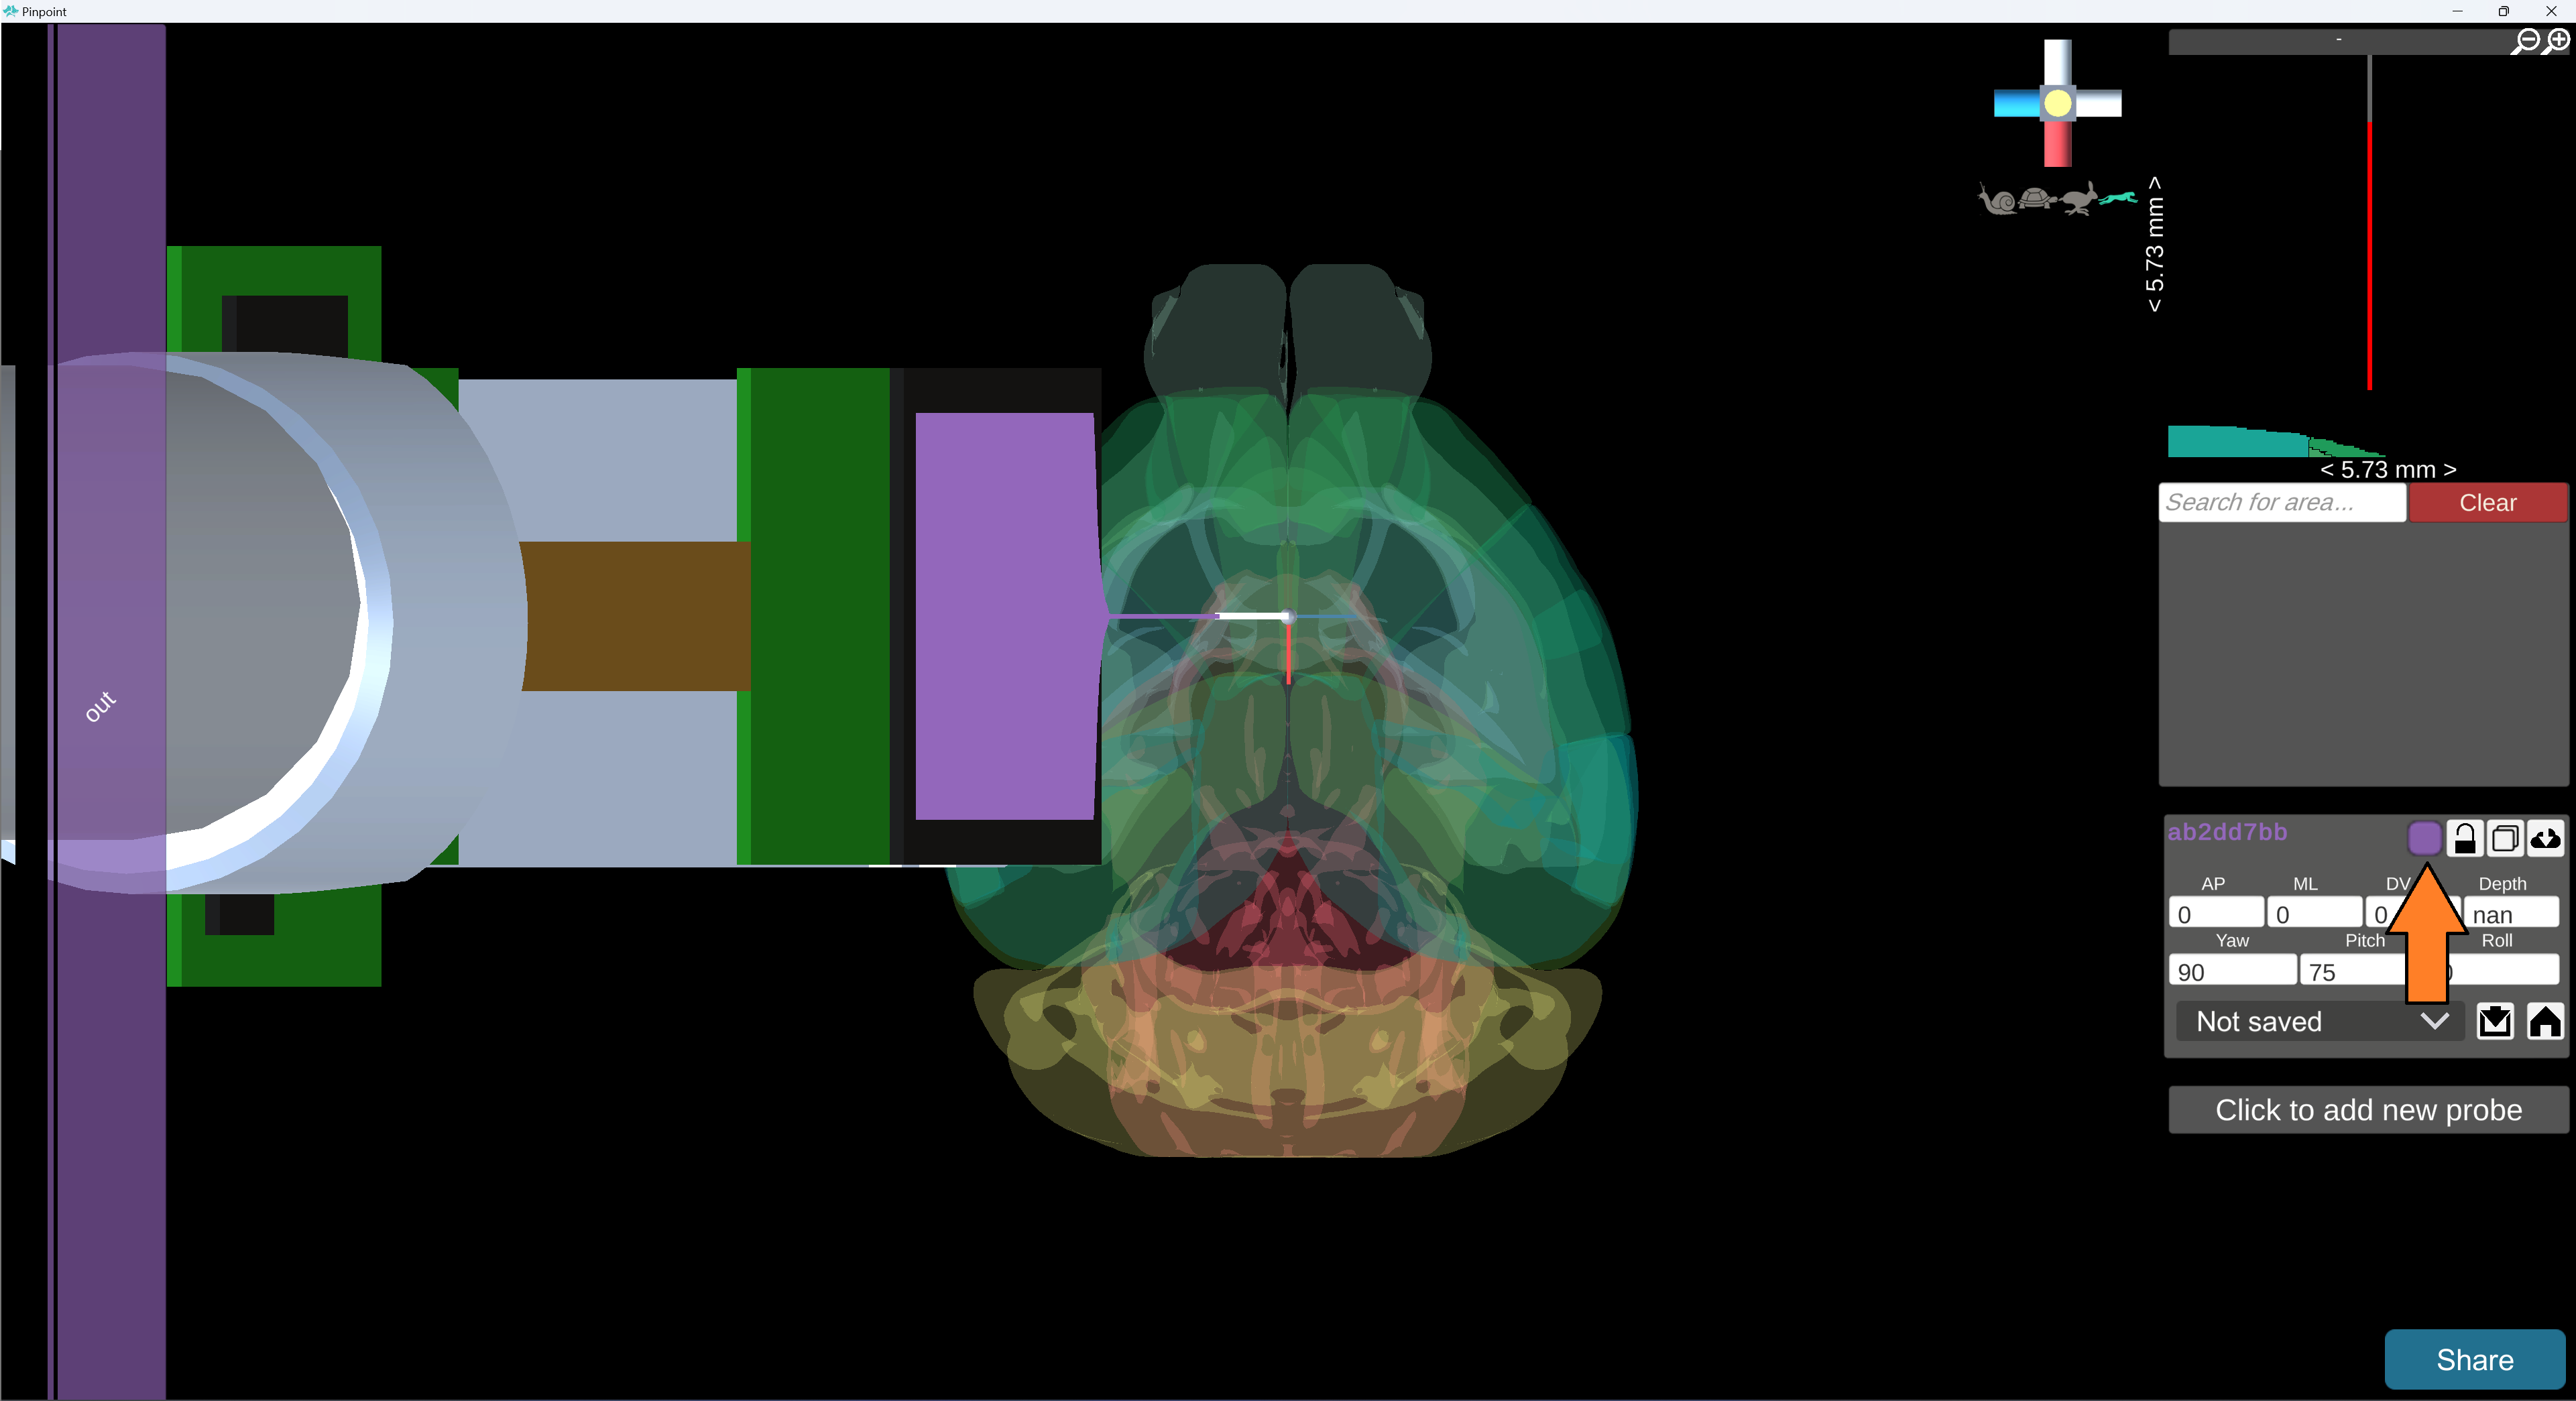
You can click the colored square to change the color of the probe in the scene.
3. Launch Ephys Link
Press ESC to open the main menu.
Switch to the “Ephys Link” tab.
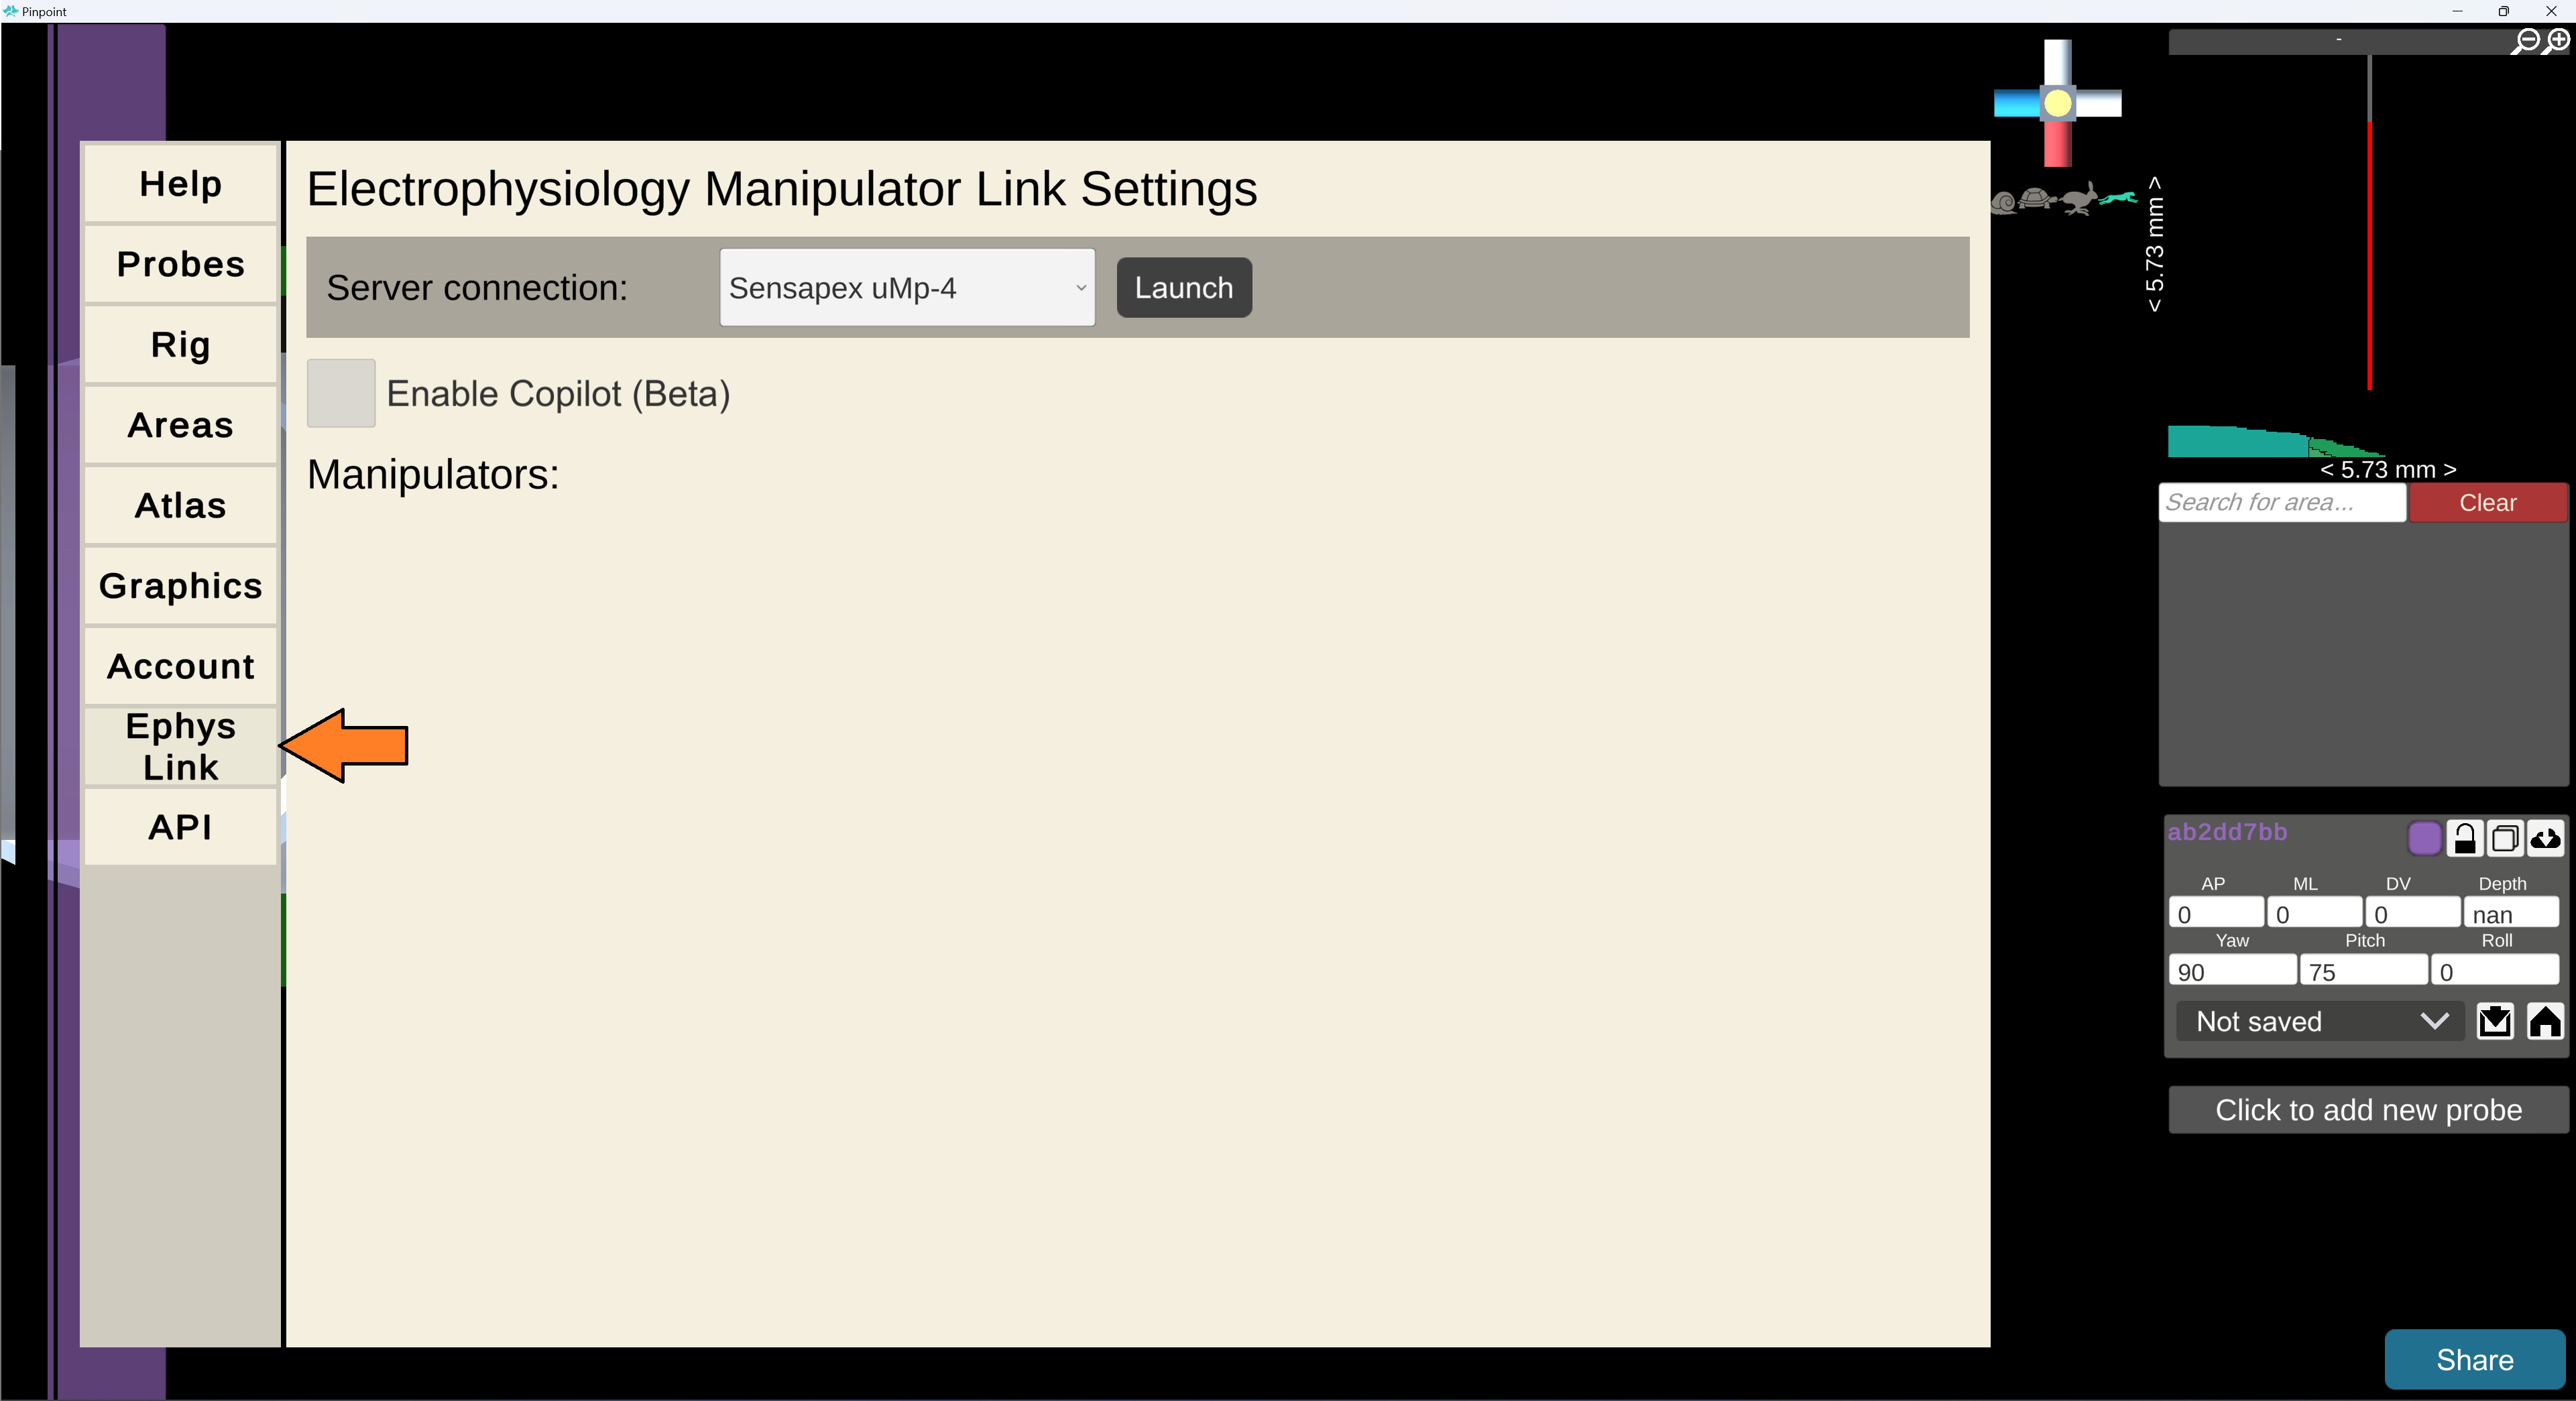
Set the dropdown to “Sensapex uMp-4” (it should be by default) and press the launch button.
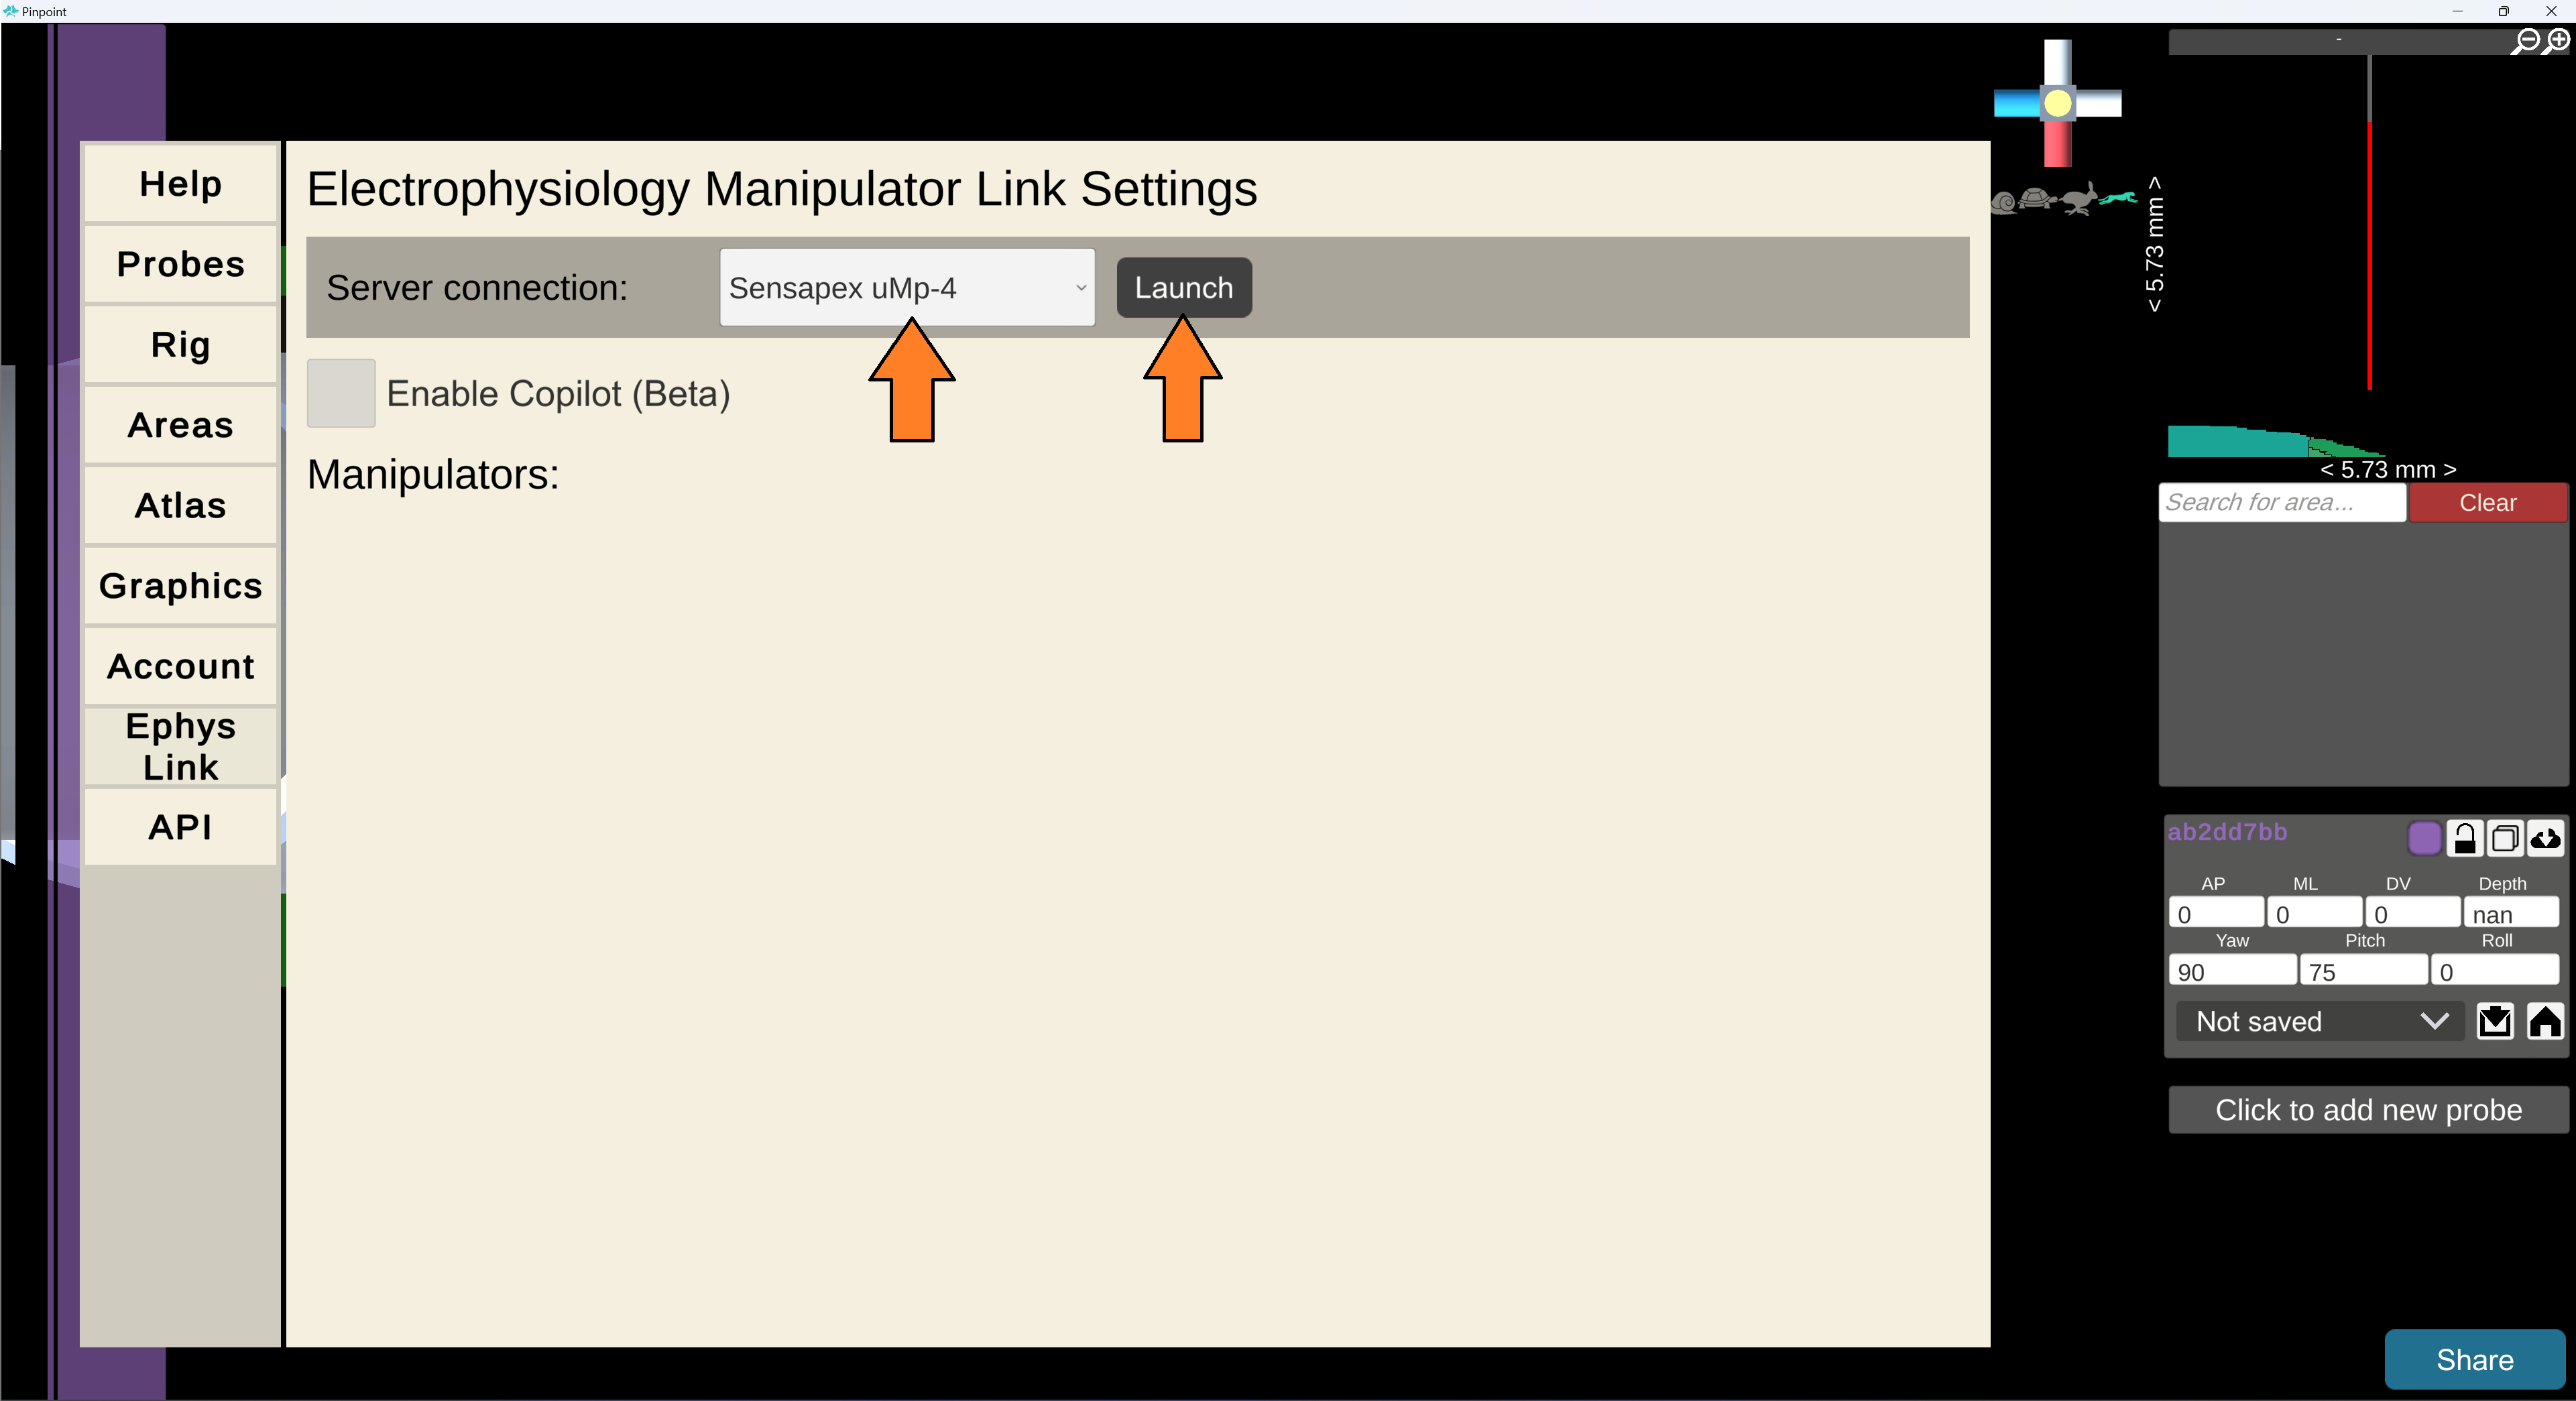
After a few seconds, you will see the Ephys Link window open separately and Pinpoint will establish a connection. Leave the Ephys Link window running in the background.
Your manipulators will appear as separate panels in the Ephys Link window.
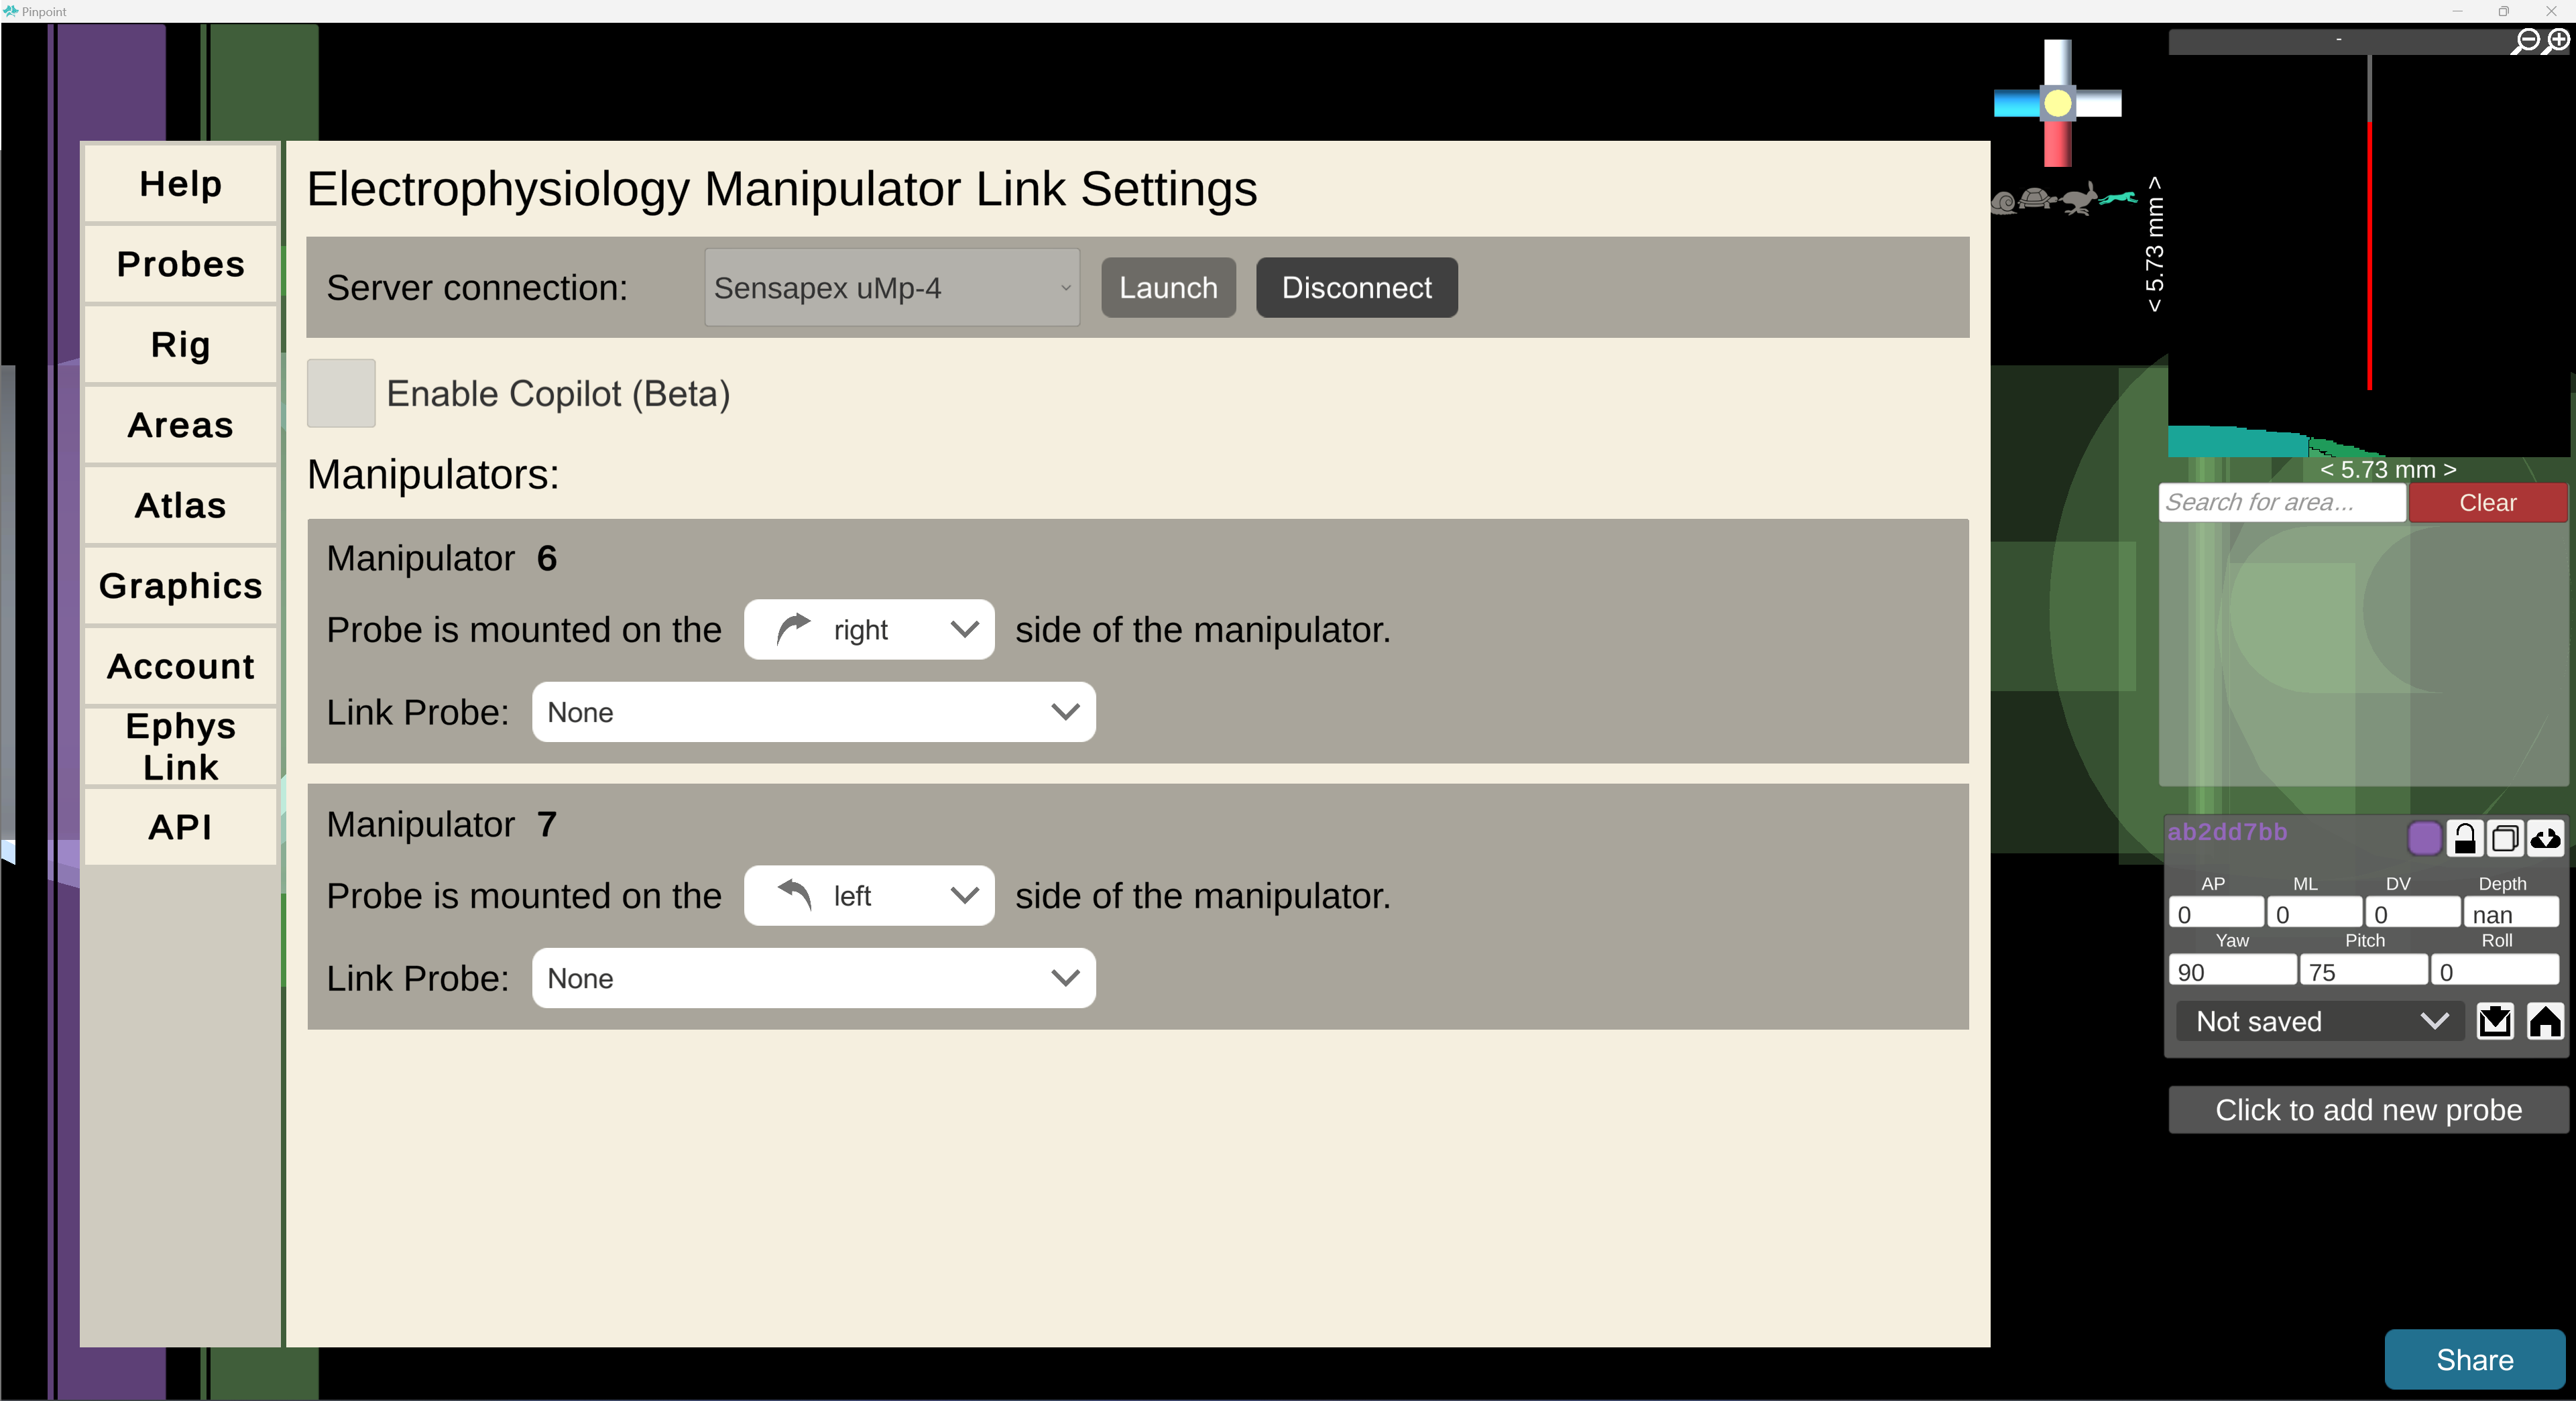
4. Configure manipulators
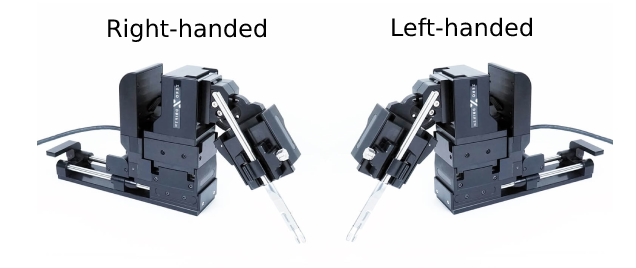
Set the handedness of each manipulator by selecting it from the dropdown.
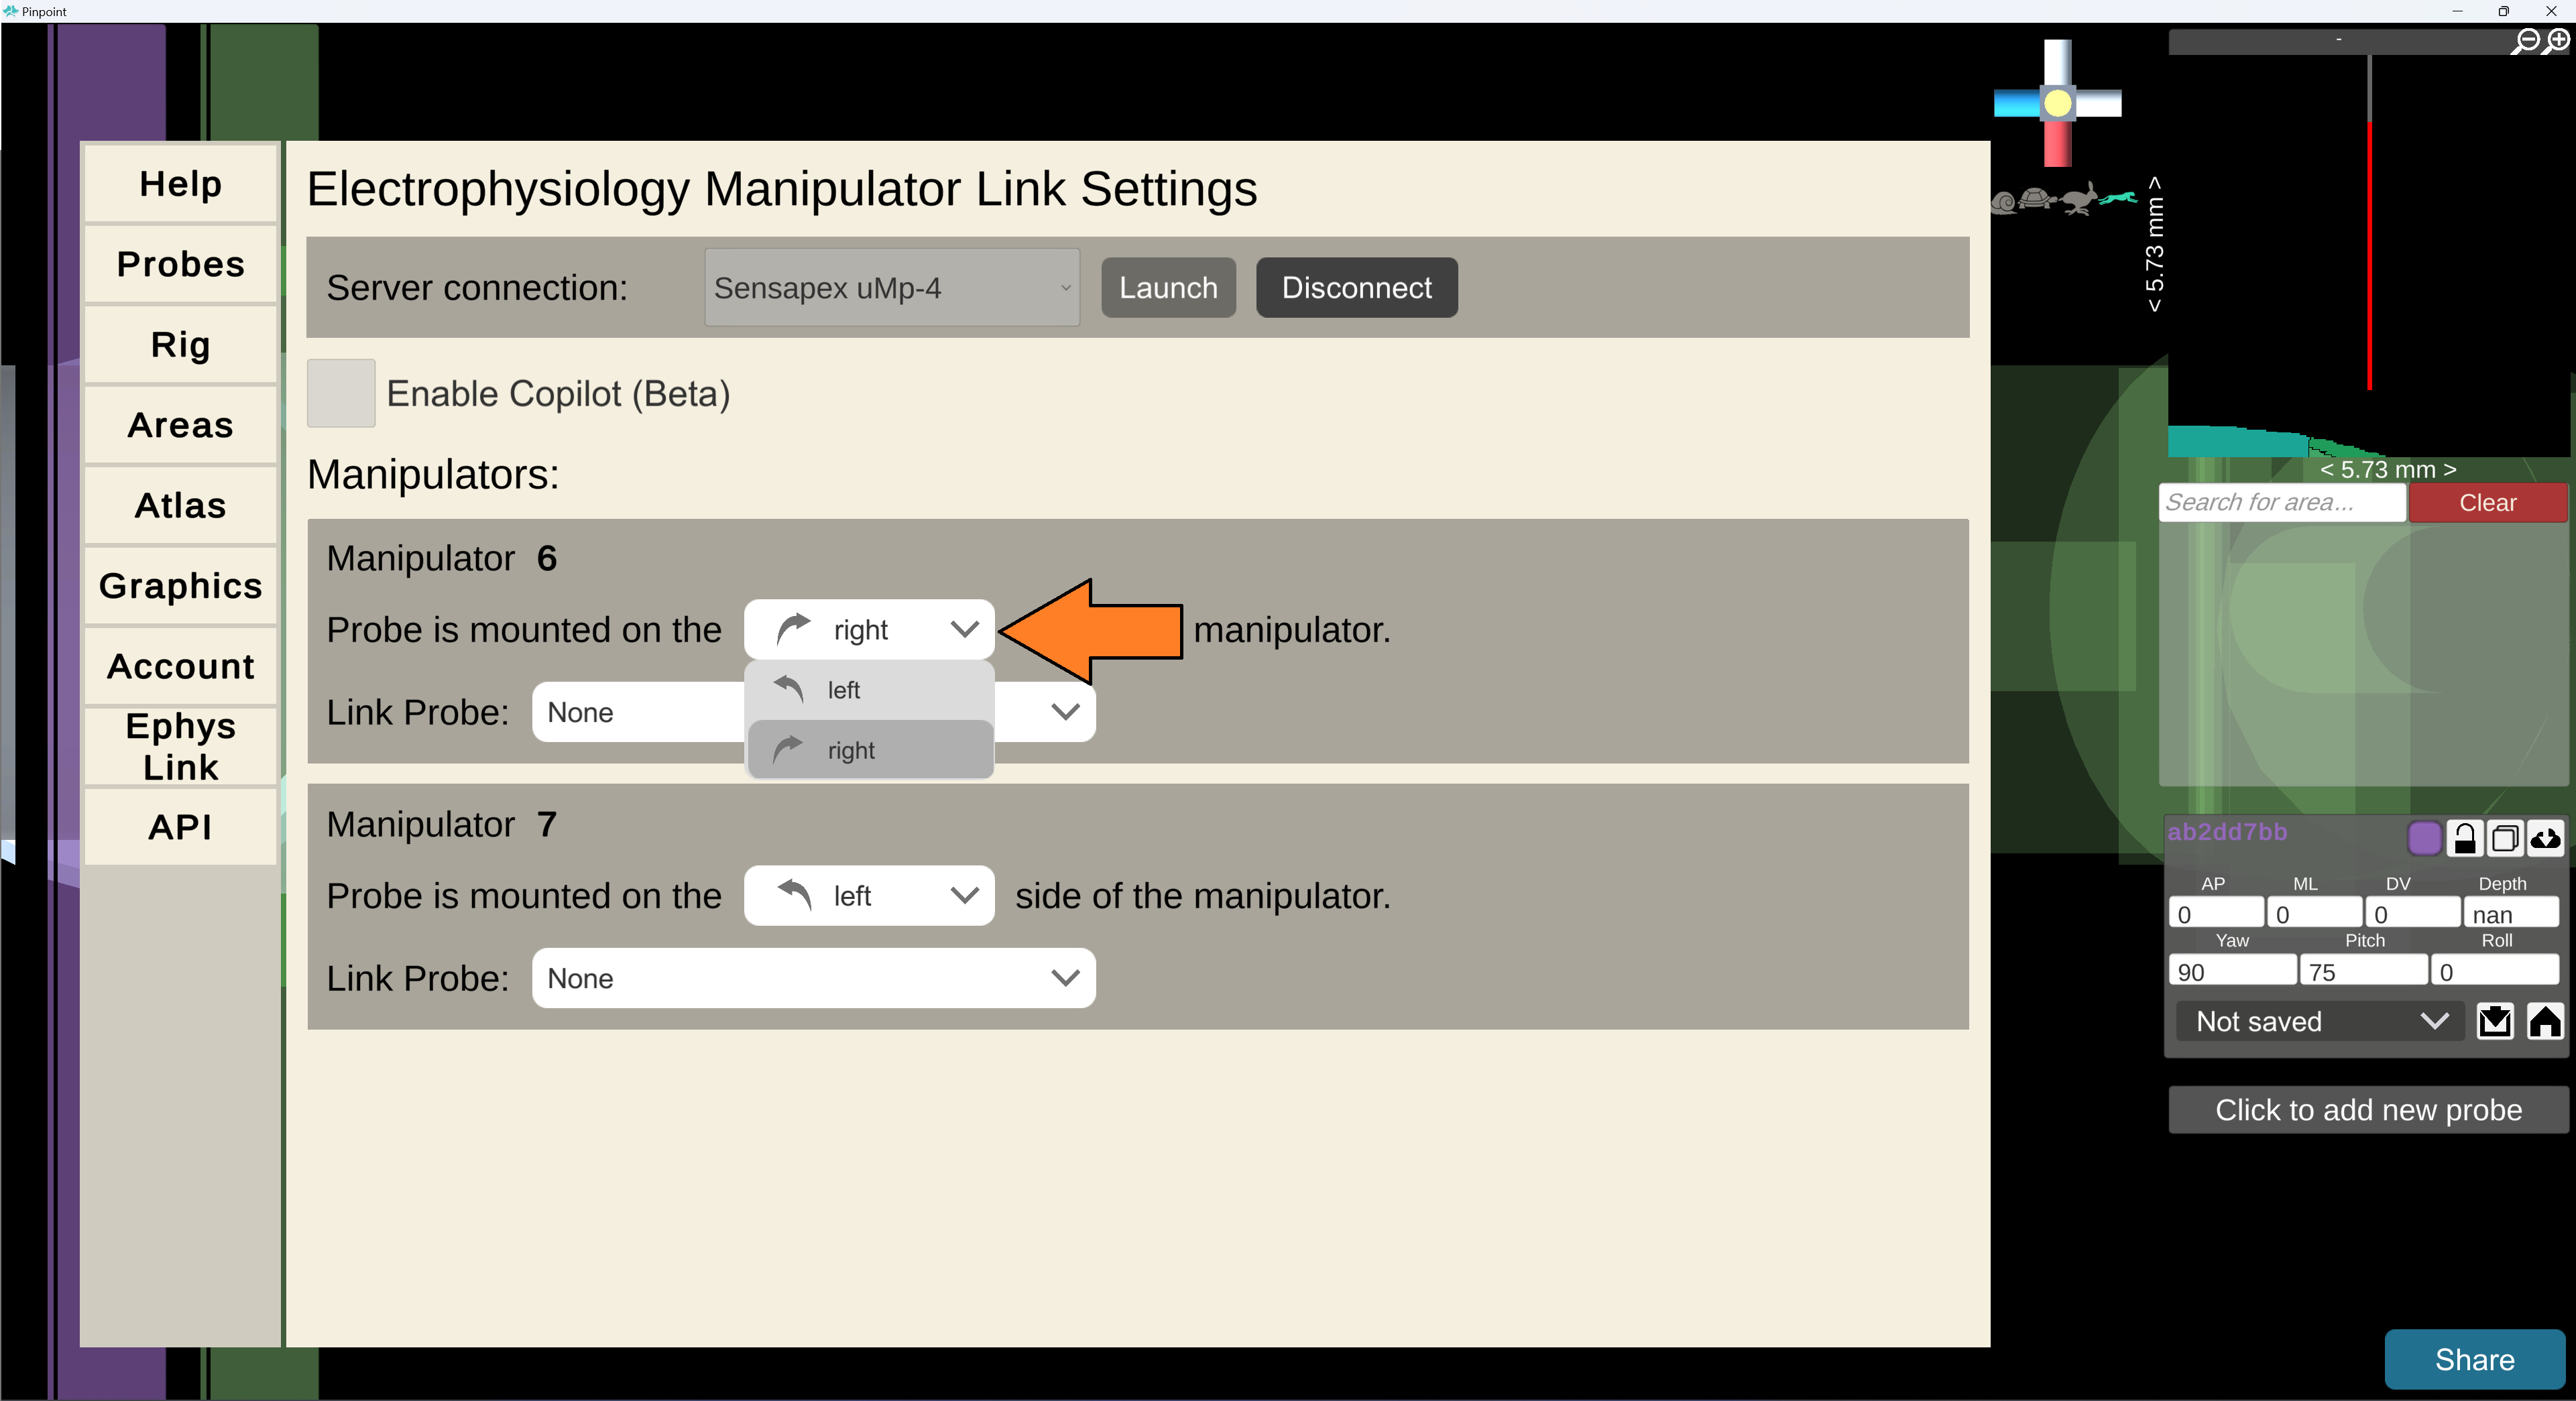
Handedness determines the orientation of the manipulator and which direction it moves. Handedness is classified by which side of the manipulator the probe will be mounted on. Ephys Link will use this to correctly orient the manipulator’s direction. Below is a diagram of the handedness of Sensapex manipulators. Use this to determine the handedness of your manipulator.
5. Connect dummy probes to manipulators
Click the dropdown by “Link Probe” and select the probe you want to link to the manipulator.
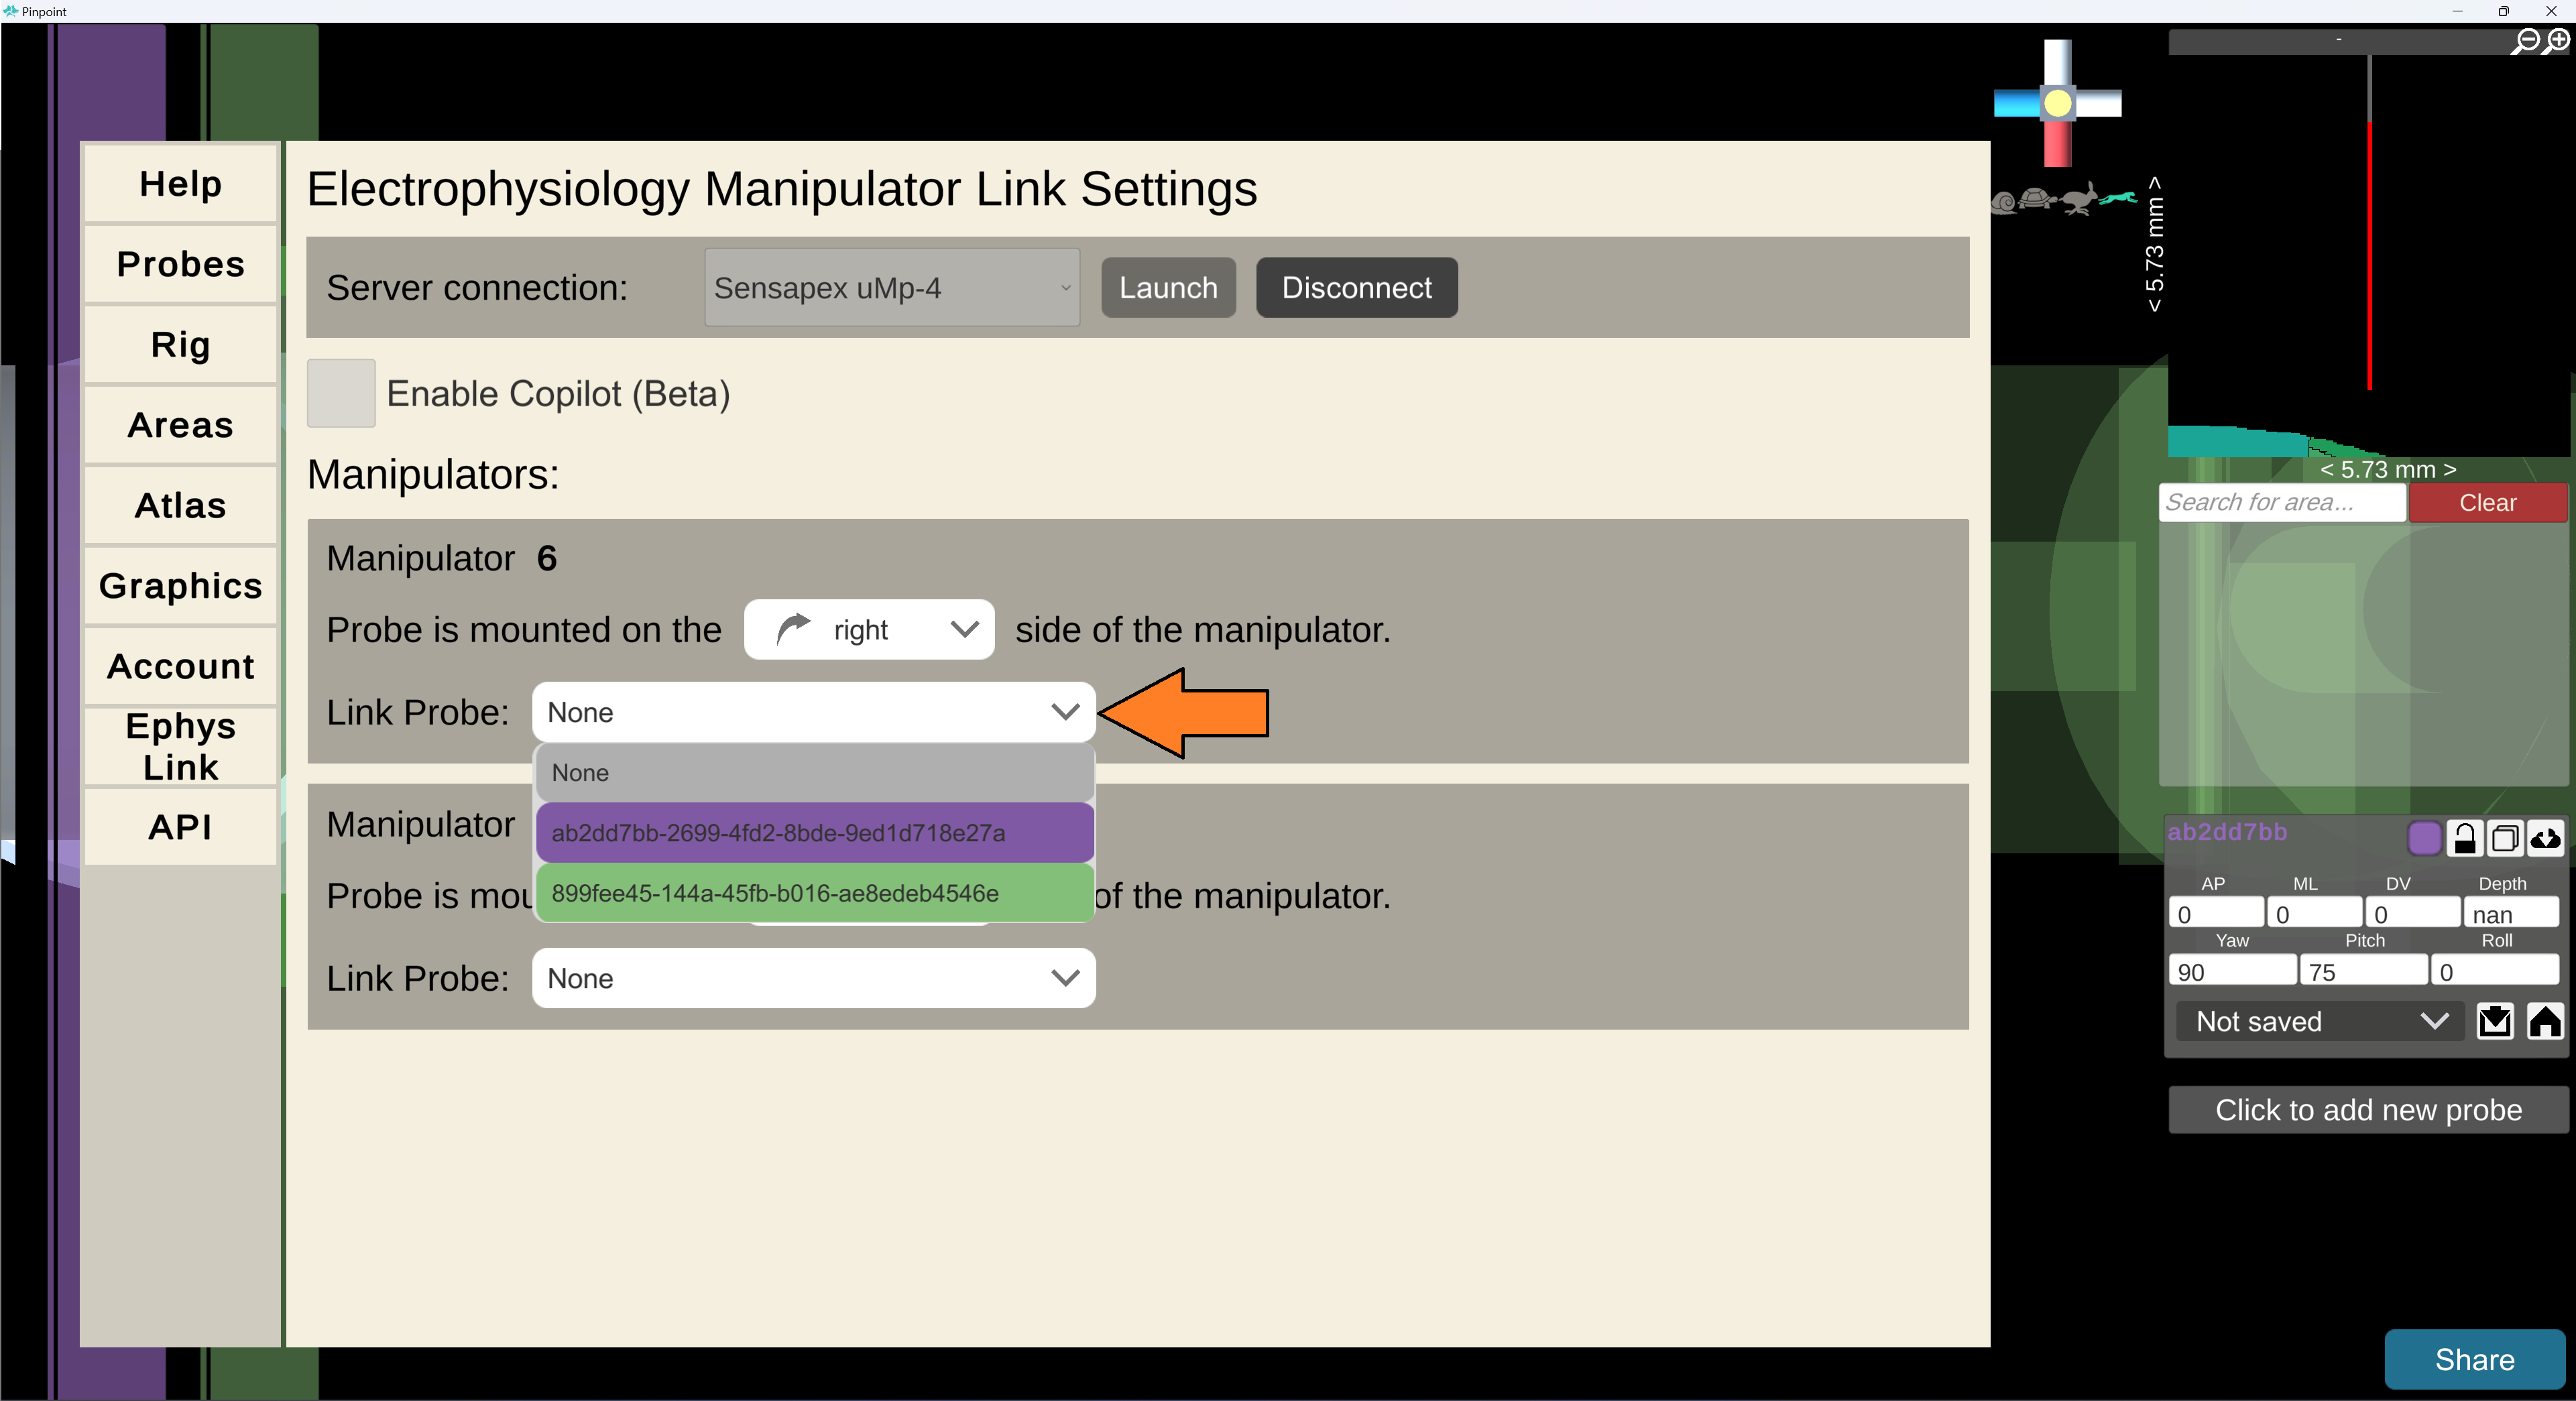
Repeat for each manipulator in vivo. There should be a 1:1 pairing of dummy probes to manipulators.
You should end up with something like this:
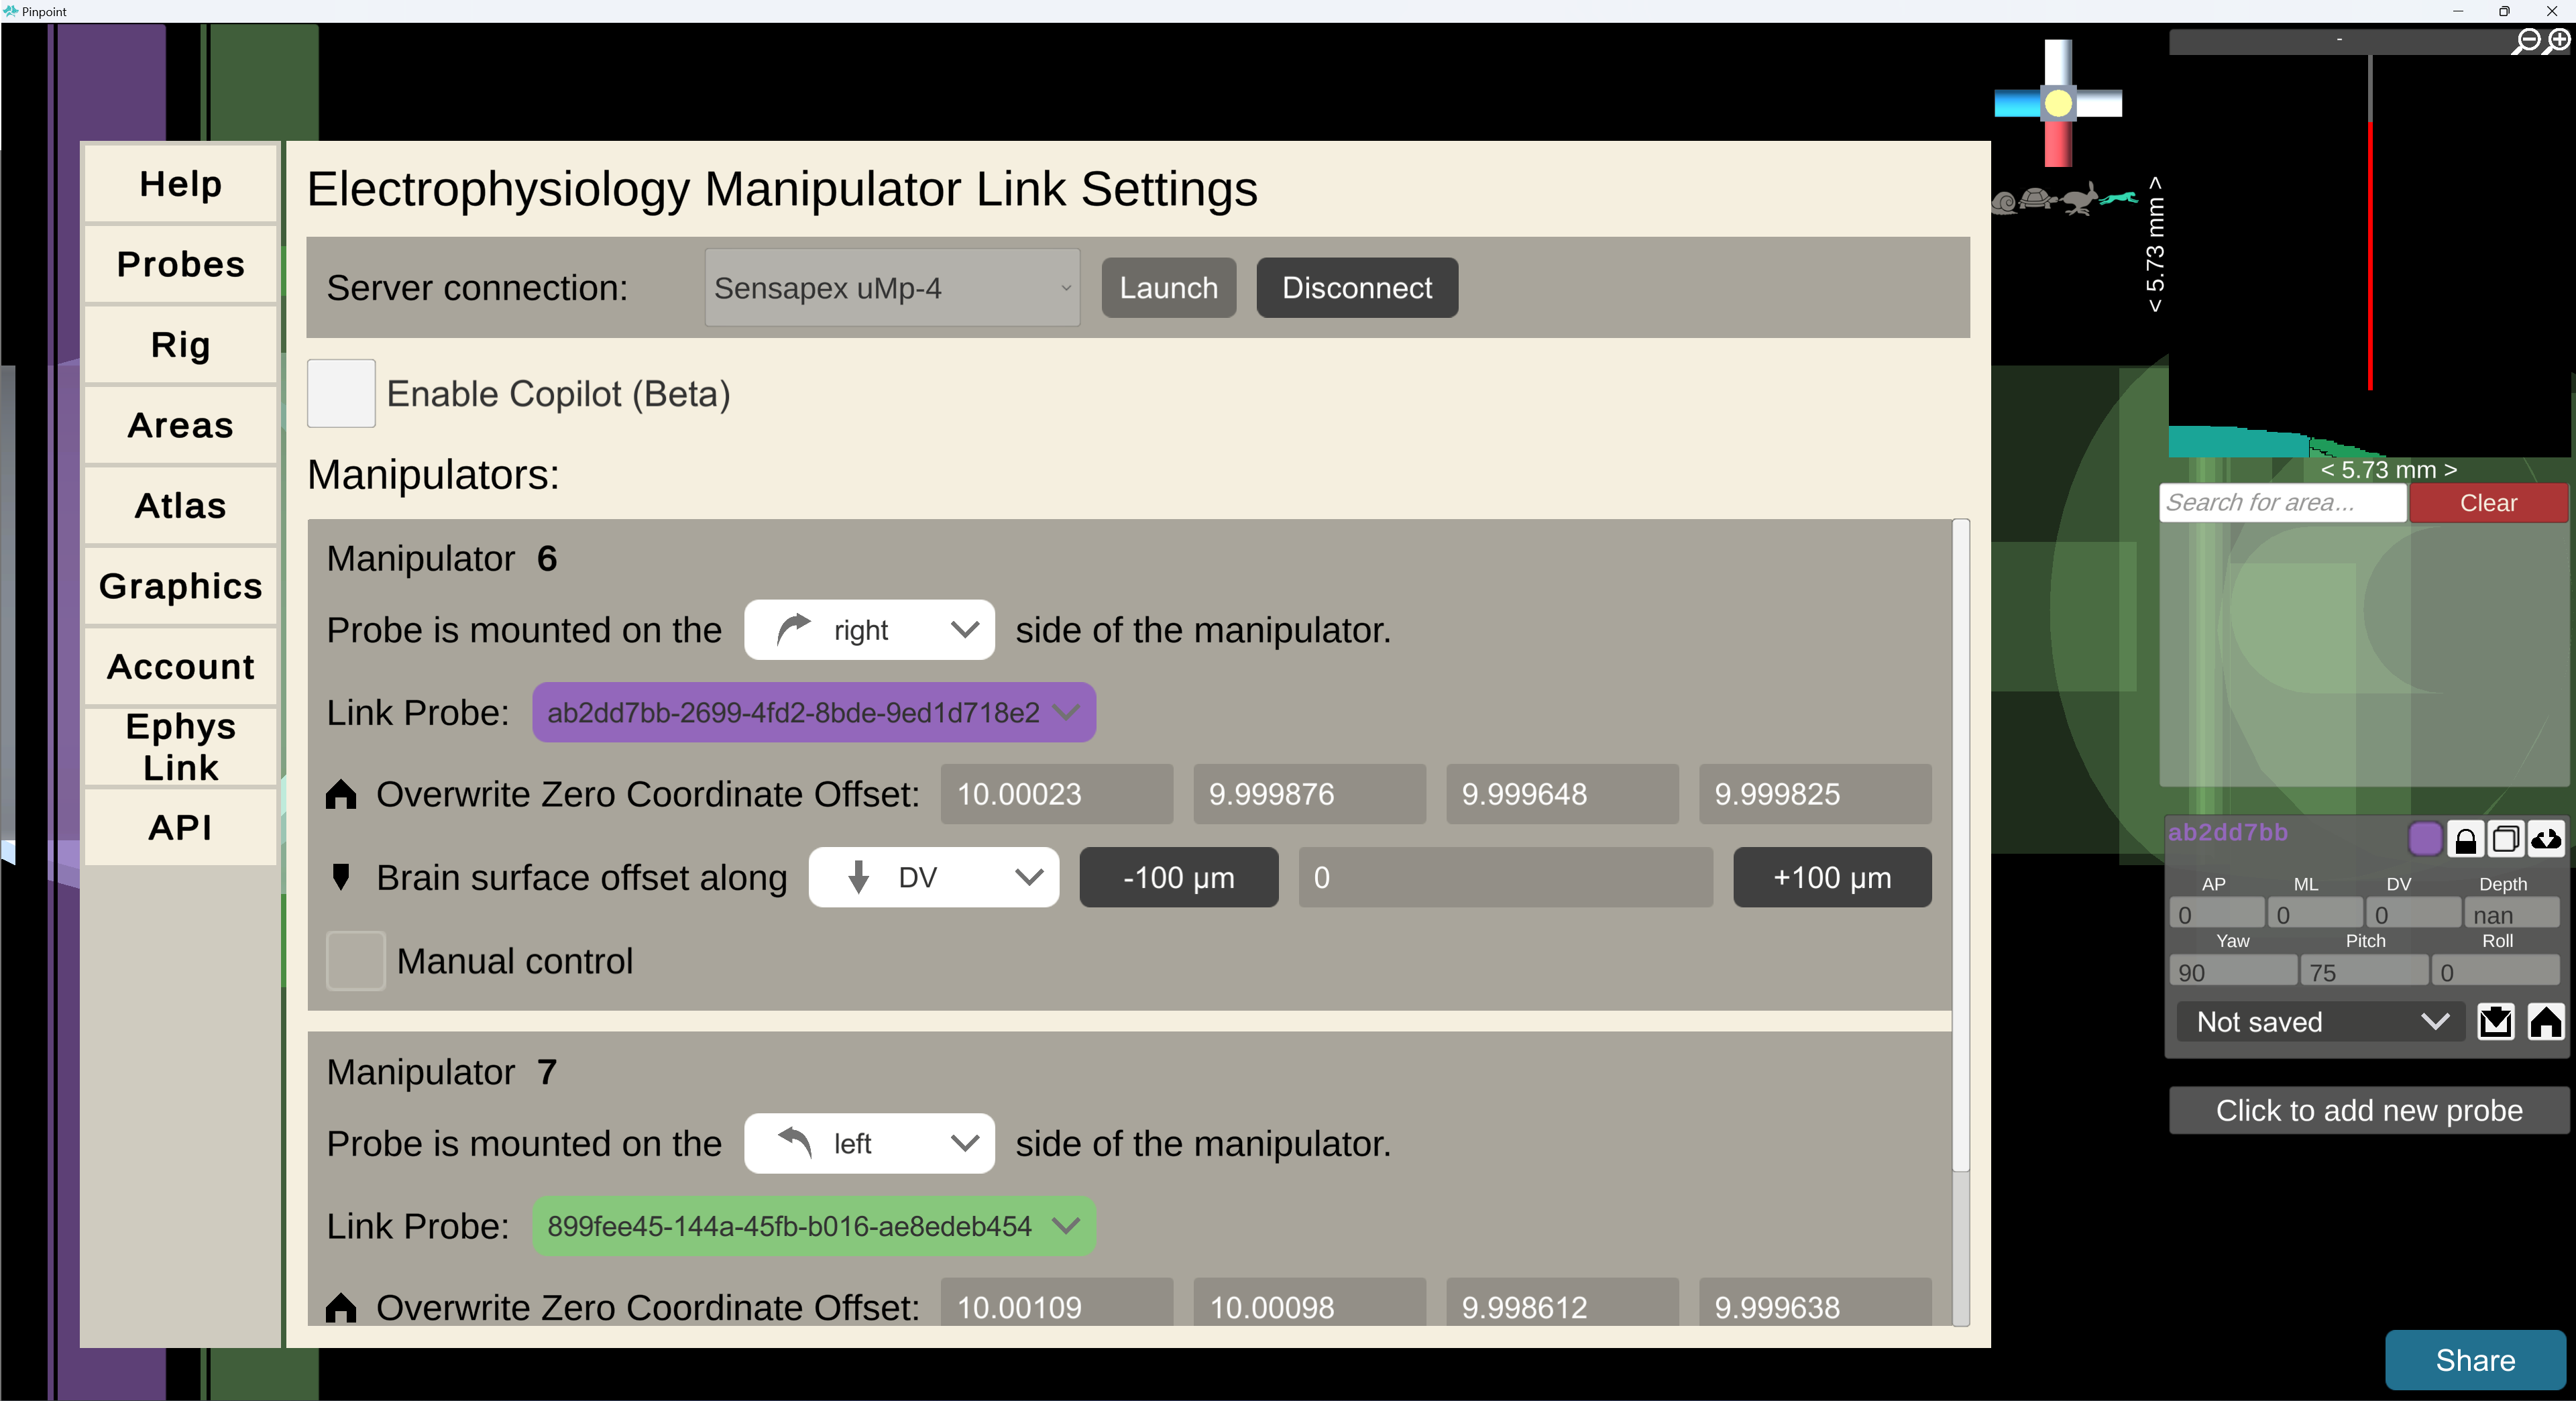
You may notice that the dummy probes do not reflect the same position as your in vivo manipulators. This is because the manipulators have not been calibrated to Bregma yet. We will do this in a later part.
6. Activate Copilot
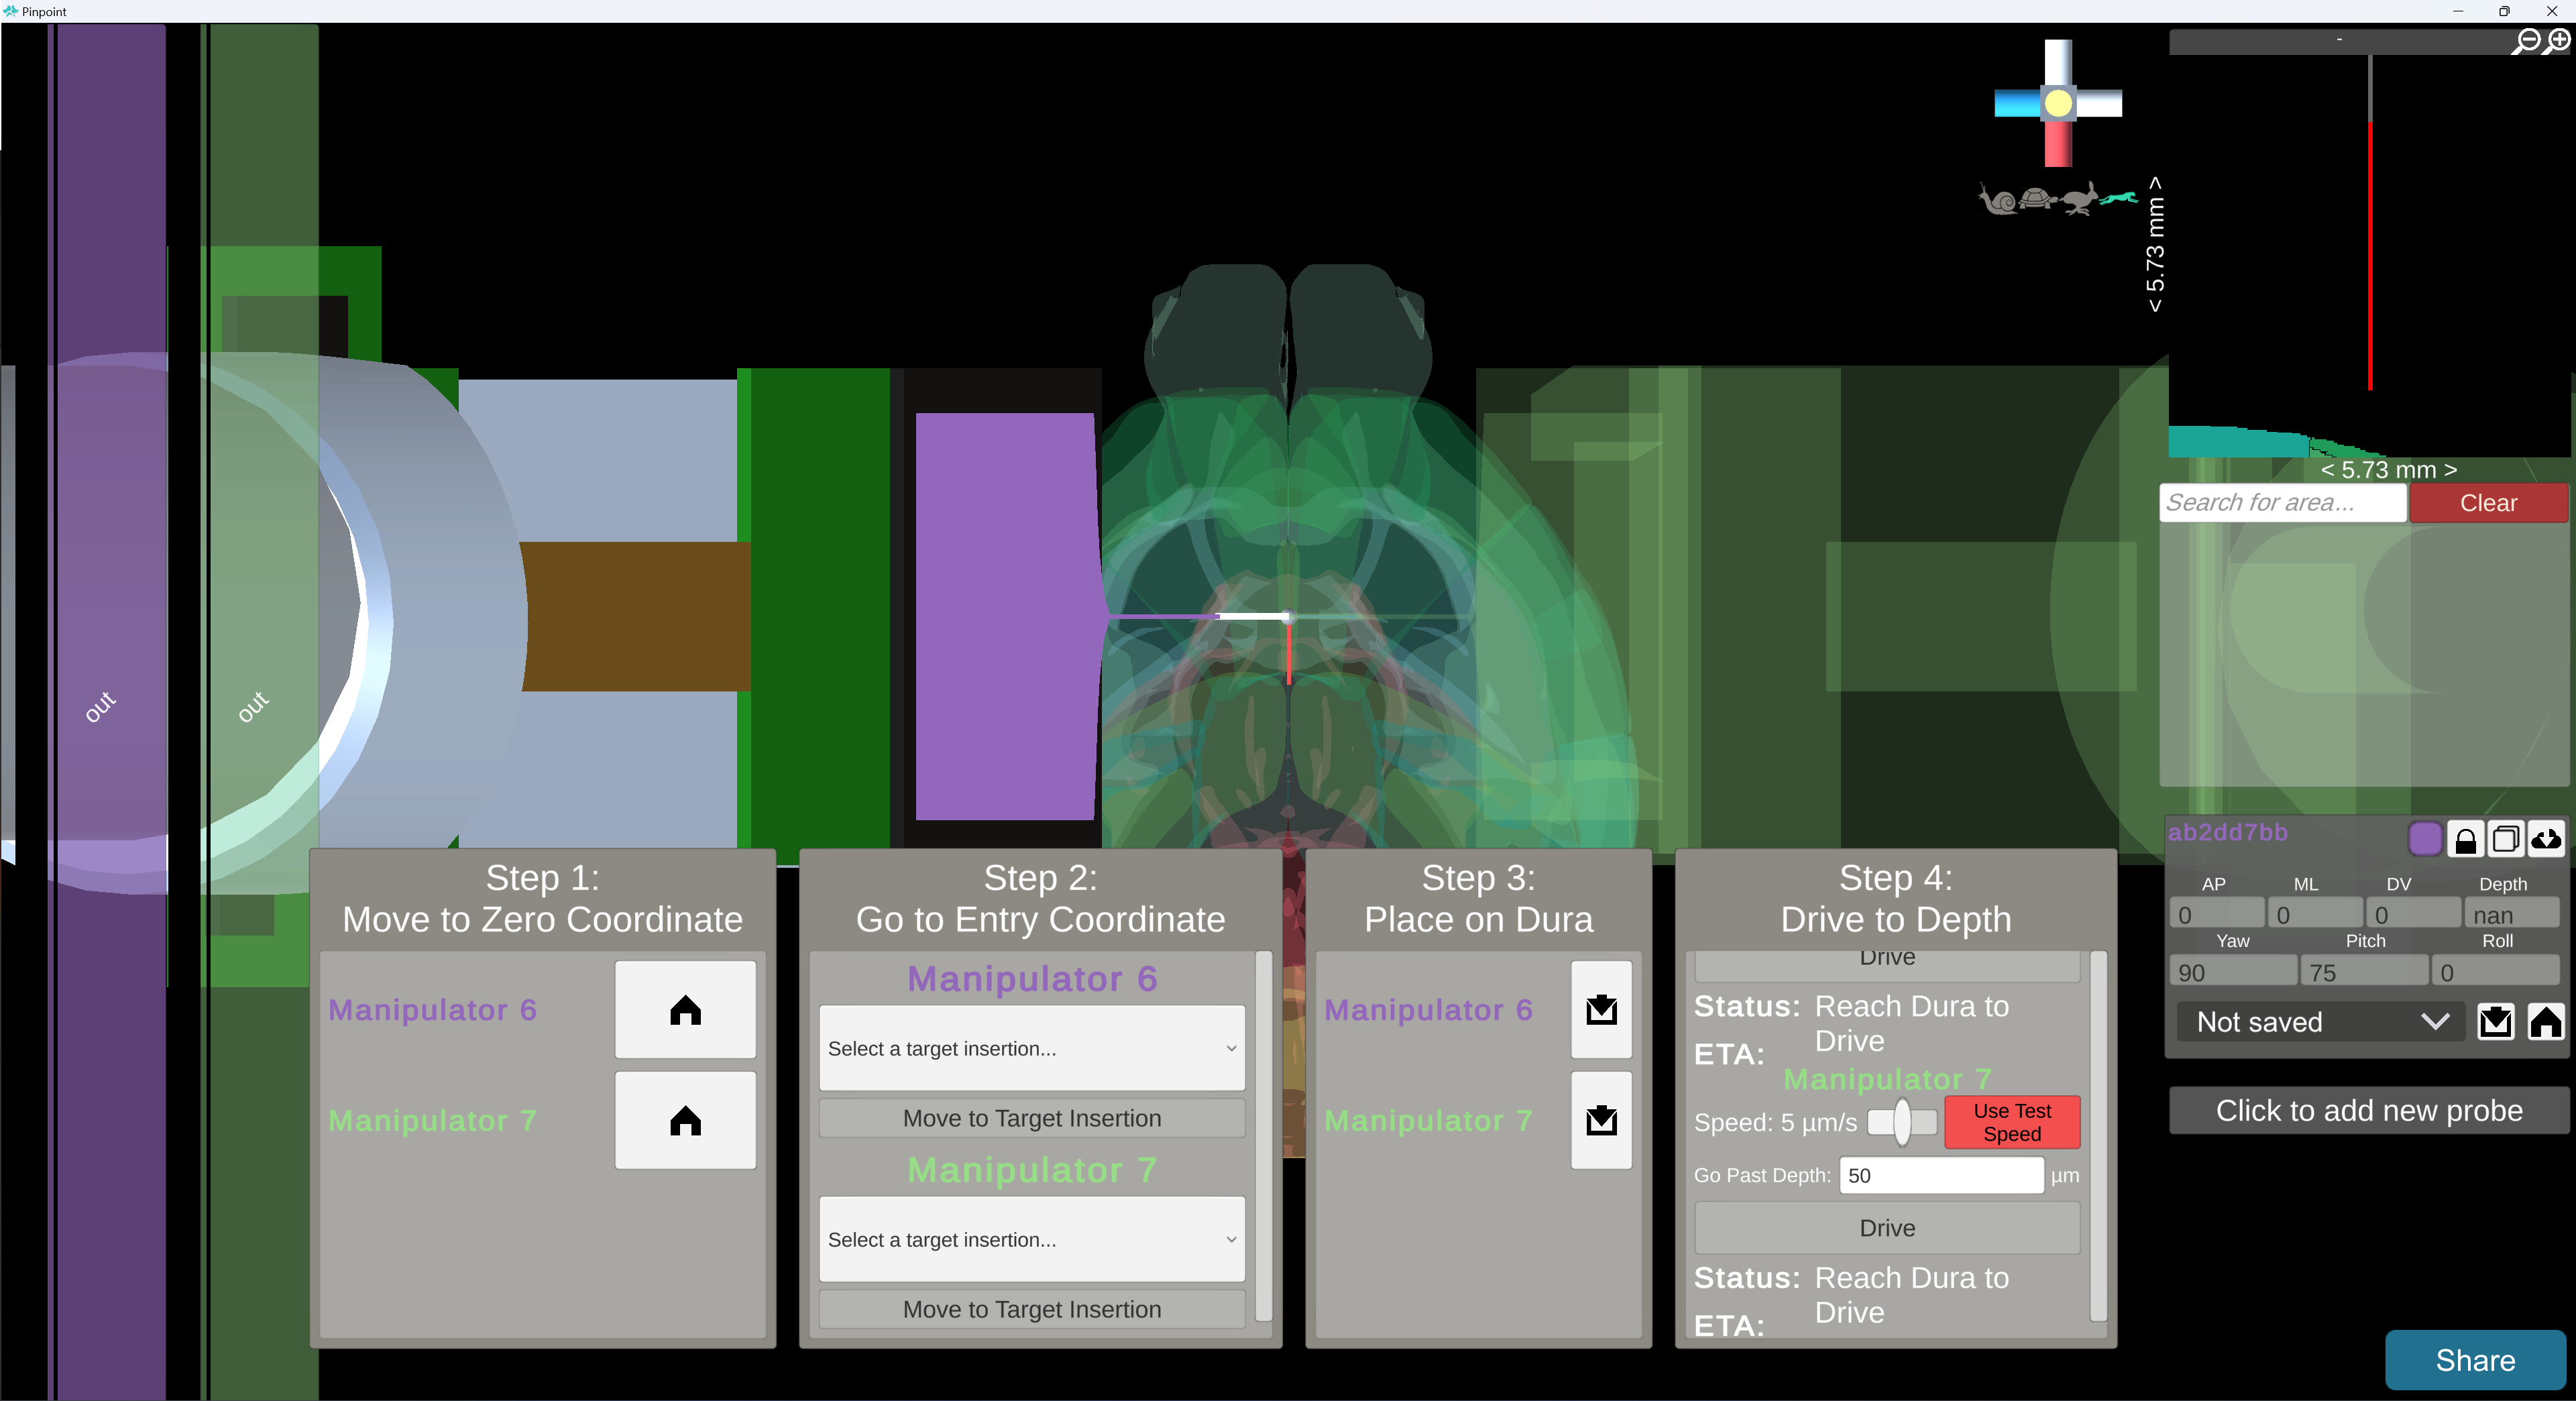
Press the Enable Copilot Checkbox to activate the Copilot panel.
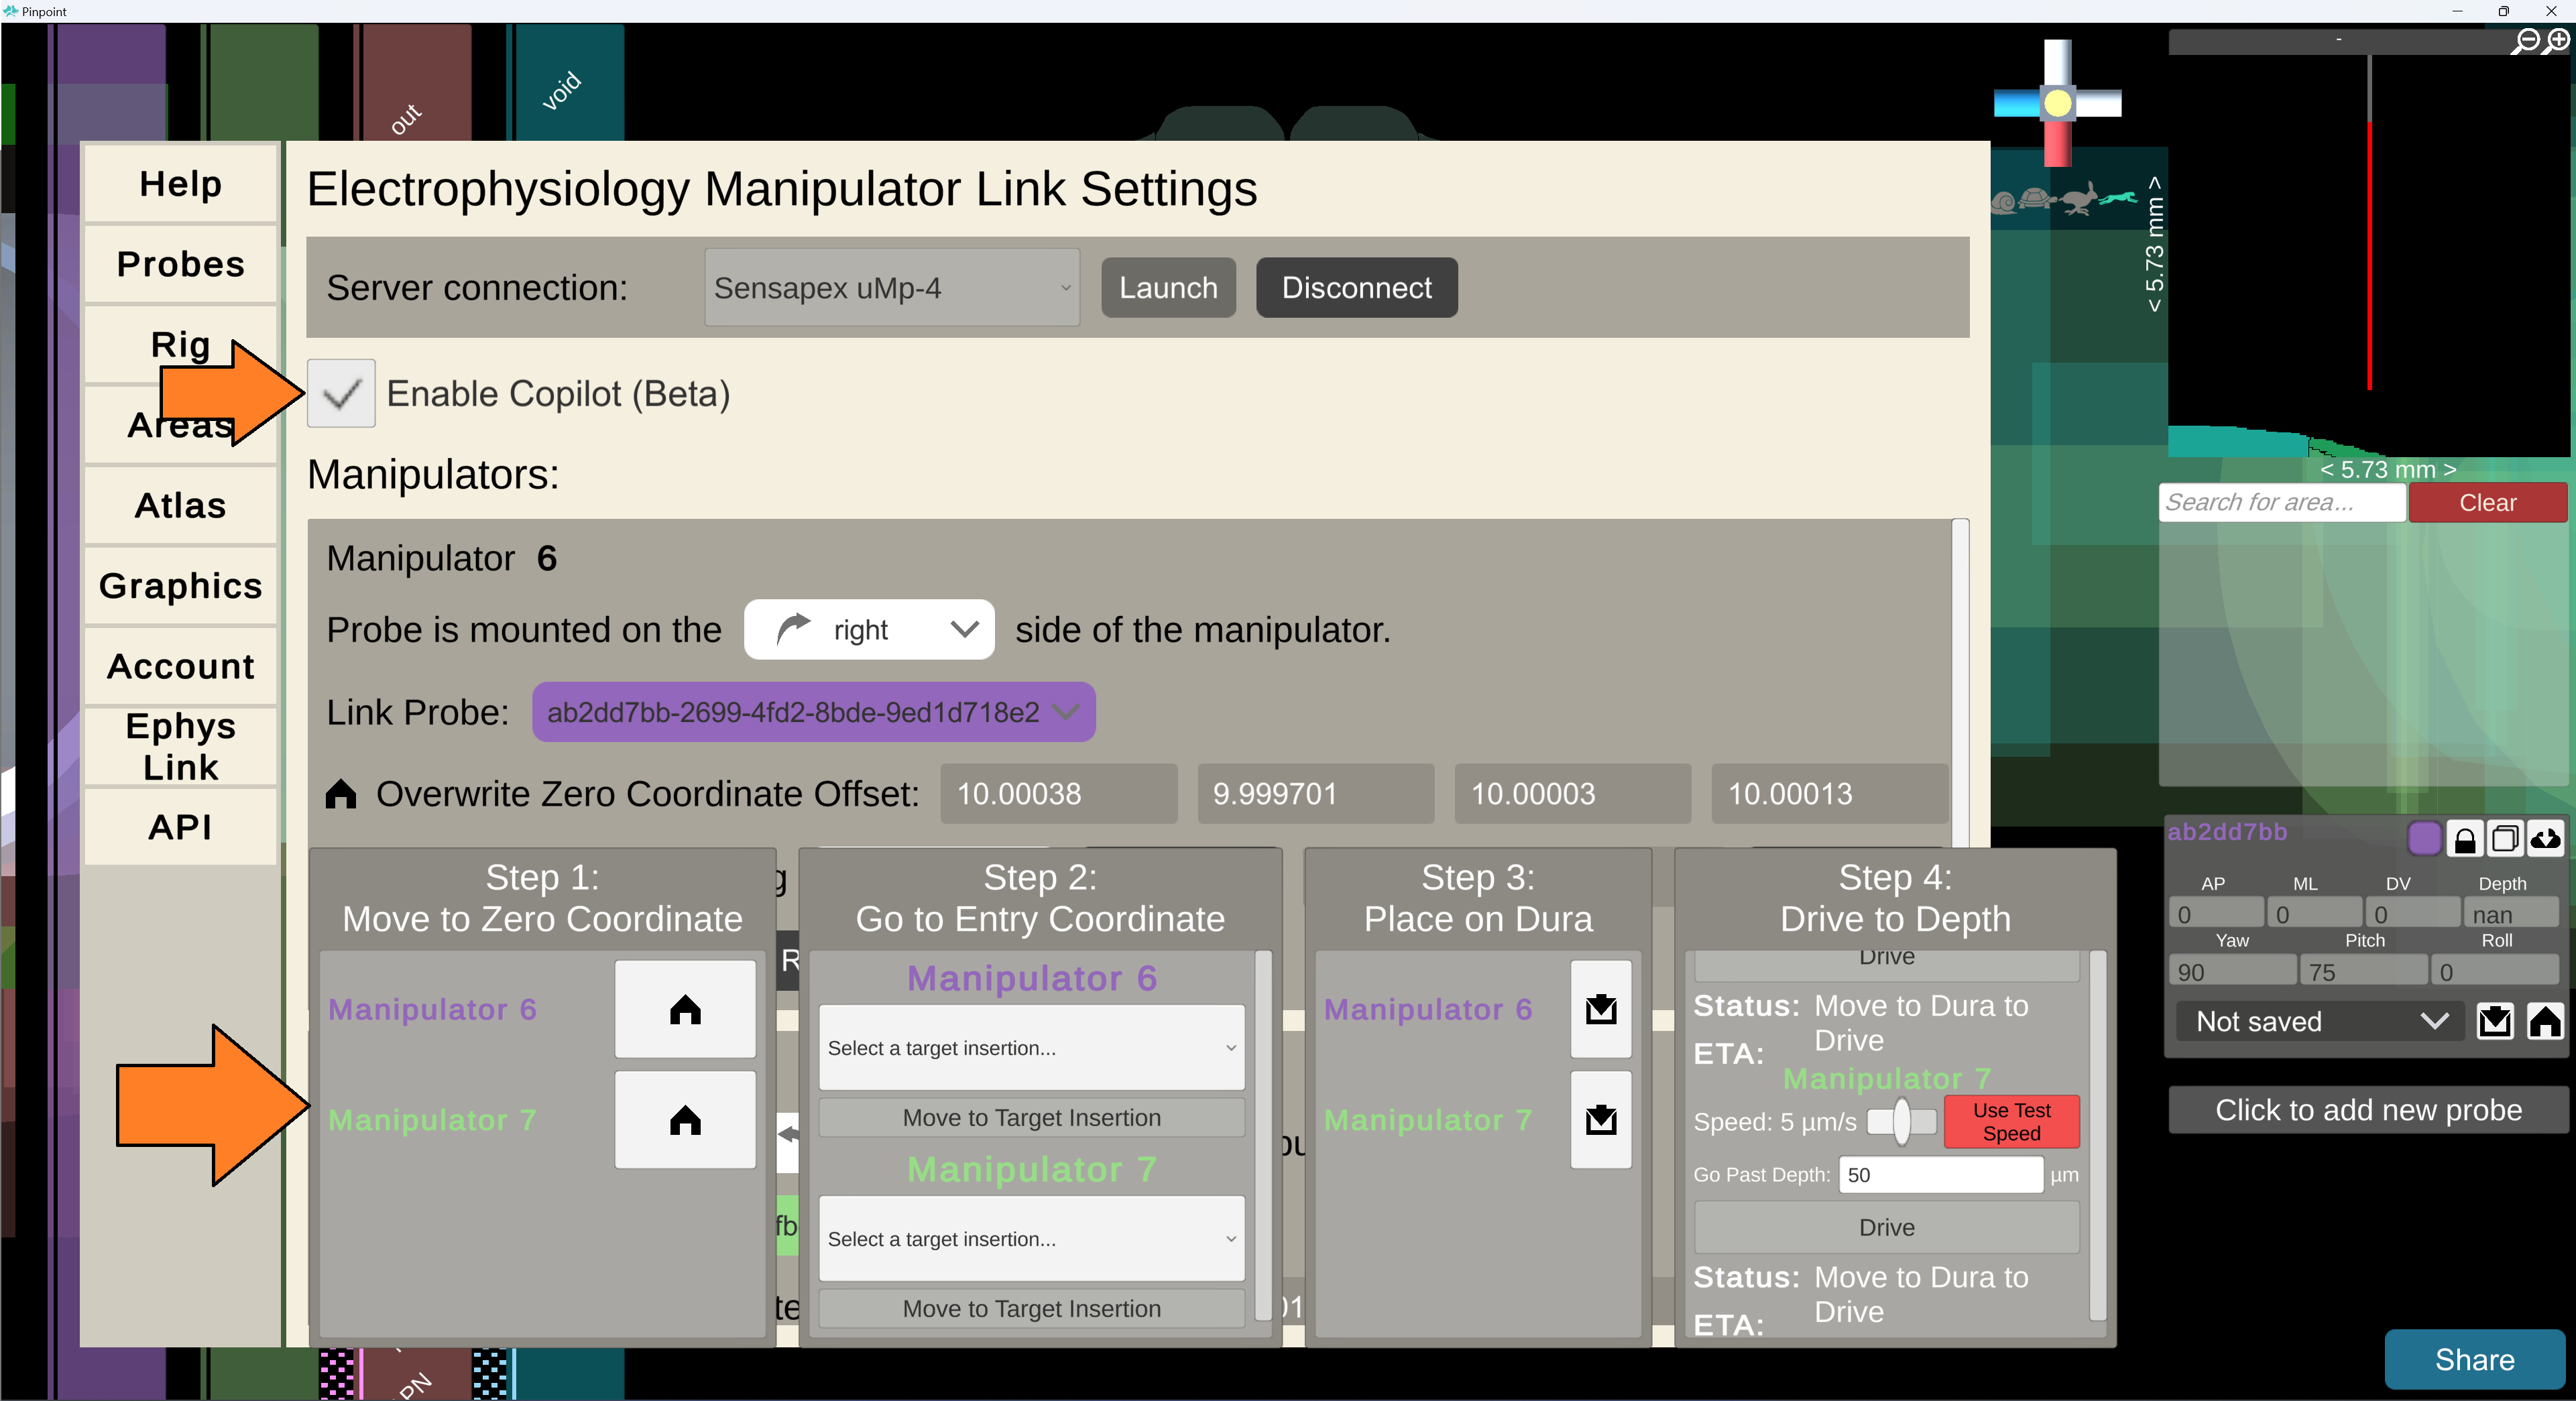
Close the menu by pressing ESC.
7. Calibrate manipulators to Bregma
Get up and physically move to your manipulators.
Manually move a manipulator and touch the probe tip to Bregma.
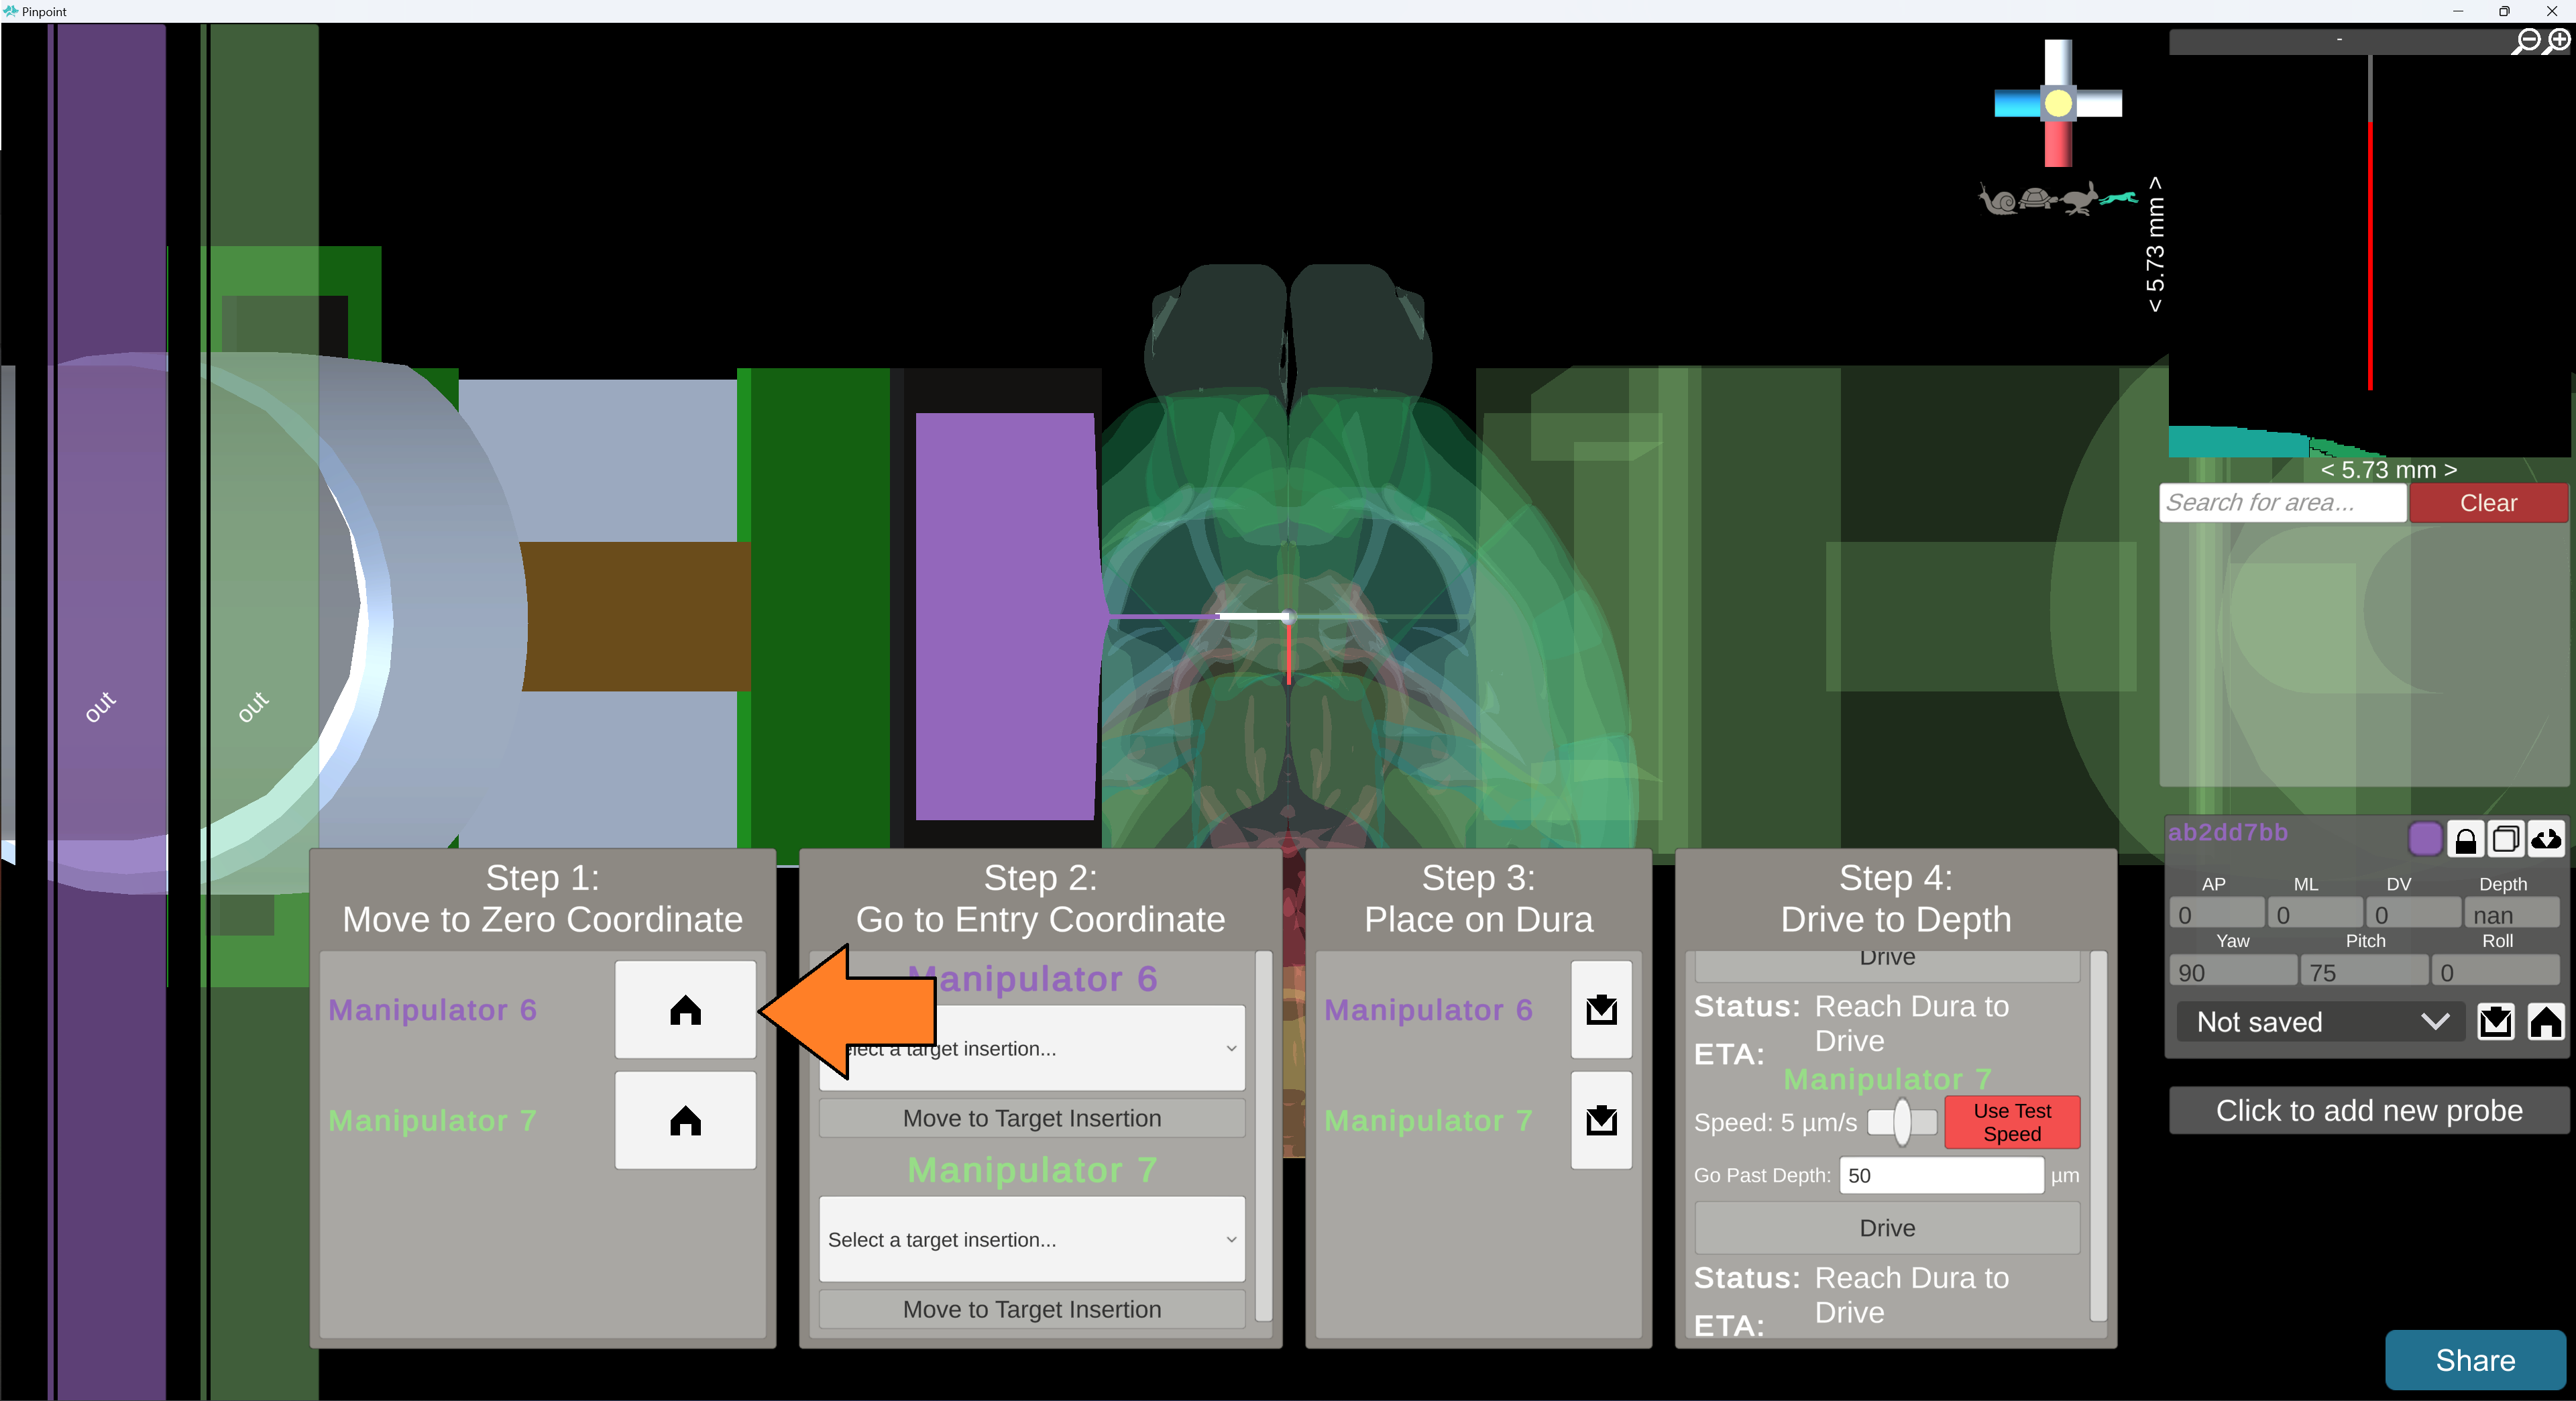
Return to your computer and press the home icon in the Copilot panel next to the corresponding manipulator.
(Optional) Go back to your manipulators and manually move that manipulator away from Bregma. This is to give space for other manipulators.
Repeat steps 2 - 4 for each manipulator.
(Recommended) Go back to your manipulators and manually move your manipulators up and away from Bregma (and each other). This reduces the chances of collisions and makes it easier to organize your workspace.
At this point: your dummy probes should reflect the positions of your in vivo manipulators.
8. Drive manipulators to target
Use the dropdown menu under each manipulator to select their target insertion point. If you don’t see any options, check that your experiment probes have the same angles as your manipulators.
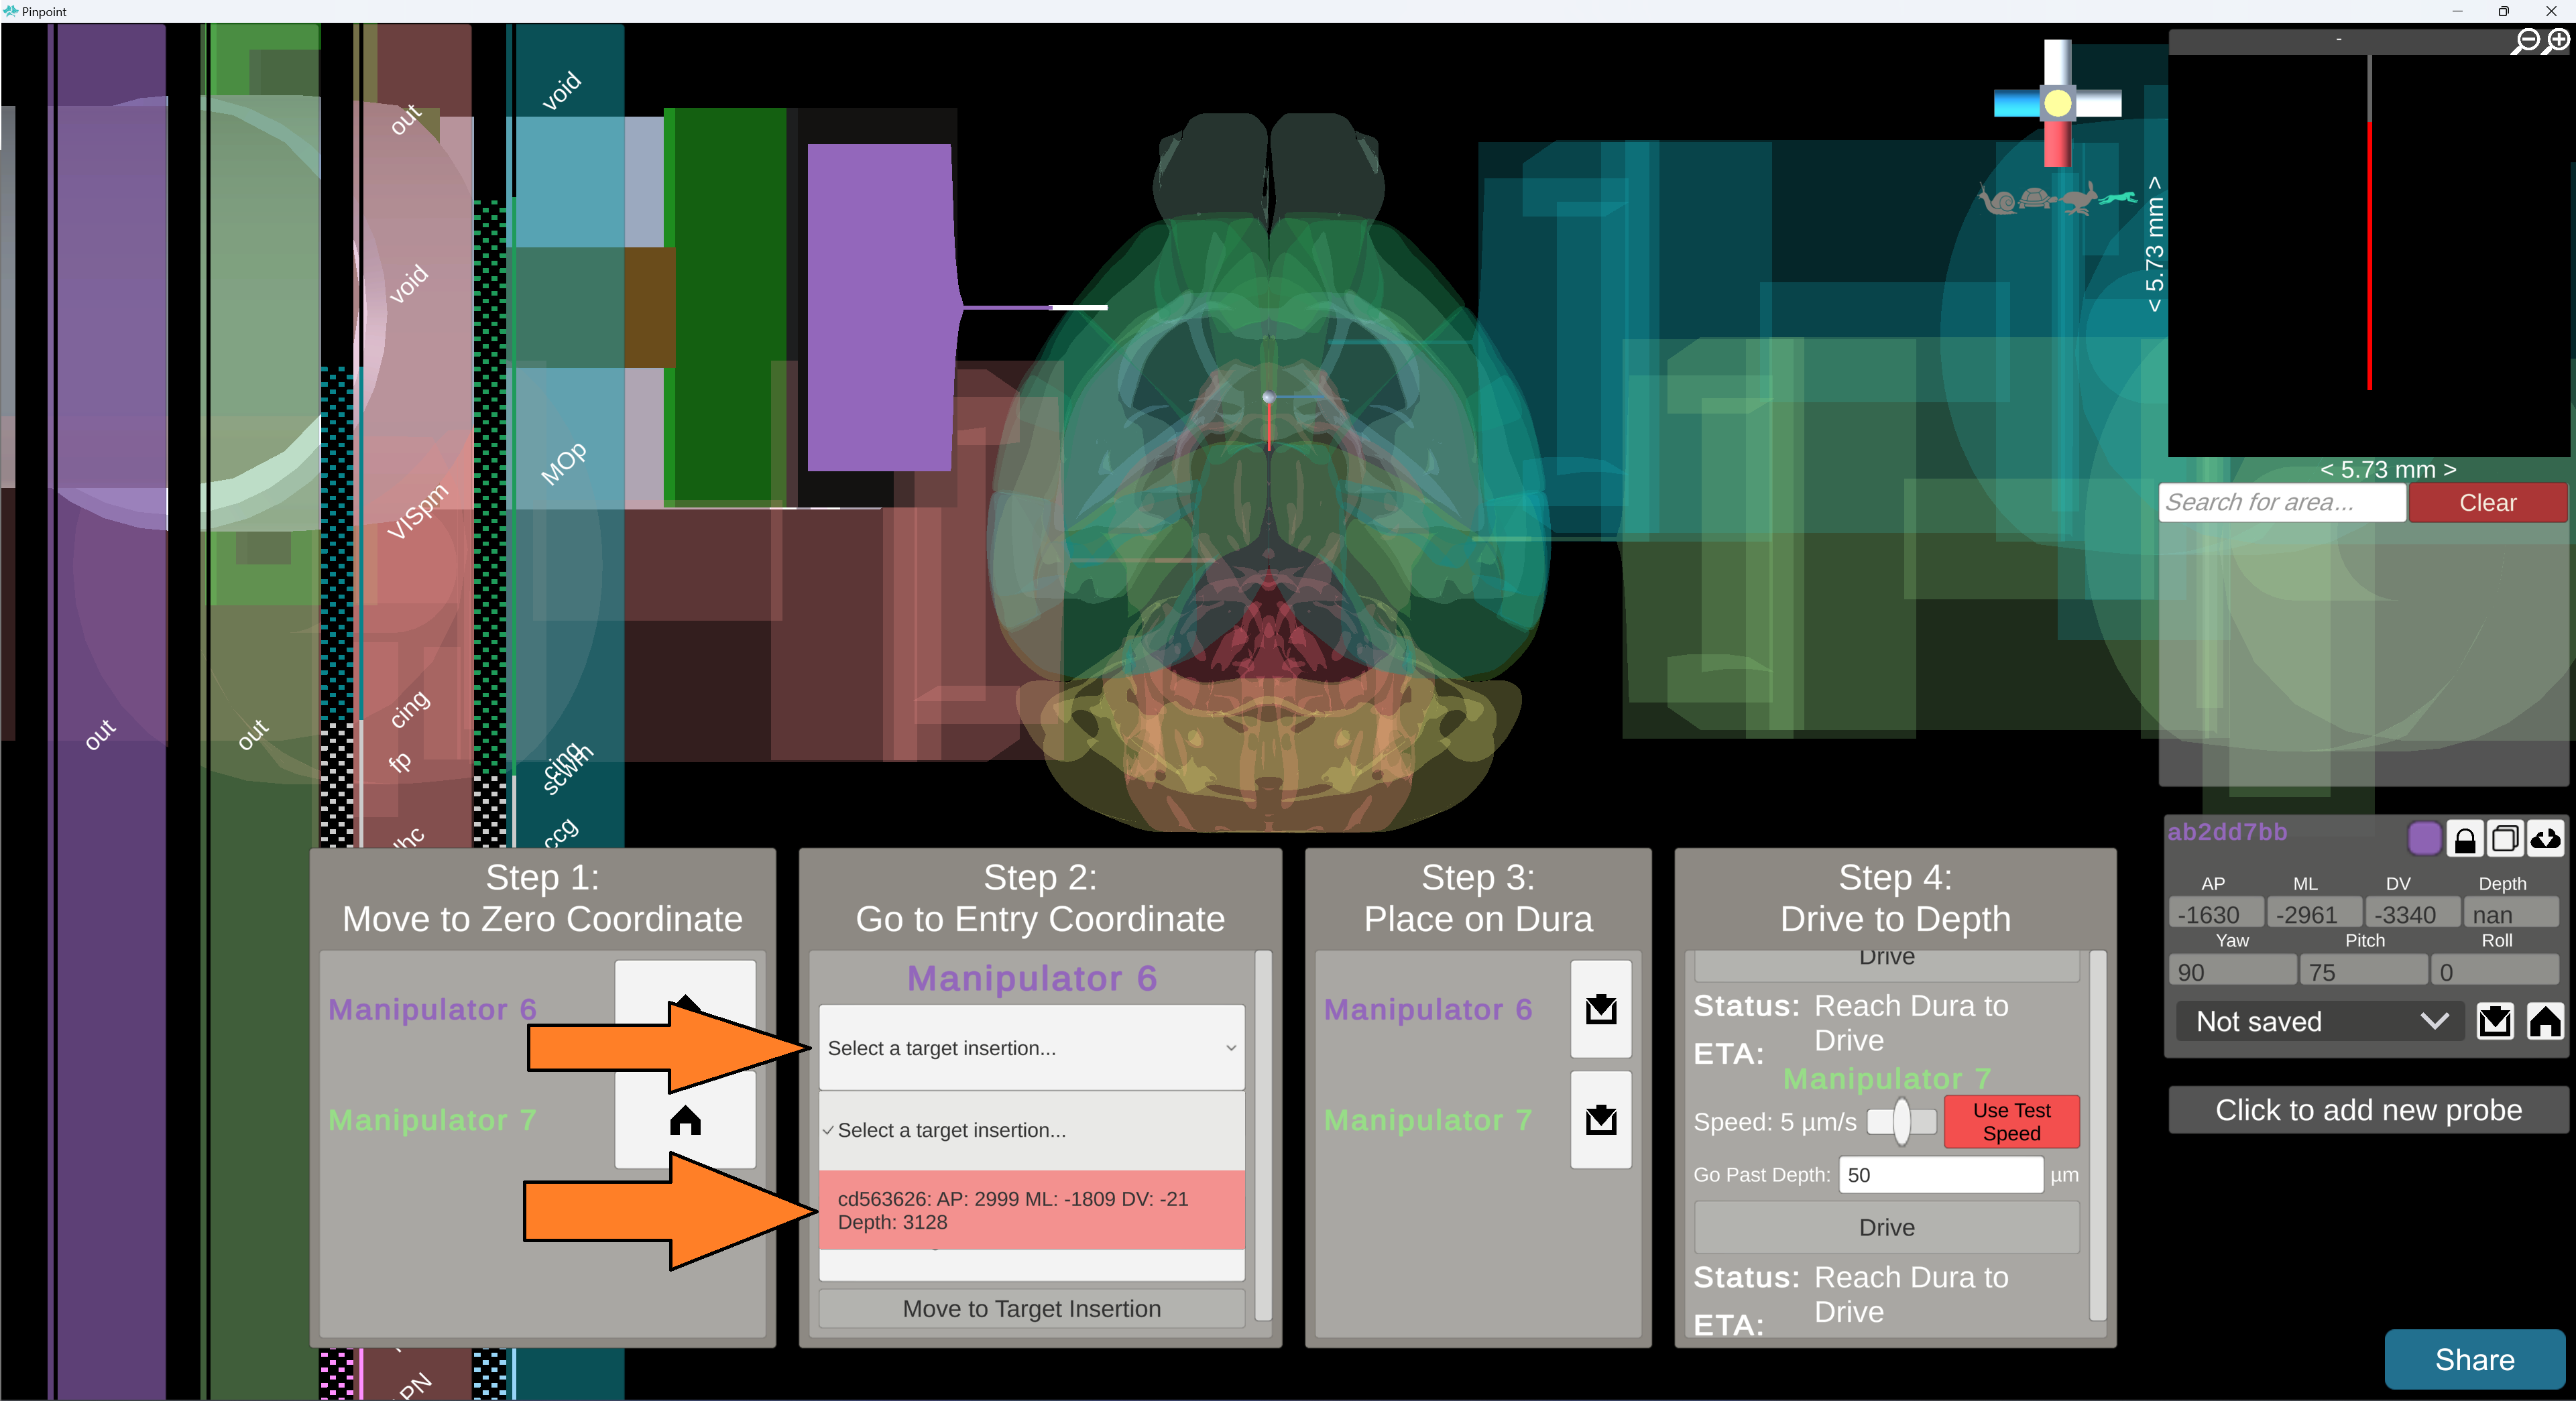
With targets selected, lines will be drawn showing the path probes will take to reach their target entry coordinates.
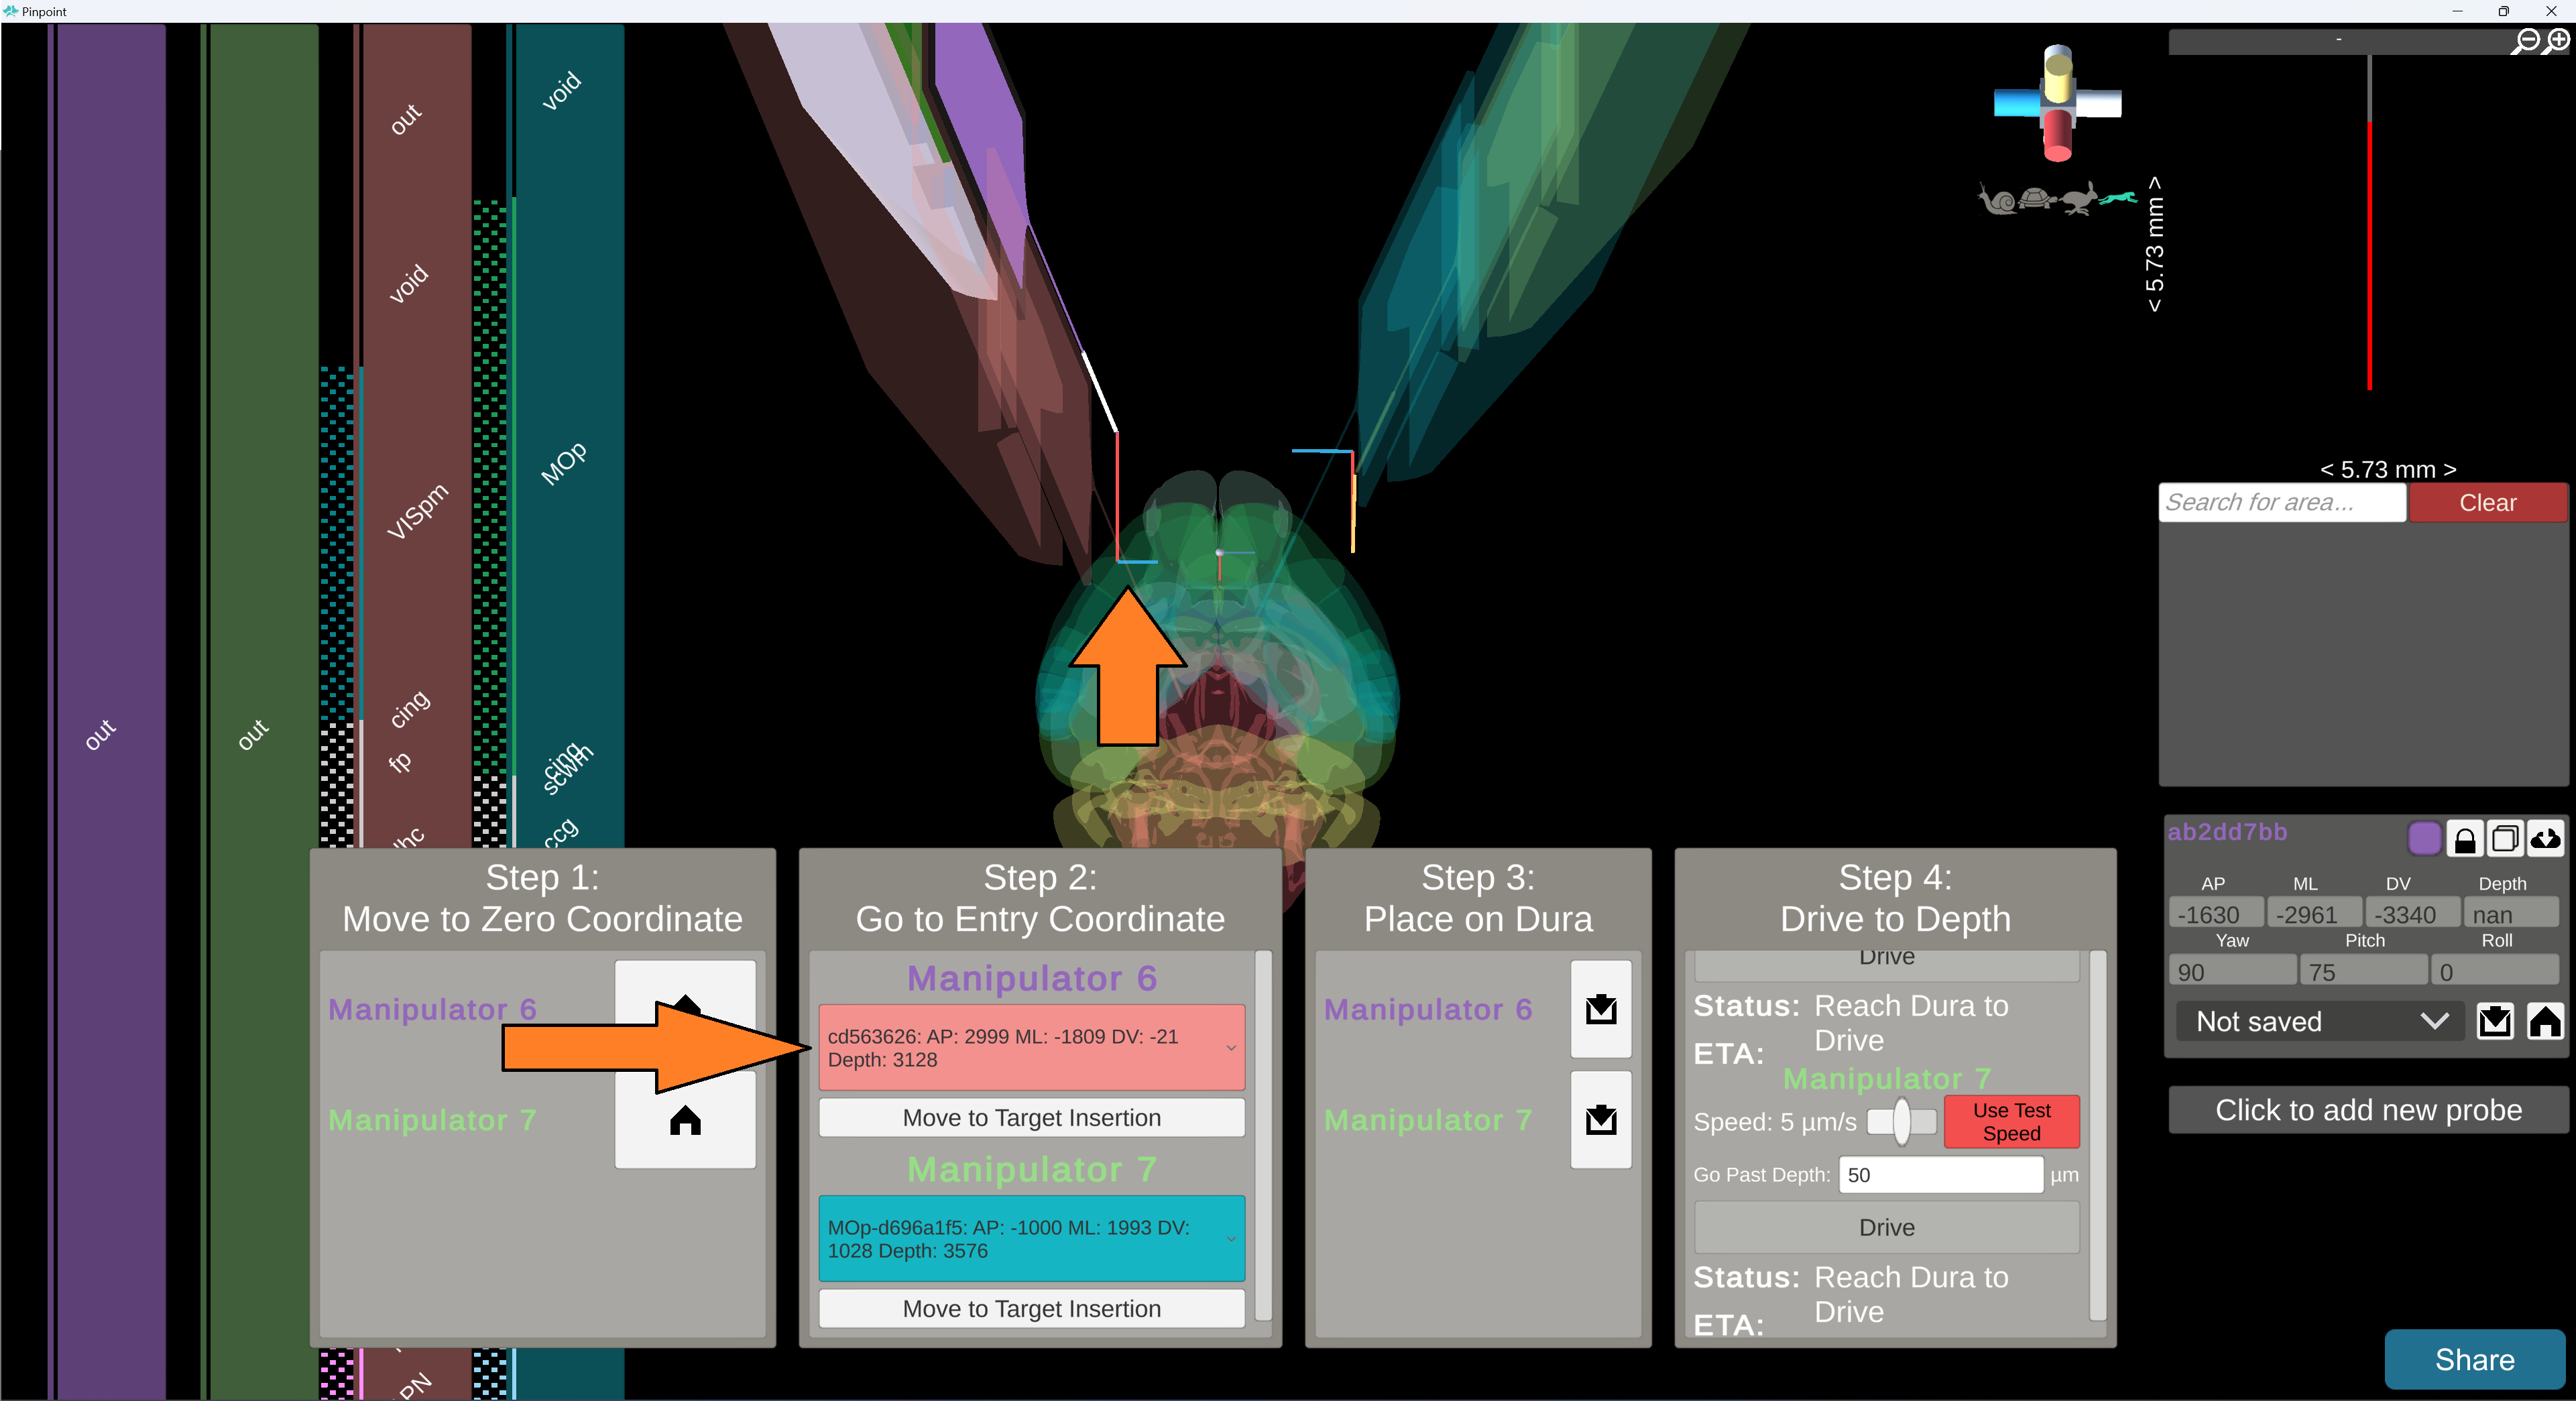
When ready, press “Move to Target Insertion” for each manipulator to drive them to their target entry coordinates. You may drive them all at once to save time, just watch out for collisions.
At any point, you may press the “Stop Movement” button or the hardware stop button to pause the movement of that manipulator.
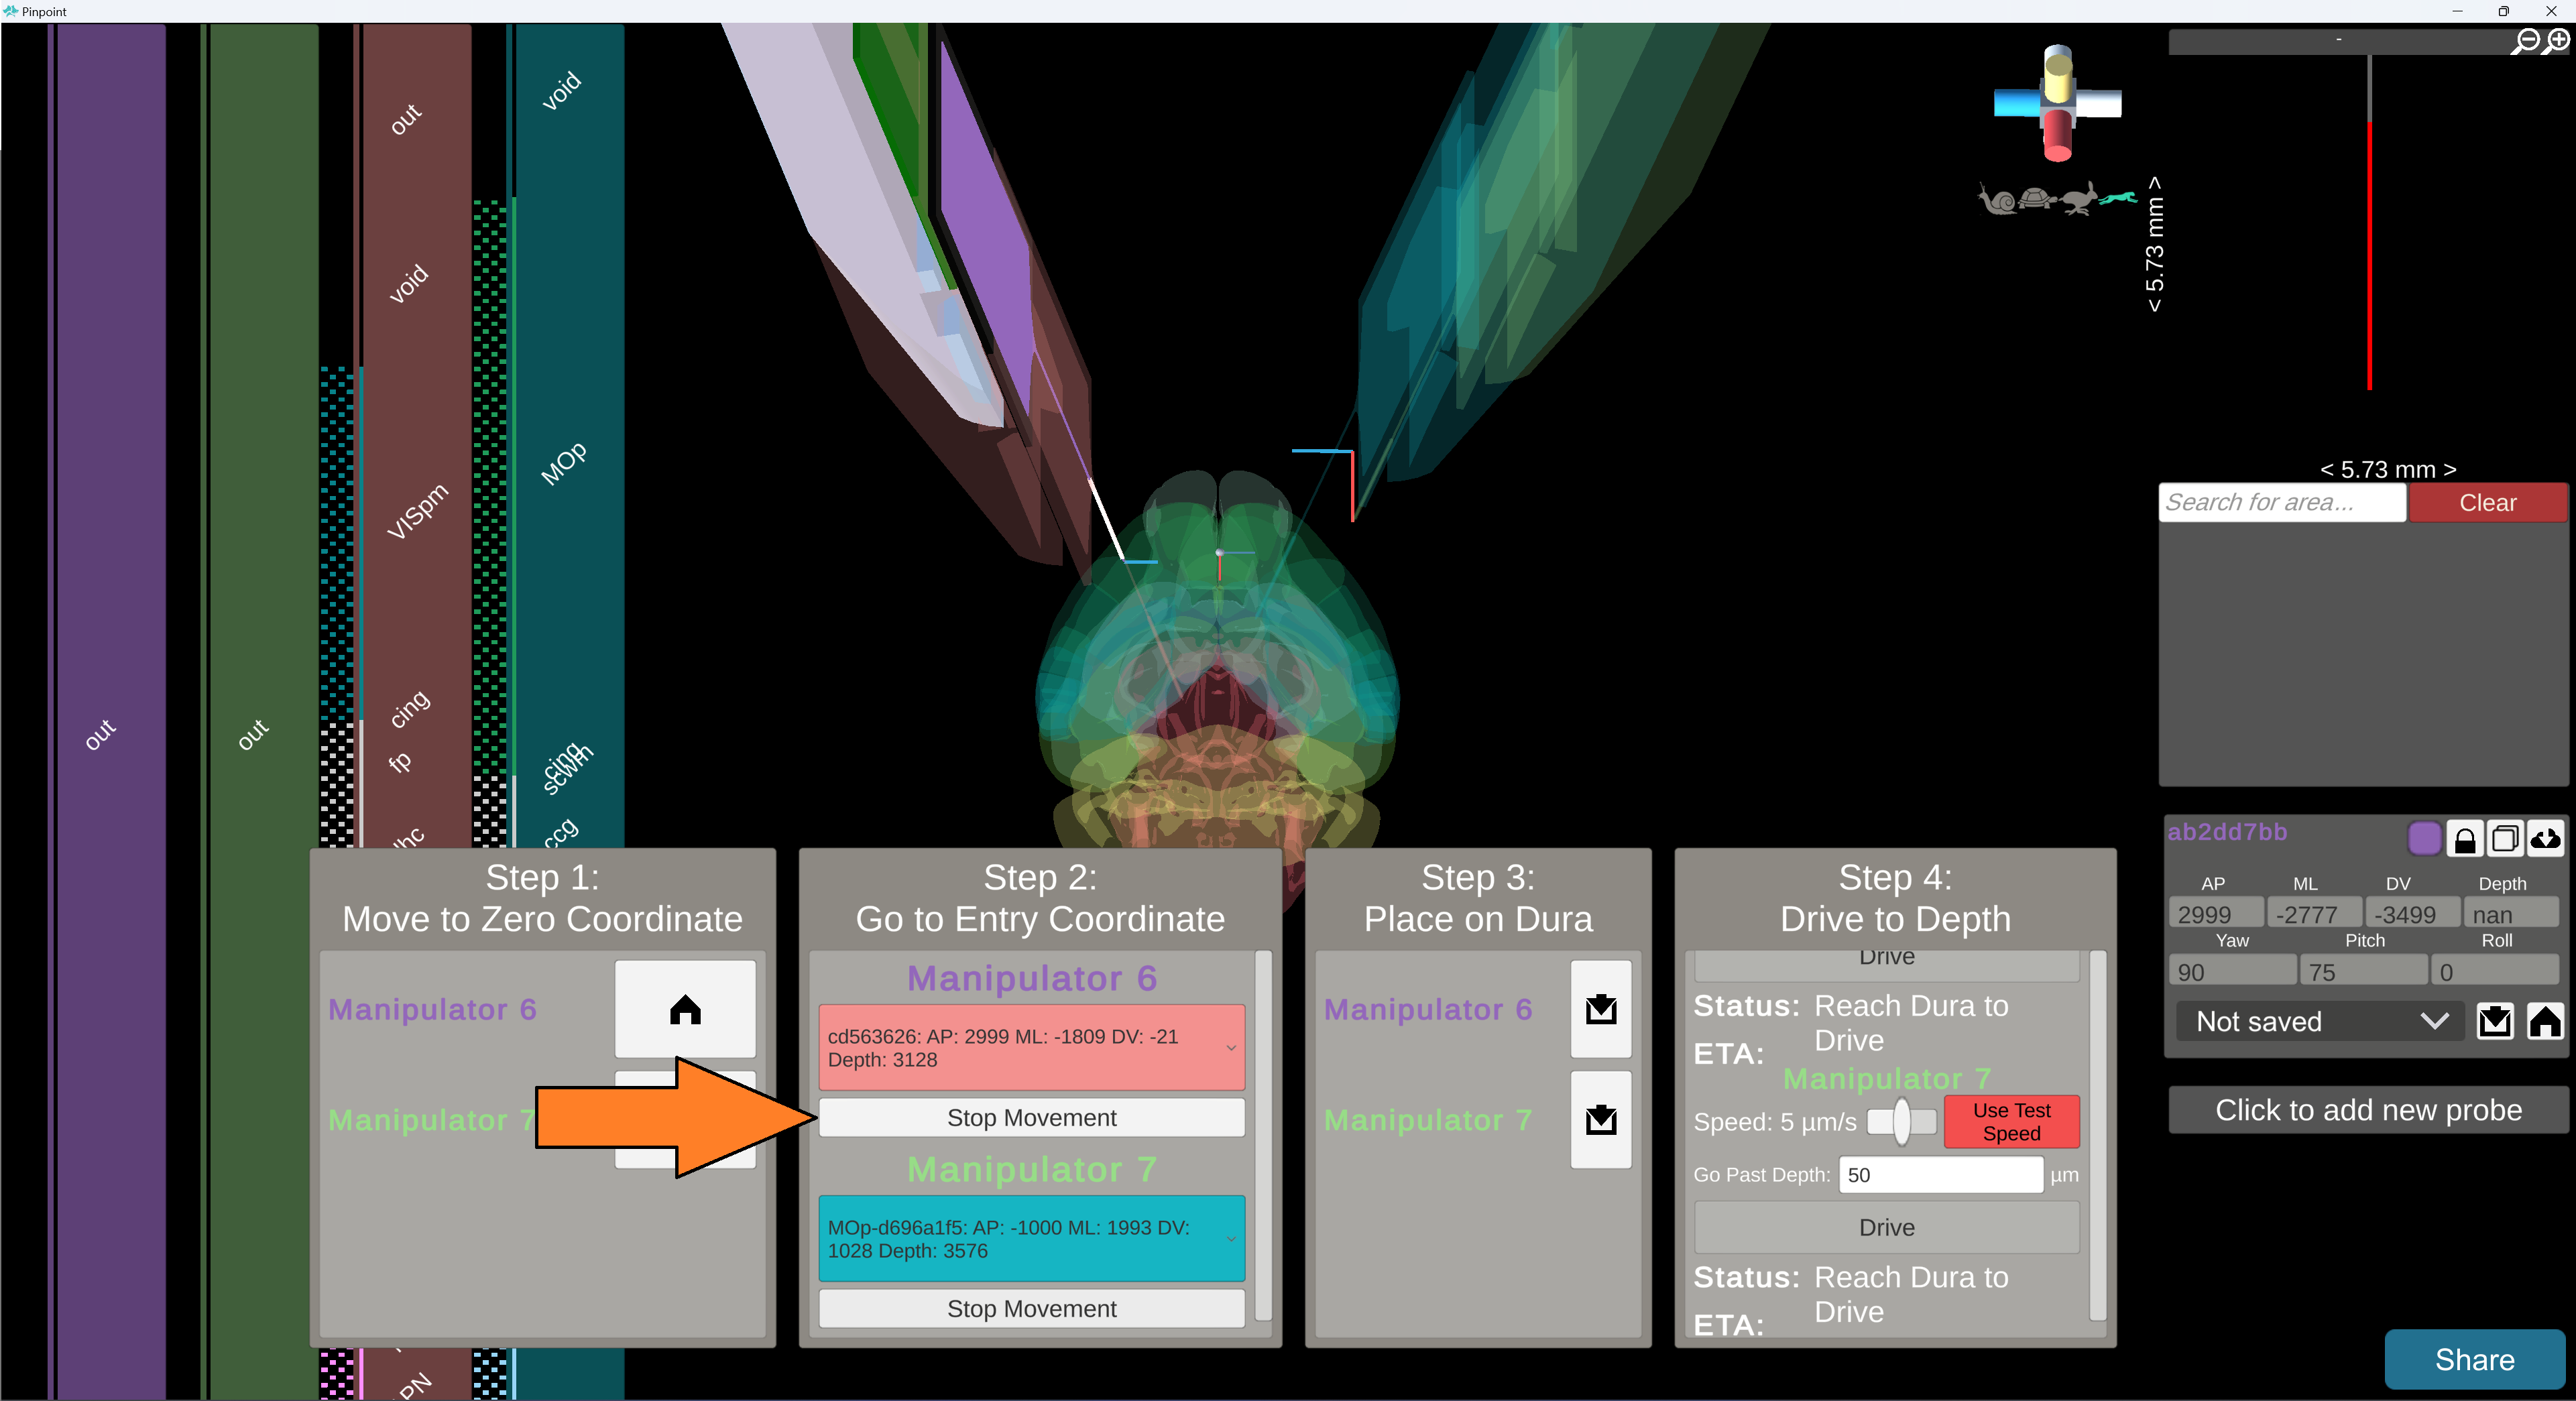
To resume movement, press “Move to Target Insertion” again. If you use the hardware stop button, you will have to reset it.
At this point: your manipulators should be hovering above the brain at their target entry coordinates.
9. Calibrate to the Dura
Get up and physically move to your manipulators.
Manually move a manipulator ventrally (on the DV / Z axis) until the probe tip touches the Dura.
Return to your computer and press the down arrow button in the Copilot panel next to the corresponding manipulator. This will re-align the dummy probe to the Dura in Pinpoint.
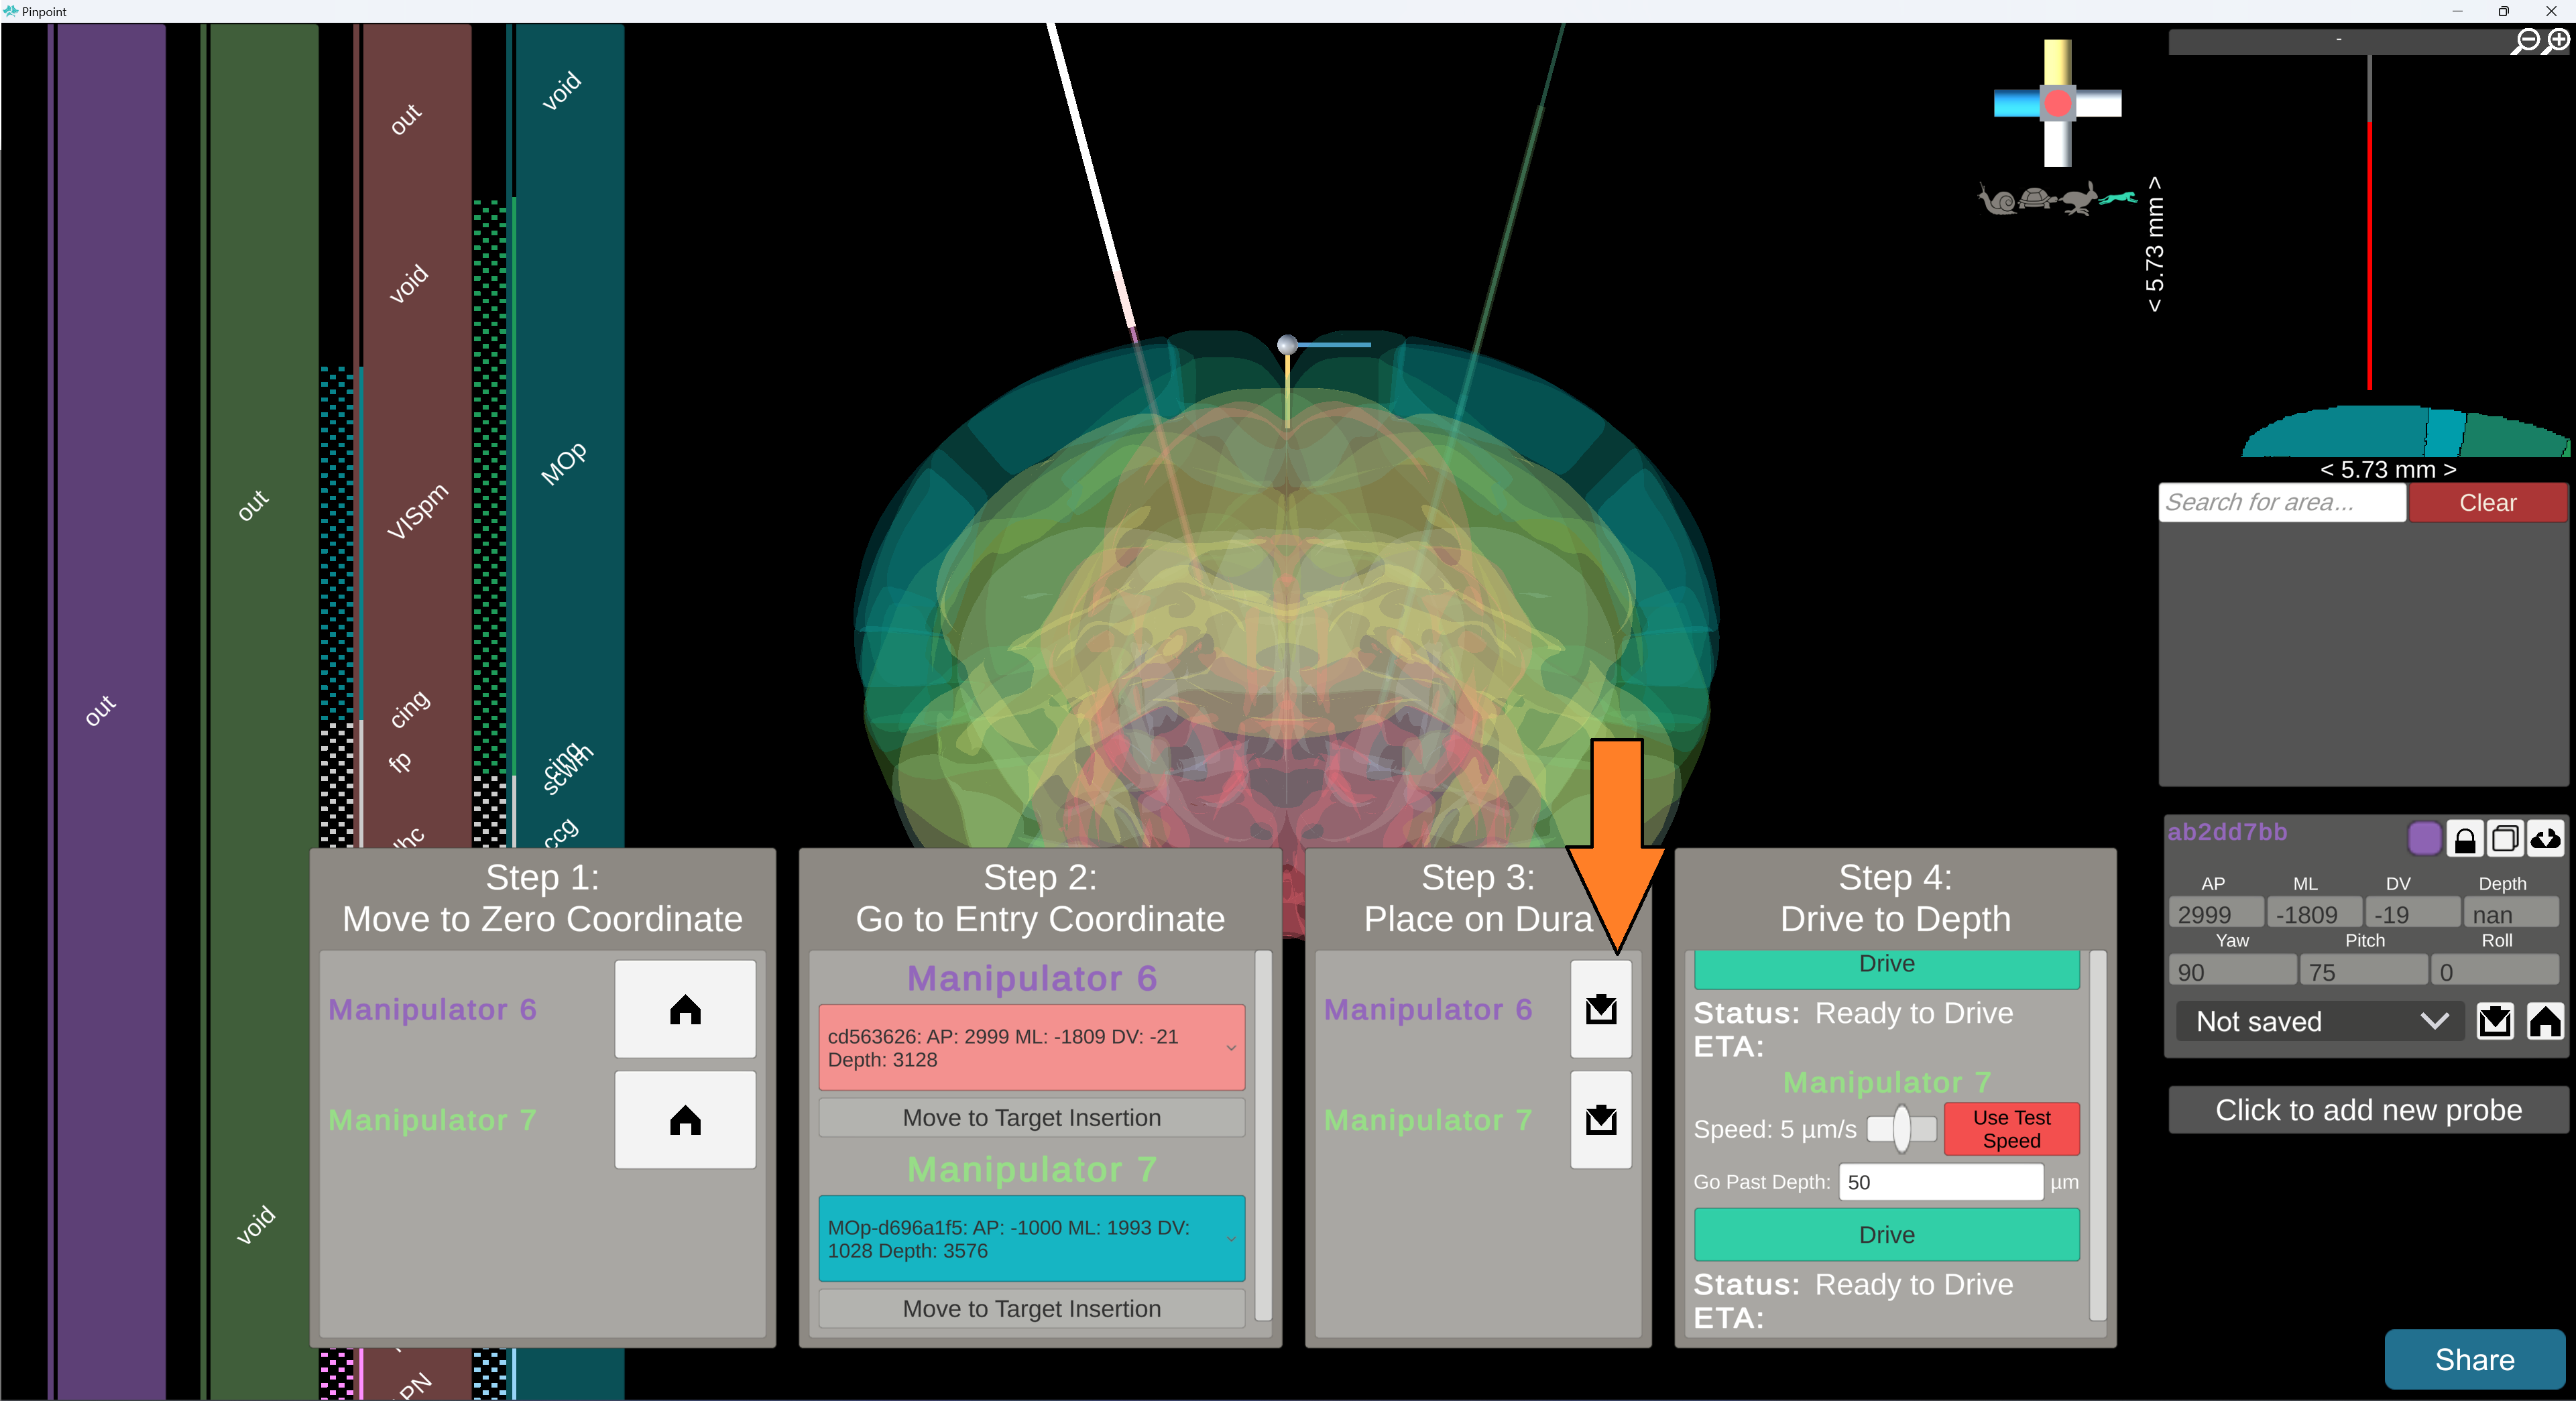
Repeat steps 1 - 3 for each manipulator.
At this point: your manipulators should be touching the Dura at their entry coordinates and the dummy probes should reflect this. If you need to make any adjustments, you may do so manually and then press the down arrow button again when the tip is back at the Dura.
10. Punch through the Dura
Get up and physically move to your manipulators.
Using the depth axis, manually punch the probe tip through the Dura.
At this point: your manipulators should be through the Dura.
11. Drive to target depth
Set your desired drive speed with the slider and drive past distance. The defaults are 5 µm/s and 50 µm.
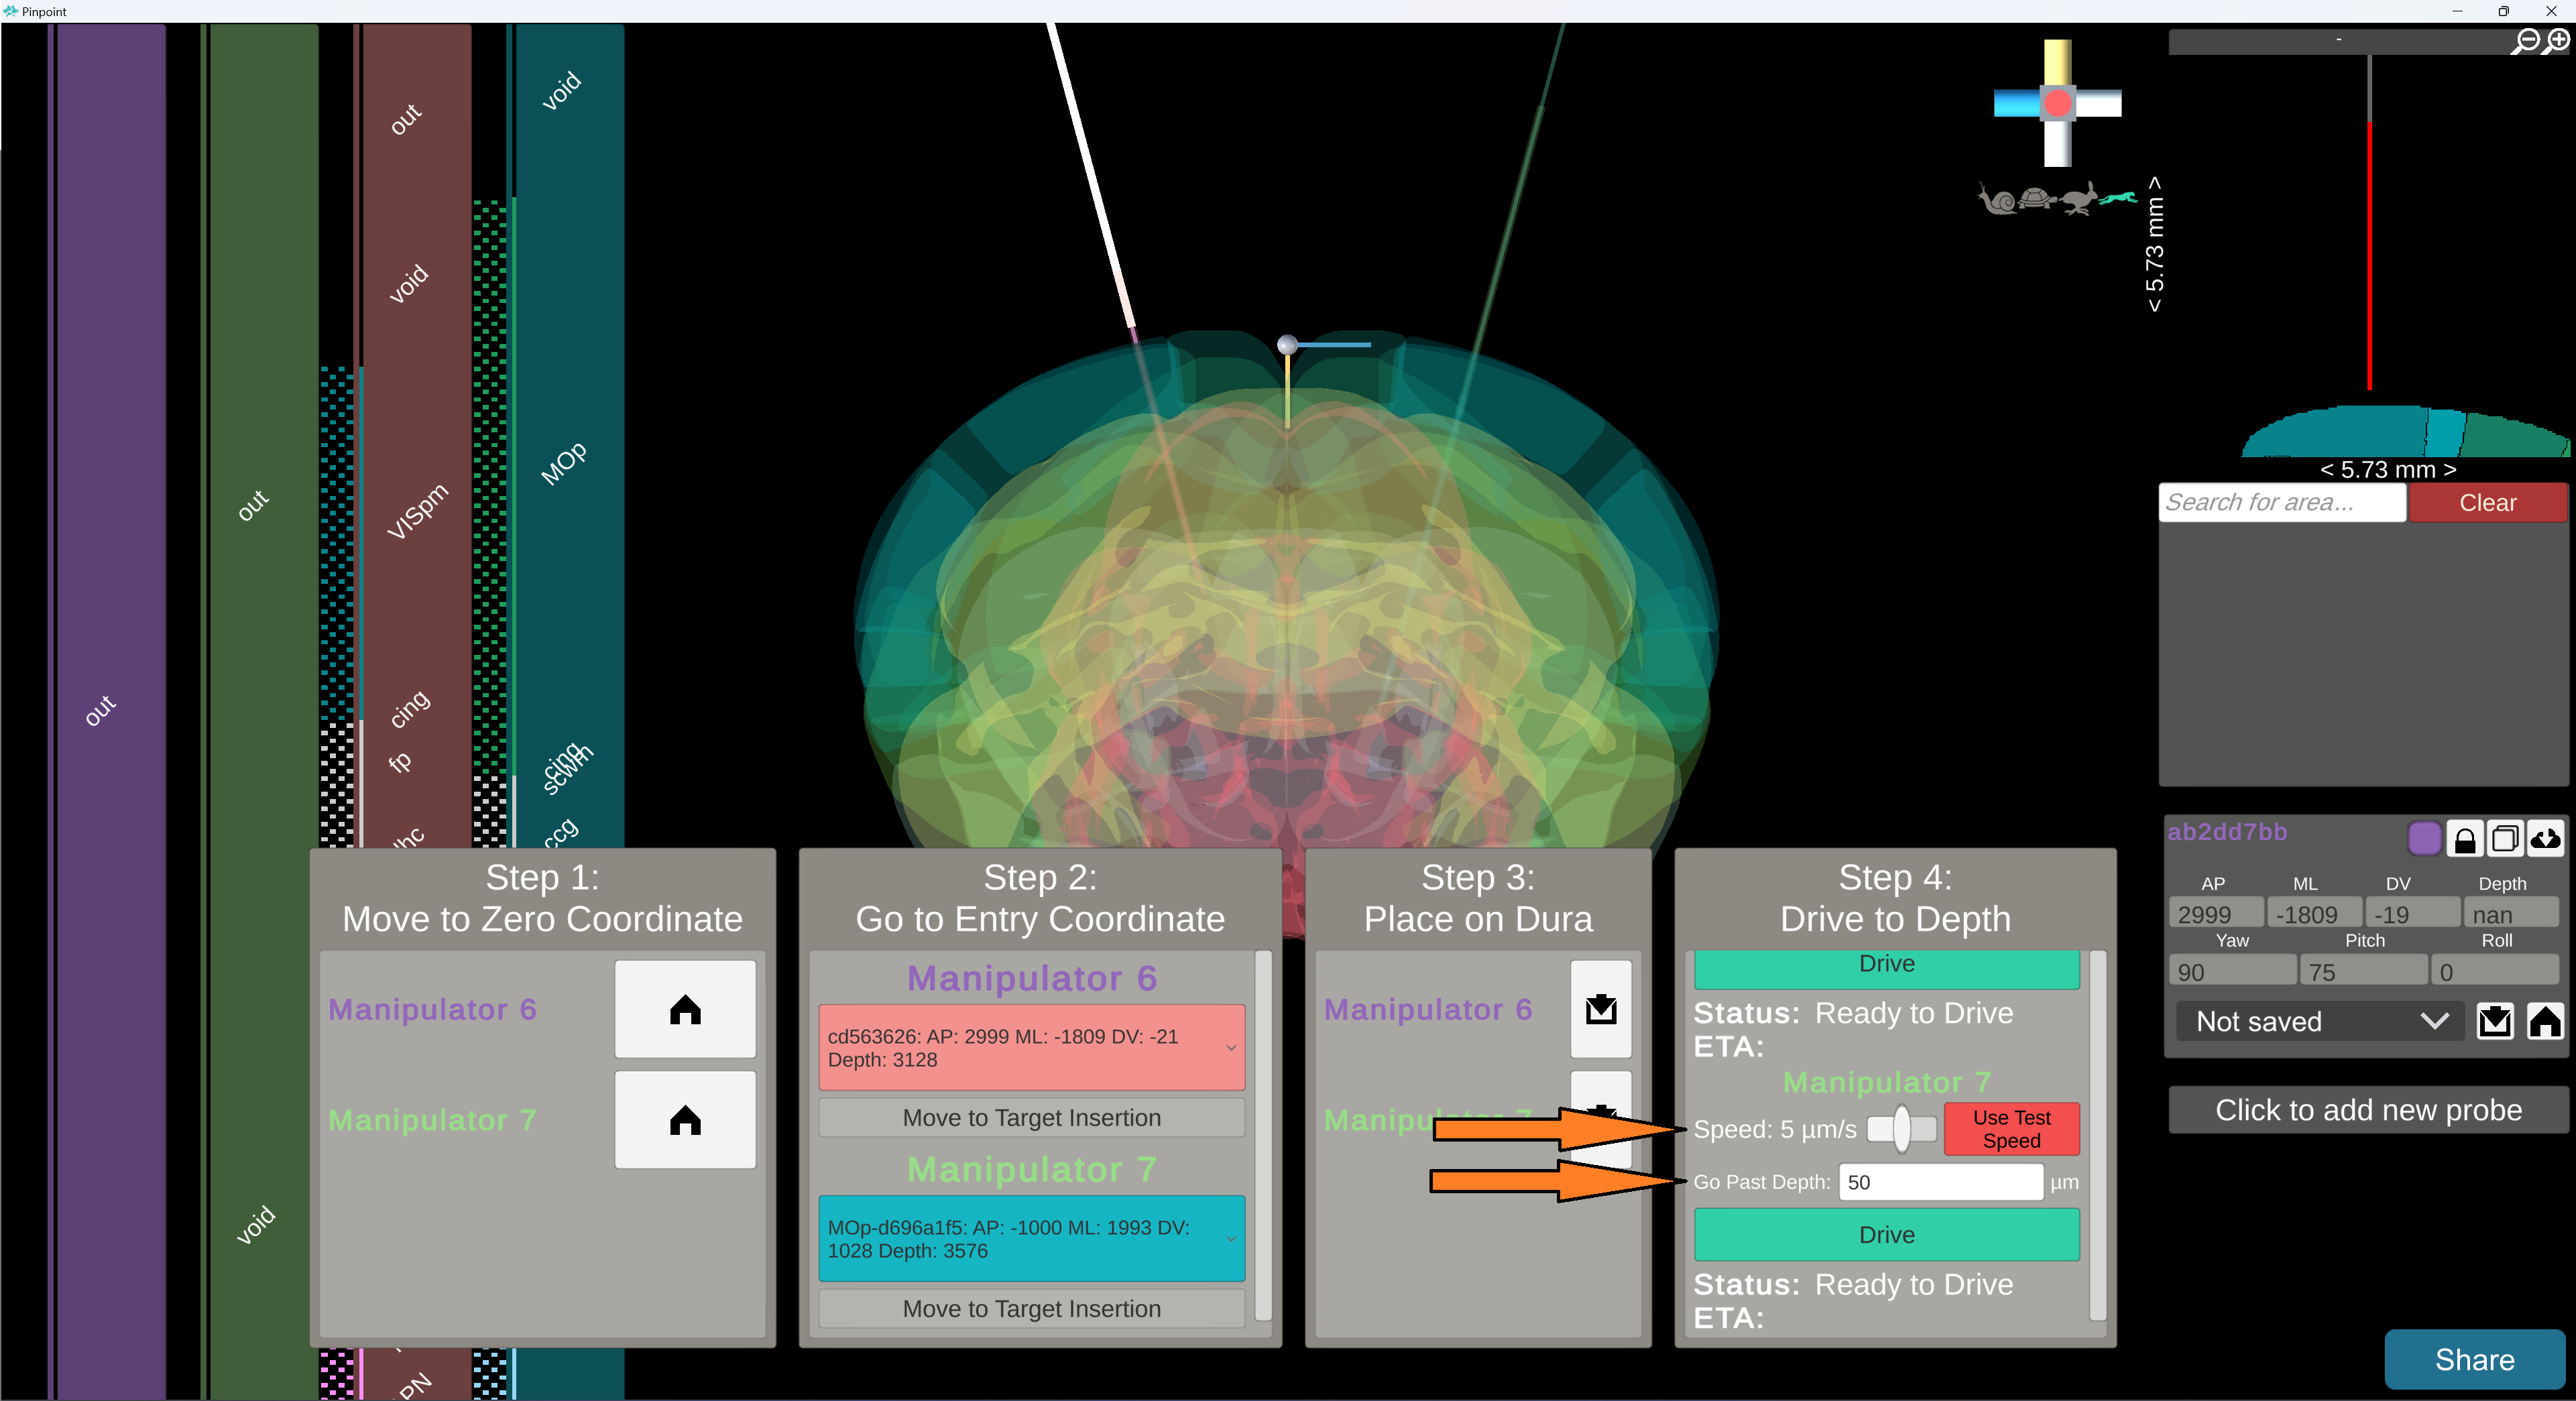
When ready, press “Drive to Target Depth” for each manipulator to drive them to their target depth. To save time, you can drive them all at once.
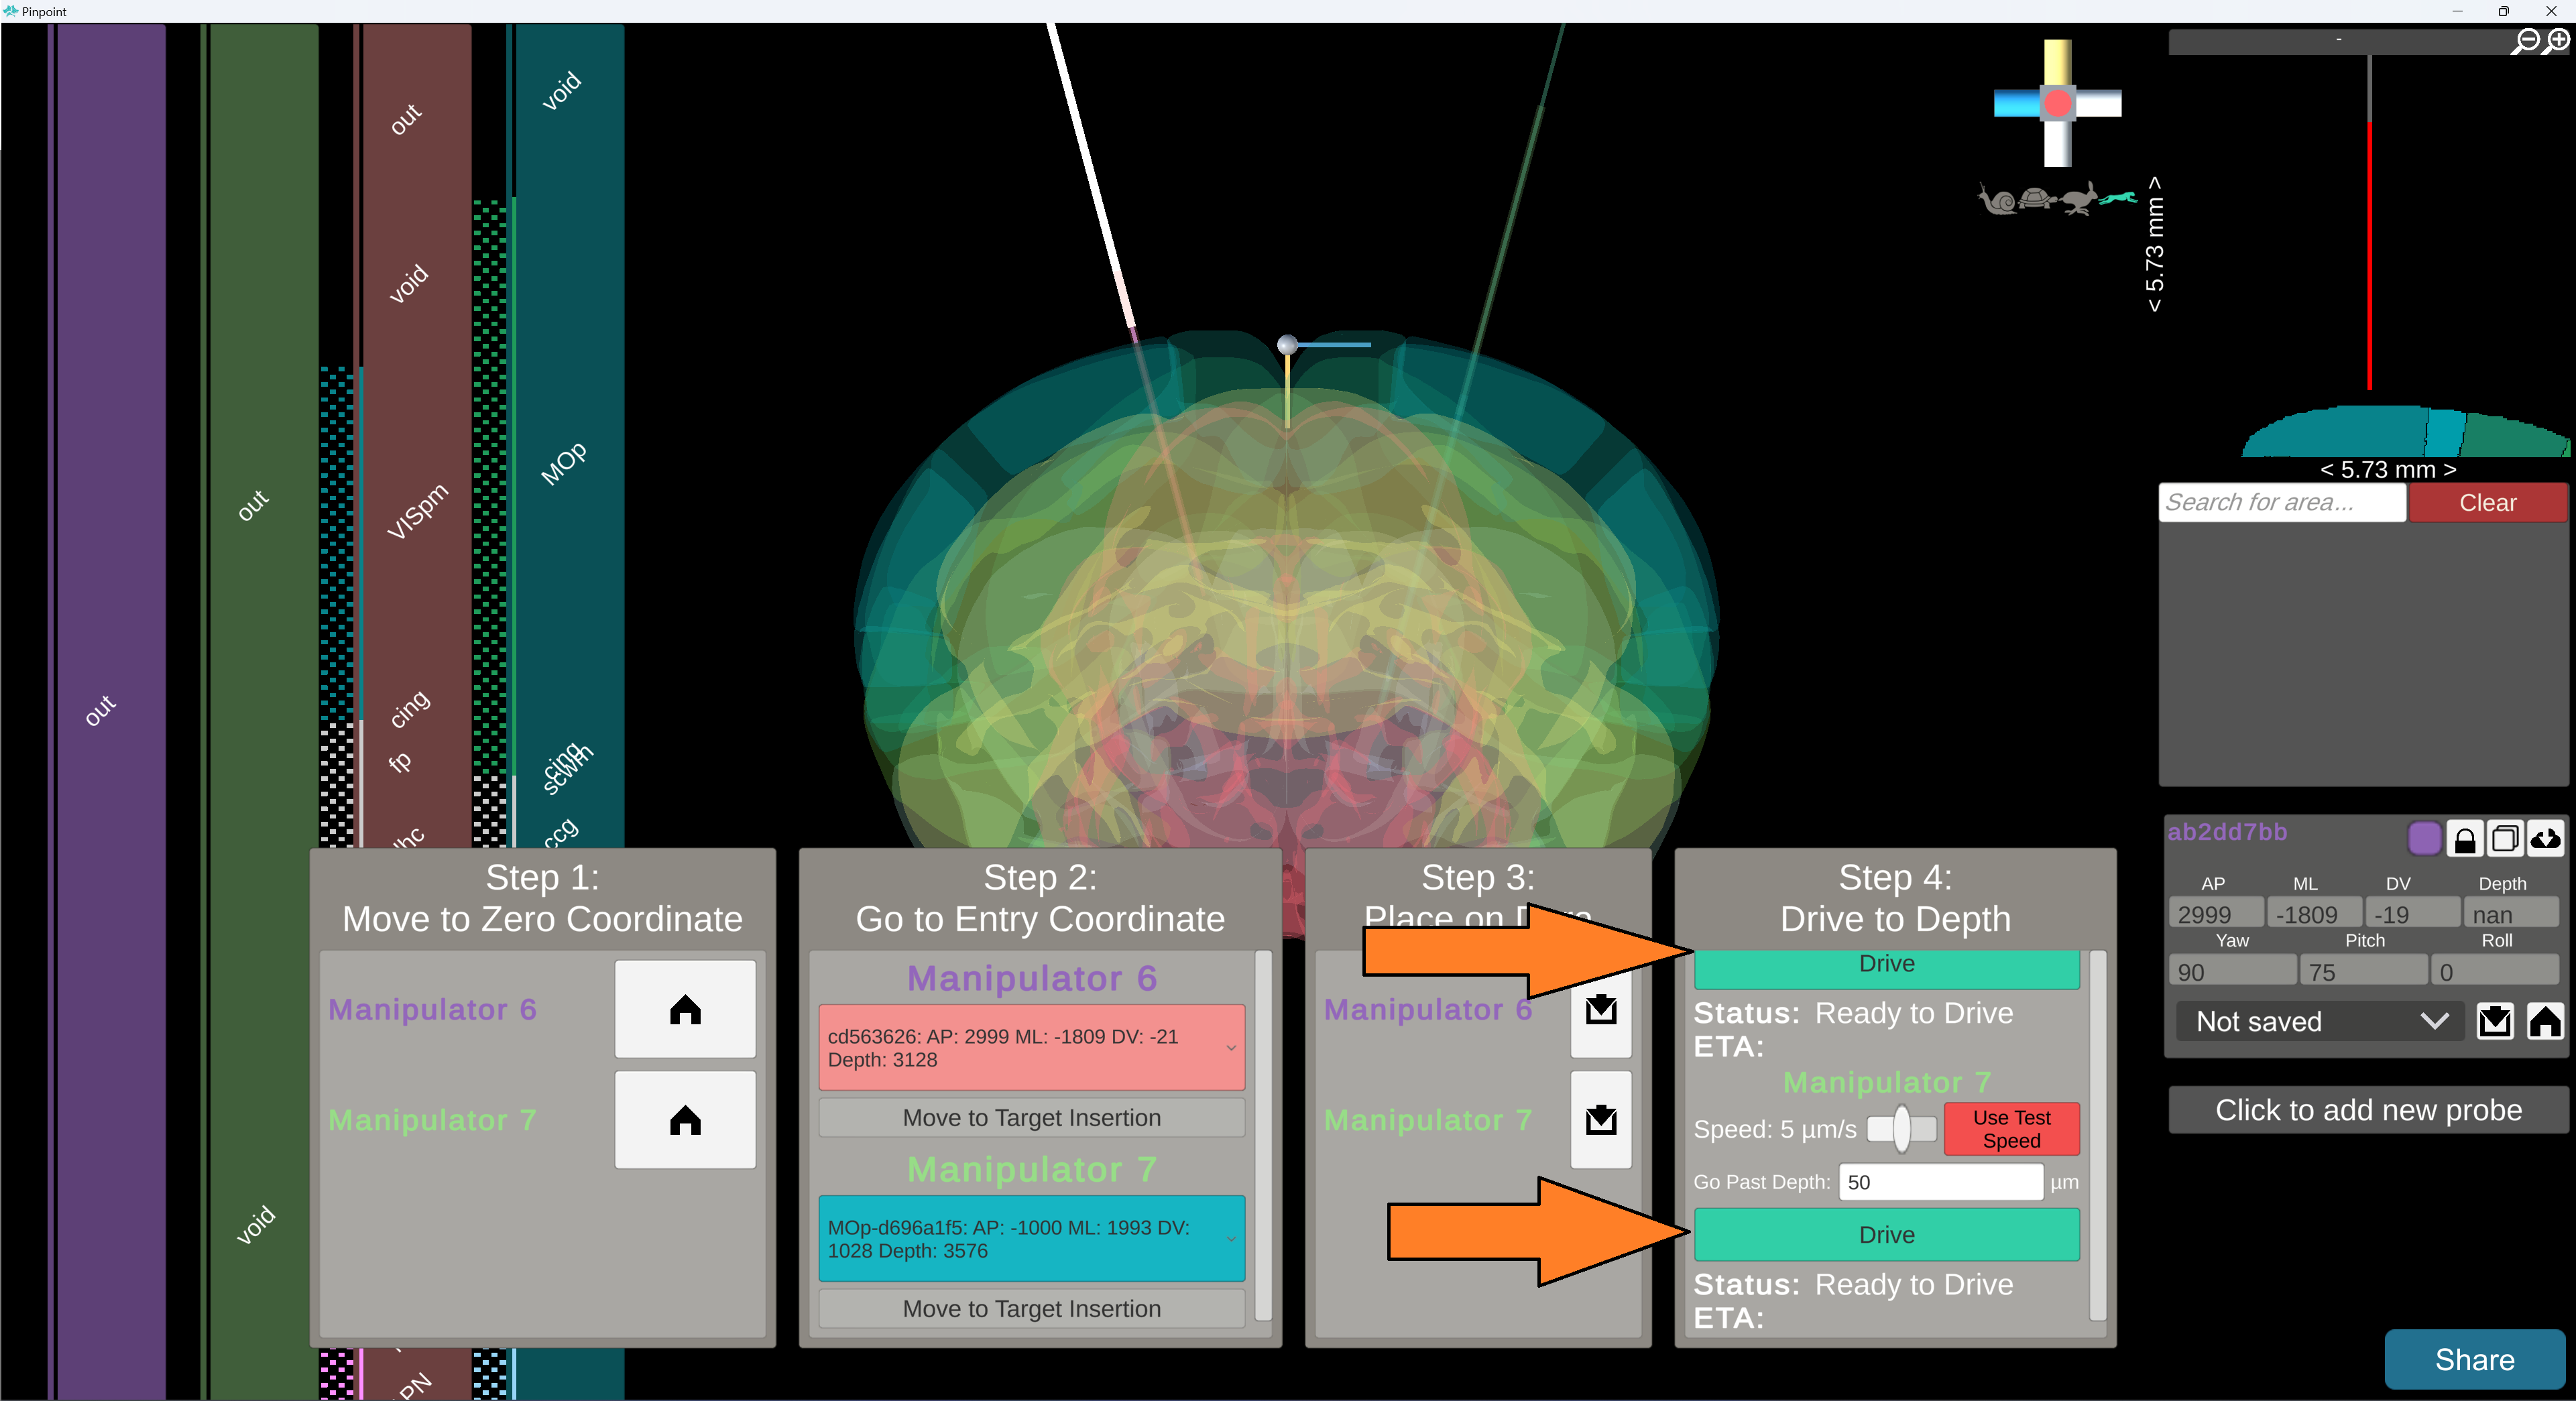
At any point, you may press the “Stop Movement” button or the hardware stop button to pause the movement of that manipulator.
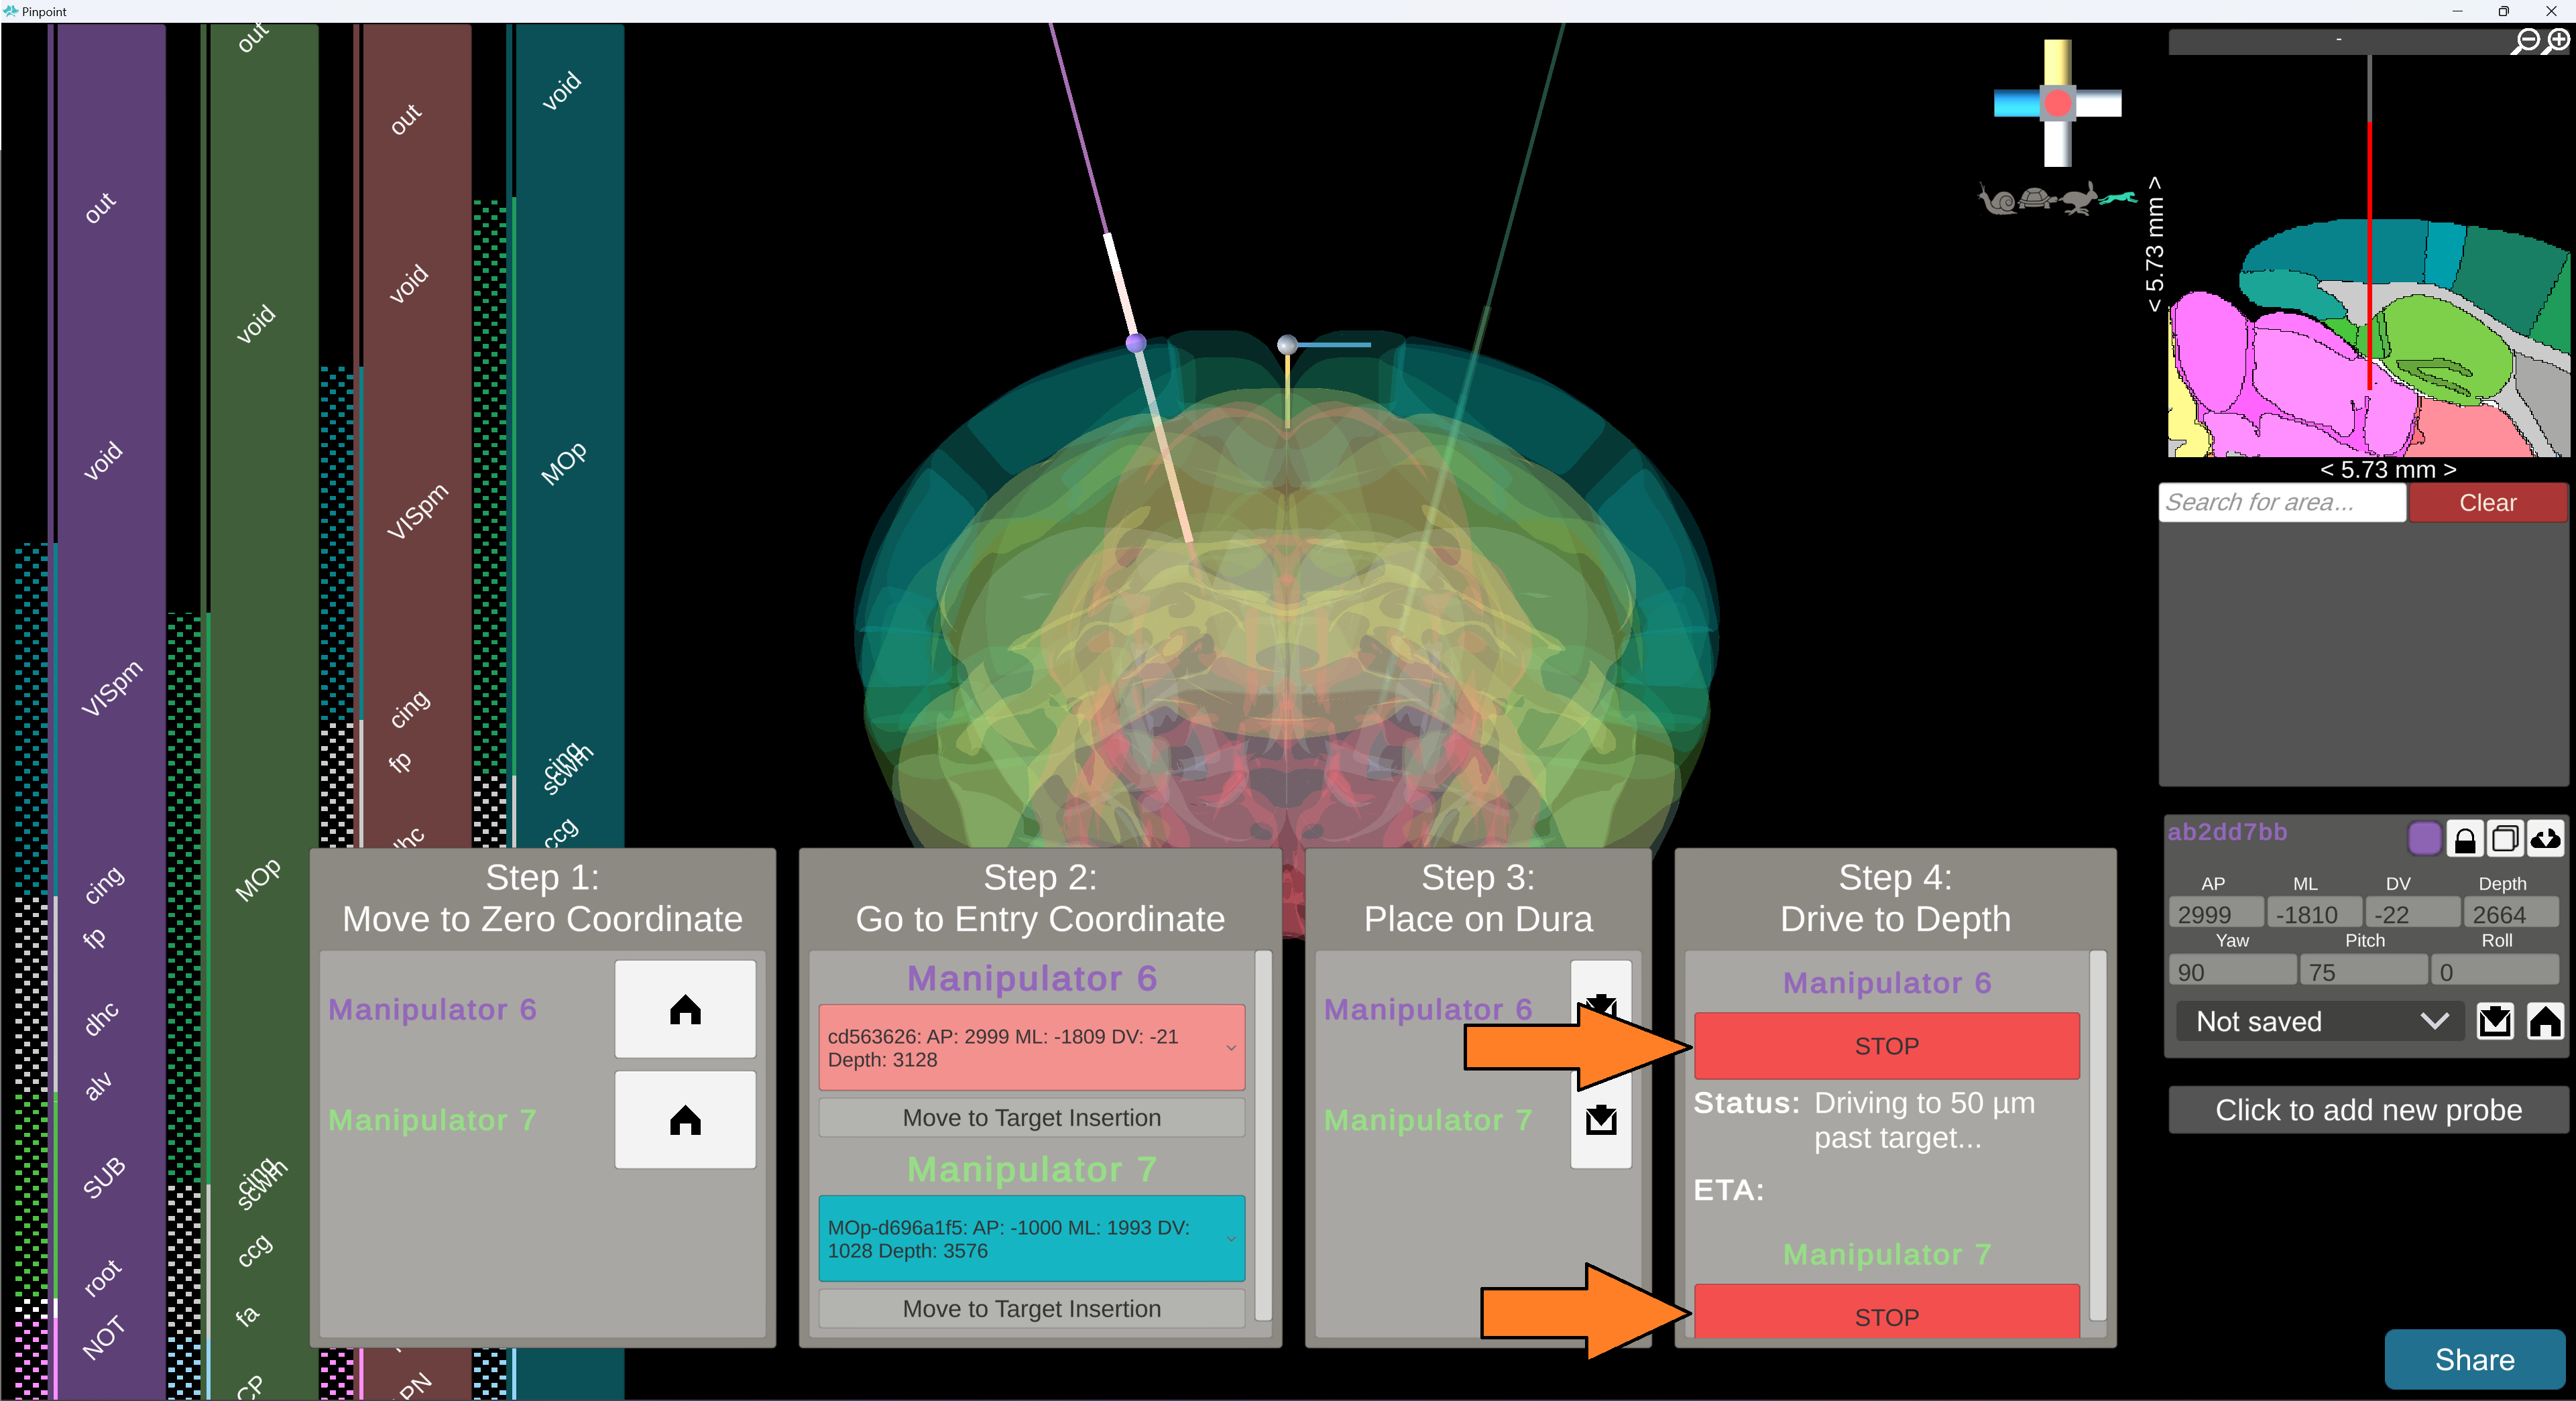
To resume movement, press “Move to Target Insertion” again. If you use the hardware stop button, you will have to reset it.
Wait for the manipulators to reach their target depth. You can watch the progress in the Copilot panel and in Pinpoint.
At this point: your manipulators should be at their target depth, and you may record data!
12. Record data
😀🔬🧠👩🔬👨🔬🧑🔬
14. Return to the surface
When you are done recording, press “Return to Surface” for each manipulator to drive them back to their target entry coordinates. To save time, you can drive them all at once.
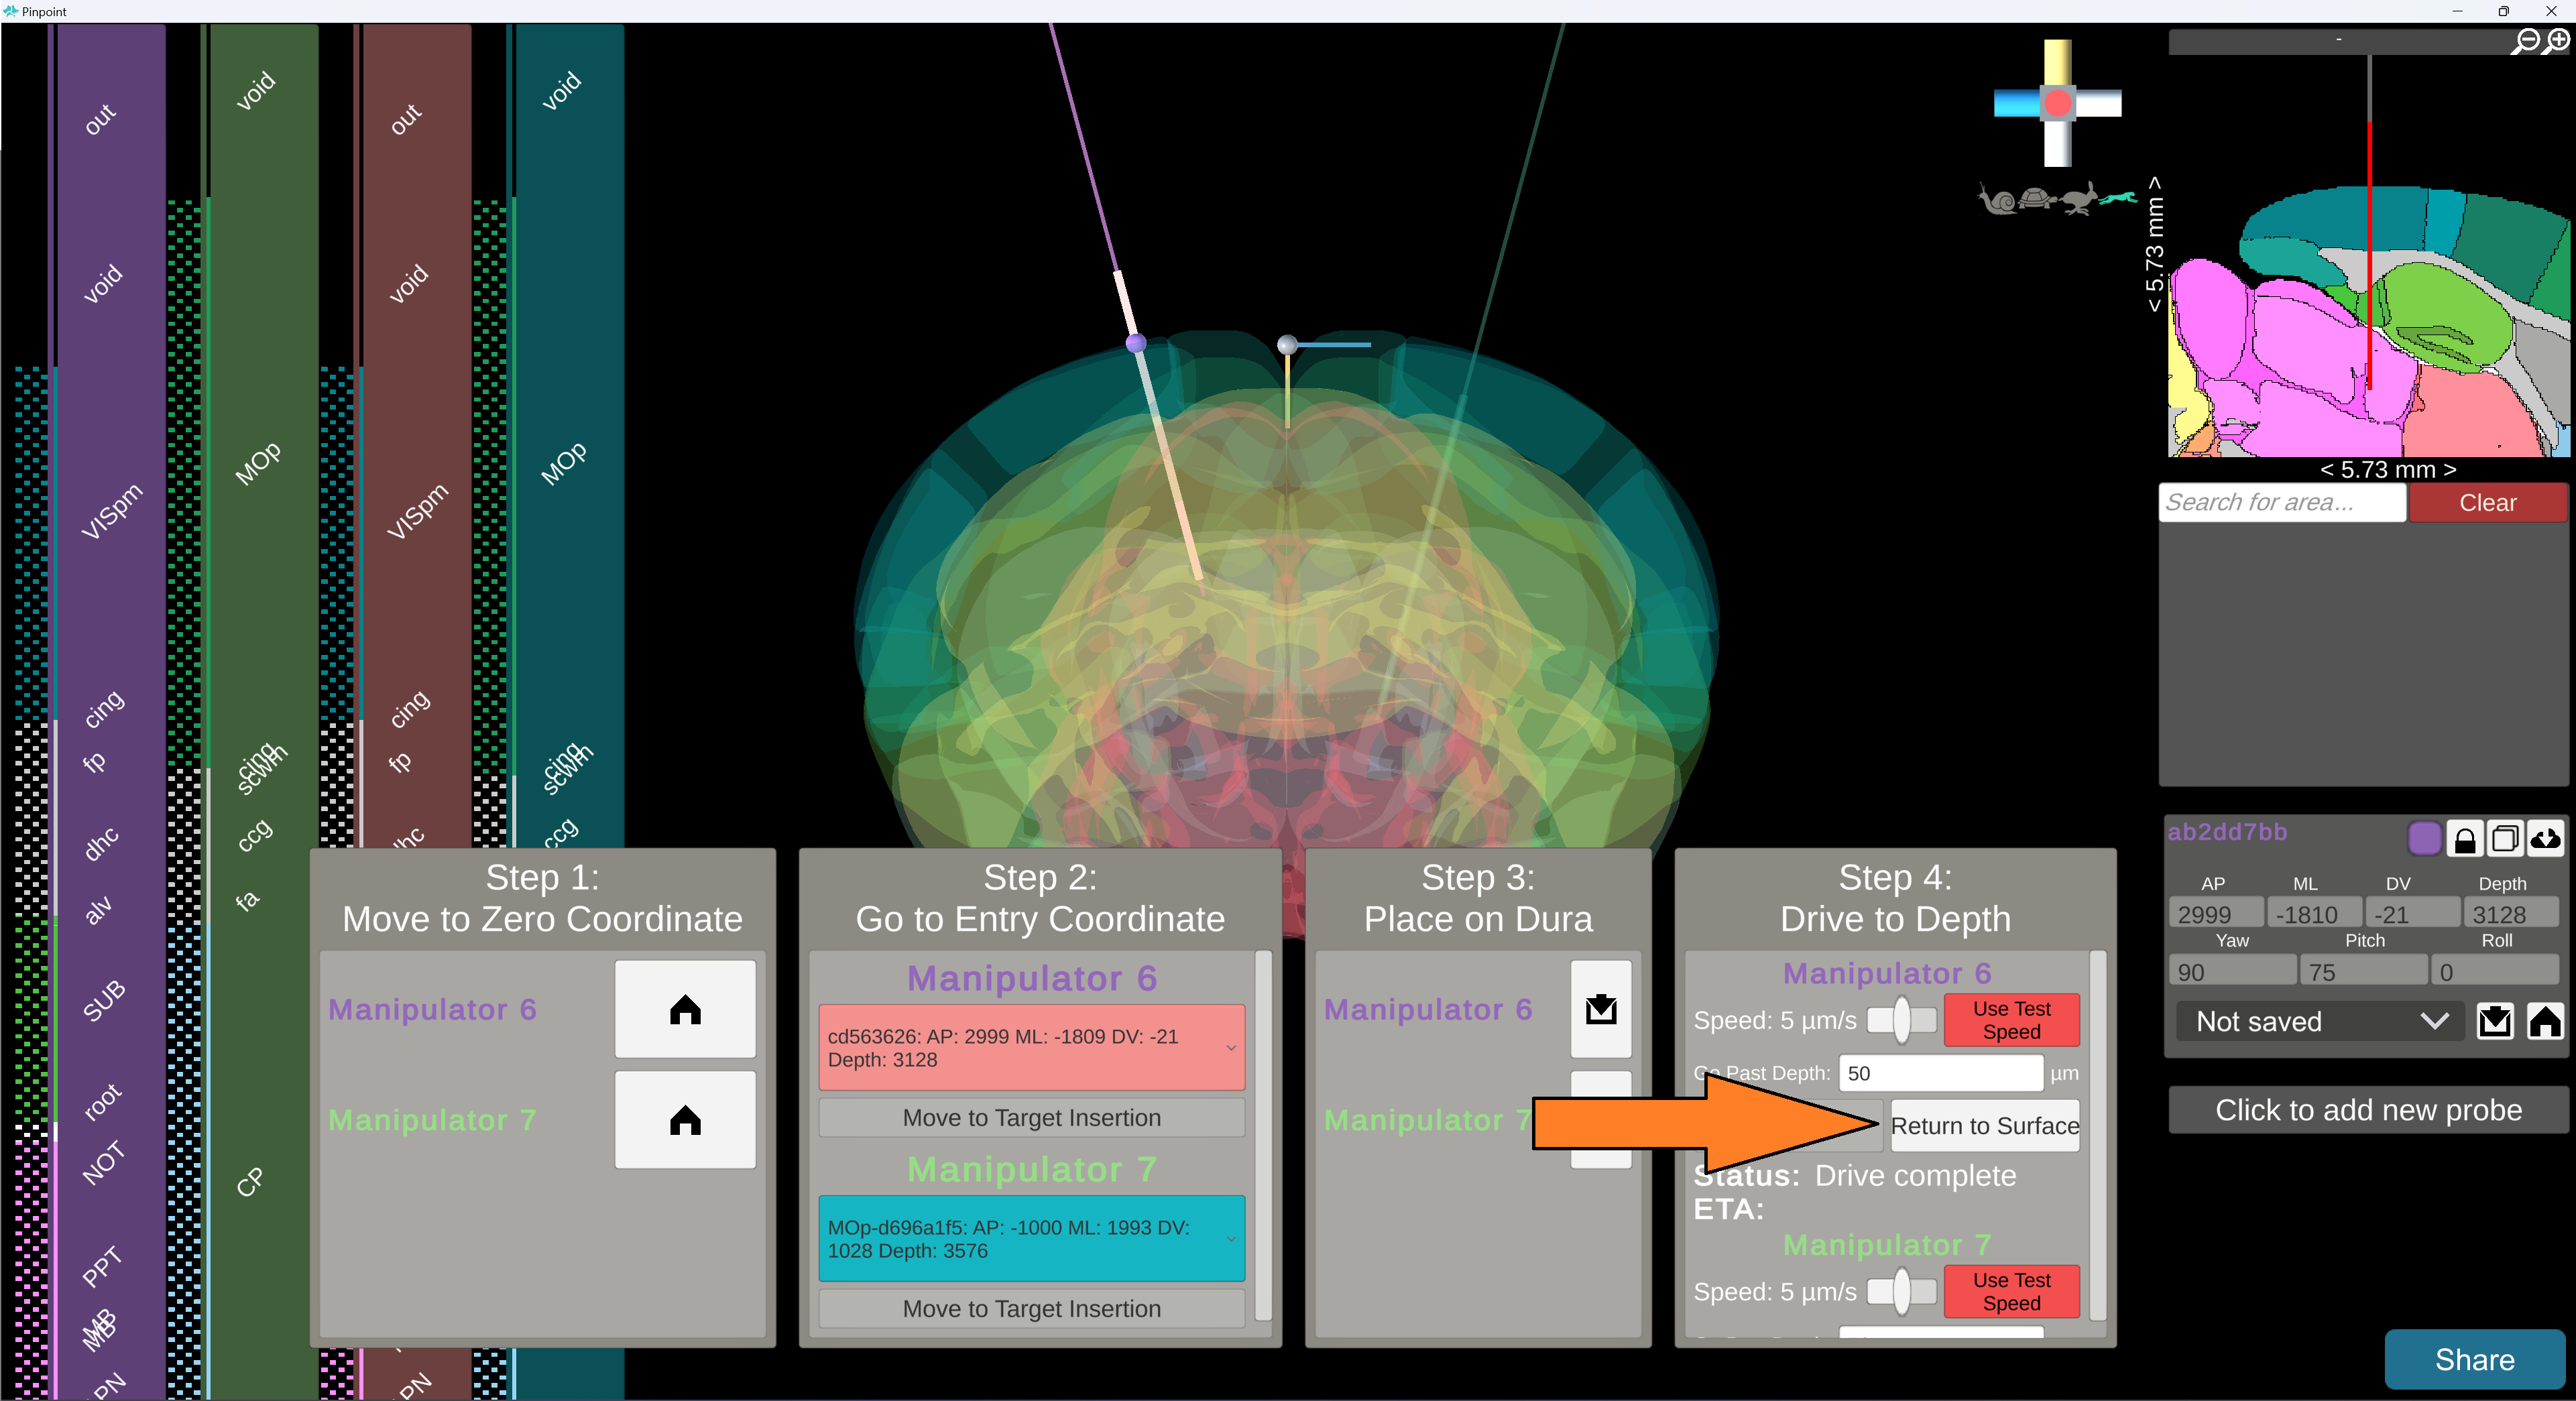
At any point, you may press the “Stop Movement” button or the hardware stop button to pause the movement of that manipulator.
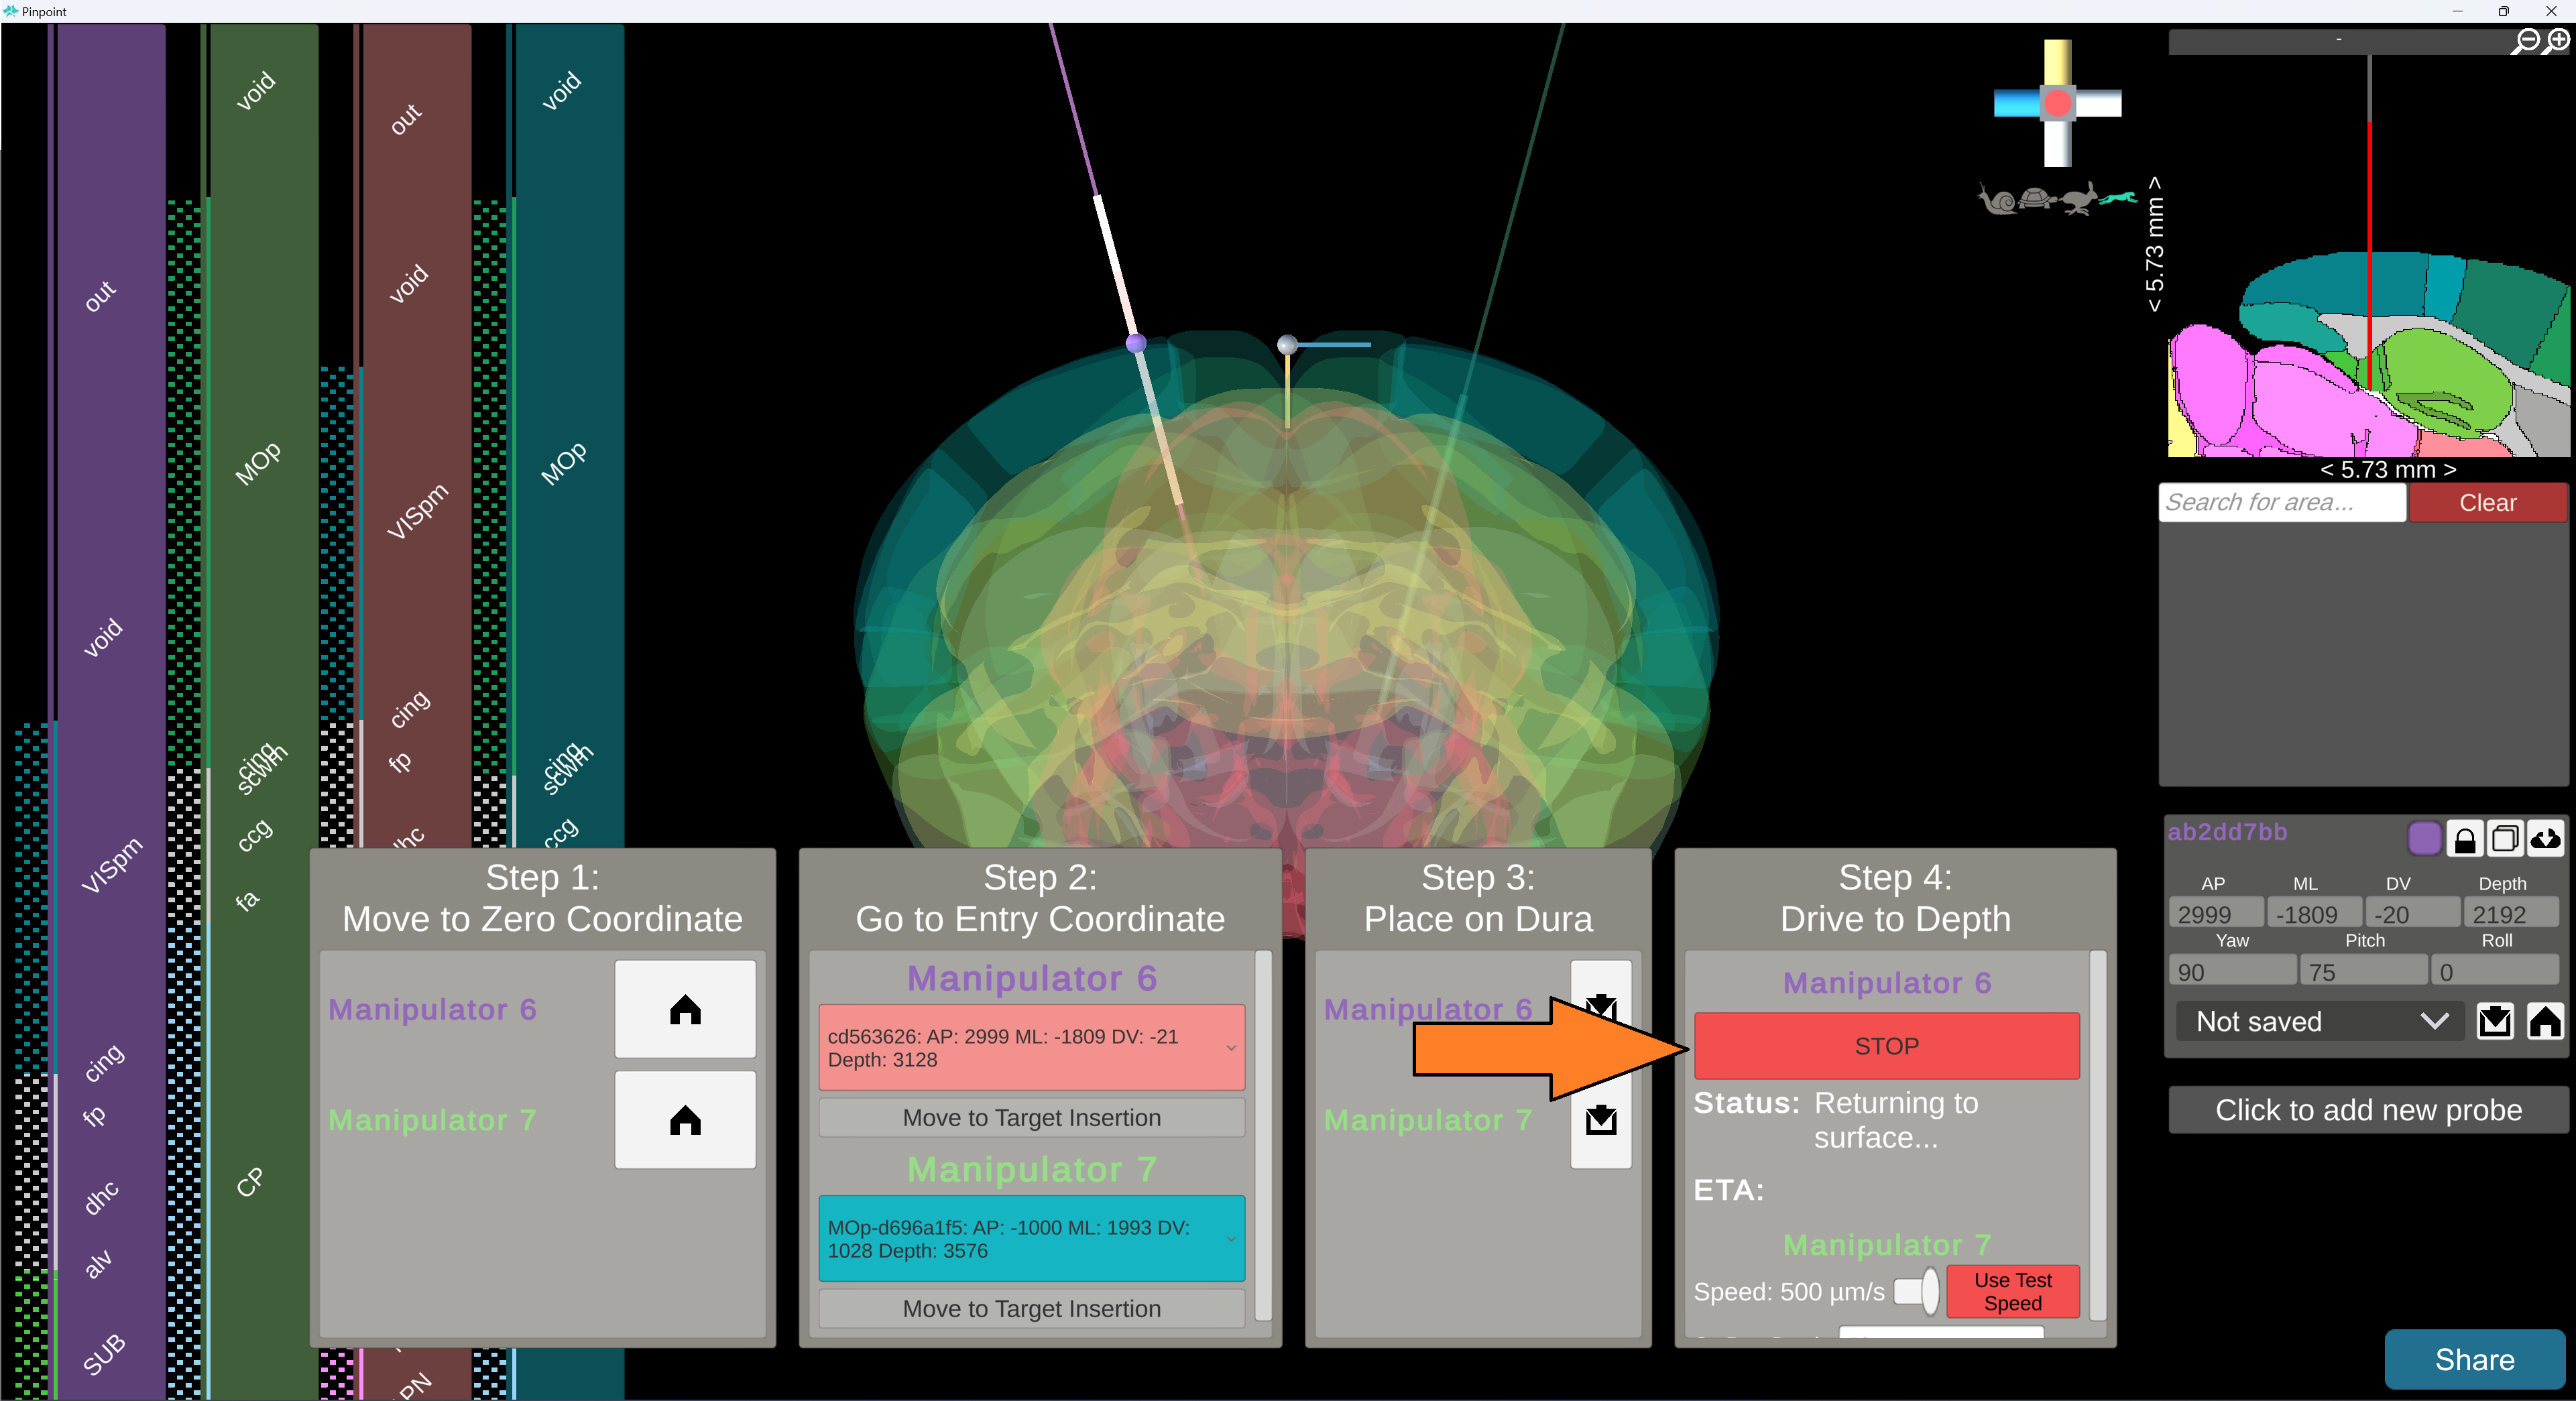
To resume movement, press “Move to Target Insertion” again. If you use the hardware stop button, you will have to reset it.
At this point: your manipulators should be back at their target entry coordinates outside the brain.
To re-insert the probes, go back to step 10 (calibrating to the Dura) and repeat the drive process.
15. Clean up
Congratulations! You have completed an experiment with Ephys Copilot! To close the Copilot panel, press ESC to open the main menu and uncheck the Enable Copilot checkbox. Press ESC again to close the main menu.
If you have any questions or feedback, please reach out to Dan or Kenneth. We are excited to hear from you!