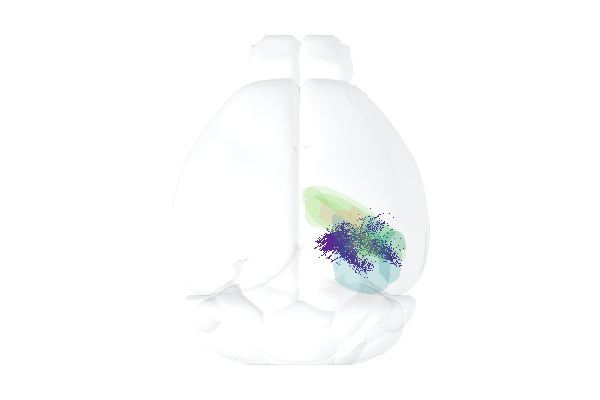
Neurons (using particle system)
This tutorial demonstrates how to generate huge numbers of neurons, up to millions, with relatively little impact on the renderer’s performance. Here, we’ll put 300,000 neurons in the scene
Install Urchin
Urchin is a Python package stored on PyPI, the following code needs to be run the first time you use Urchin in a Python environment.
Urchin’s full documentation can be found on our website.
[ ]:
#Installing urchin
!pip install oursin -U
[2]:
# If necessary, install pandas as well
!pip install pandas
Collecting pandas
  Using cached pandas-2.2.2-cp311-cp311-win_amd64.whl.metadata (19 kB)
Requirement already satisfied: numpy>=1.23.2 in c:\proj\vbl\urchin-examples\.direnv\urchin-examples\lib\site-packages (from pandas) (1.26.4)
Requirement already satisfied: python-dateutil>=2.8.2 in c:\proj\vbl\urchin-examples\.direnv\urchin-examples\lib\site-packages (from pandas) (2.9.0.post0)
Collecting pytz>=2020.1 (from pandas)
  Using cached pytz-2024.1-py2.py3-none-any.whl.metadata (22 kB)
Collecting tzdata>=2022.7 (from pandas)
  Using cached tzdata-2024.1-py2.py3-none-any.whl.metadata (1.4 kB)
Requirement already satisfied: six>=1.5 in c:\proj\vbl\urchin-examples\.direnv\urchin-examples\lib\site-packages (from python-dateutil>=2.8.2->pandas) (1.16.0)
Using cached pandas-2.2.2-cp311-cp311-win_amd64.whl (11.6 MB)
Using cached pytz-2024.1-py2.py3-none-any.whl (505 kB)
Using cached tzdata-2024.1-py2.py3-none-any.whl (345 kB)
Installing collected packages: pytz, tzdata, pandas
Successfully installed pandas-2.2.2 pytz-2024.1 tzdata-2024.1
Setup Urchin and open the renderer webpage
By default Urchin opens the 3D renderer in a webpage. Make sure pop-ups are enabled, or the page won’t open properly. You can also open the renderer site yourself by replacing [ID here] with the ID that is output by the call to .setup() at https://data.virtualbrainlab.org/Urchin/?ID=[ID here]
Note that Urchin communicates to the renderer webpage through an internet connection, we don’t currently support offline use (we hope to add support in the future).
[2]:
#Importing necessary libraries:
import oursin as urchin
urchin.setup()

import requests
import pandas as pd
import io
(URN) connected to server
Login sent with ID: ee51adb6, copy this ID into the renderer to connect.
Load Allen Institute dataset
For this tutorial, we’ll be using the Allen Institute’s Visual Behavior Neuropixels dataset. This data was recorded with six probes at a time from cortical targets in visual cortex as well as a few subcortical regions. Let’s start by just loading the neuron positions, as well as their raw firing rates.
We’ve preprocessed the data for you and saved it into a convenient CSV file.
[3]:
file_id = '1a3ozycbCT6HvC7bZM1CQ_lhIlGmo6ACB'
download_link = f"https://drive.google.com/uc?id={file_id}"
response = requests.get(download_link)

df = pd.read_csv(io.StringIO(response.text))

# some rows have a zero value for the coordinates, remove those rows
coord_cols = ['left_right_ccf_coordinate', 'anterior_posterior_ccf_coordinate', 'dorsal_ventral_ccf_coordinate']
df = df[(df[coord_cols] != 0).all(axis=1)]
[4]:
df.head()
[4]:
| unit_id | left_right_ccf_coordinate | anterior_posterior_ccf_coordinate | dorsal_ventral_ccf_coordinate | firing_rate | percentile_rank | color | size_scale | |
|---|---|---|---|---|---|---|---|---|
| 0 | 1157005856 | 6719 | 8453 | 3353 | 0.931674 | 0.262039 | #cbbadc | 0.046550 |
| 1 | 1157005853 | 6719 | 8453 | 3353 | 8.171978 | 0.775100 | #6a399a | 0.079213 |
| 2 | 1157005720 | 6590 | 8575 | 3842 | 13.353274 | 0.885895 | #551d8c | 0.088849 |
| 3 | 1157006074 | 6992 | 8212 | 2477 | 12.006044 | 0.864987 | #59228f | 0.086945 |
| 4 | 1157006072 | 6992 | 8212 | 2477 | 6.058306 | 0.692708 | #7a4ea5 | 0.072731 |
Before doing anything with the neurons, let’s just the load the root area for the CCF.
[5]:
urchin.ccf25.load()
[6]:
urchin.ccf25.root.set_visibility(True)
urchin.ccf25.root.set_material('transparent-lit')
urchin.ccf25.root.set_color([0,0,0])
urchin.ccf25.root.set_alpha(0.15)
Cool. Let’s create a group of neuron objects in Urchin. To create a group of neurons, call the urchin.neurons.create(n) function, passing the number of neurons n as a parameter. The create function returns a list of neuron objects, which can then be passed to plural functions to set the position, color, size (etc) of all the neurons at once.
[7]:
psystem = urchin.particles.ParticleSystem(n=len(df))
Now let’s go through the dataframe, and set the positions of the neurons. When you’re setting the positions of a large number of neurons like this, it’s best practice to the use the “plural” functions. If you were to call Neuron.set_position() for each neuron in the list you would generate an unnecessary amount of communication overhead!
To use the plural urchin.neurons.set_positions() function, pass in the neurons list, followed by the new position for each neuron.
Note that we’re about to create 300,000 neurons! This will take a second!
[8]:
positions_list = []

bregma = [5200, 5700, 330]
positions_list = df[['anterior_posterior_ccf_coordinate', 'left_right_ccf_coordinate', 'dorsal_ventral_ccf_coordinate']].values.tolist()

positions_list = [[x[0]-bregma[0], x[1]-bregma[1], x[2]-bregma[2]] for x in positions_list]

psystem.set_positions(positions_list)
[9]:
urchin.camera.main.set_zoom(45)
await urchin.camera.main.screenshot(size=[600,400])
(Camera receive) Camera CameraMain received an image
(Camera receive) Camera CameraMain received an image
(Camera receive) CameraMain complete
[9]:
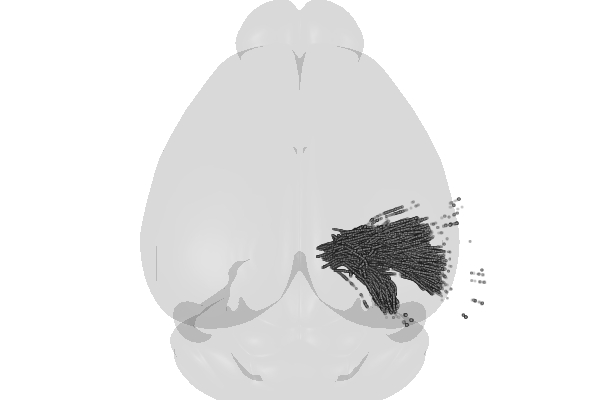
Cool! That looks promising. Maybe we should add all the brain regions that the probes are going through, just to make things look good? Check out the Areas tutorial for more details on this code.
[10]:
brain_areas = ["VISp", "VISl", "VISal", "VISpm", "VISam", "VISrl", "LGd", "LP", "CA1", "CA3", "DG"]

area_list = urchin.ccf25.get_areas(brain_areas)

urchin.ccf25.set_visibilities(area_list, True, urchin.utils.Side.RIGHT)
urchin.ccf25.set_materials(area_list, 'transparent-unlit', "right")
urchin.ccf25.set_alphas(area_list, 0.2, "right")
[11]:
await urchin.camera.main.screenshot(size=[600,400])
(Camera receive) CameraMain complete
[11]:
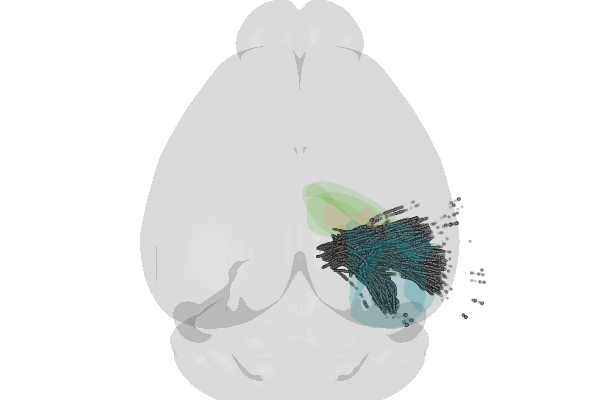
Urchin can take in color input in different formats, including hex codes, RGB floats, and RGB ints. Urchin uses hex colors represented as strings by default, but you can also pass colors as lists or tuples. The followig examples are all equivalent:
neurons[i].set_color((0,255,0))
neurons[i].set_color([0,255,0])
neurons[i].set_color((0,1.0,0))
Let’s set the color of all the neurons according to their firing rates. We’ve pre-computed the colors in the CSV file for convenience.
[12]:
colors = list(df['color'].values)
colors = [urchin.utils.hex_to_rgb(x) for x in colors]

psystem.set_colors(colors)
[22]:
await urchin.camera.main.screenshot(size=[600,400])
(Camera receive) CameraMain complete
[22]:
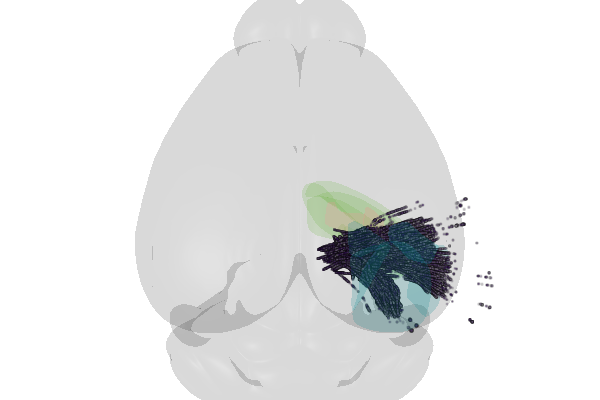
We can also set the scale of neurons in a similar way
[14]:
sizes = list(df['size_scale'].values)
sizes = [int(x*1000) for x in sizes]

psystem.set_sizes(sizes)
[37]:
await urchin.camera.main.screenshot(size=[600,400])
(Camera receive) Camera CameraMain received an image
(Camera receive) CameraMain complete
[37]:
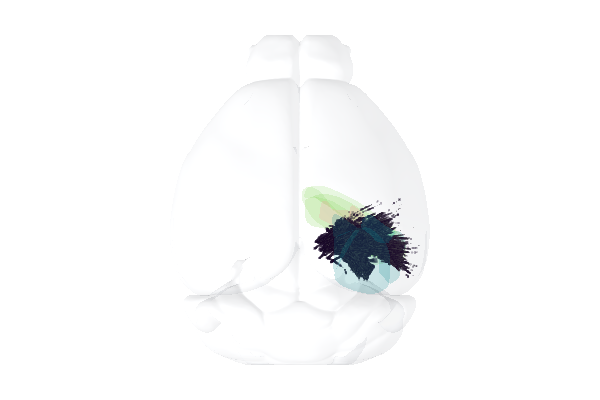
Now the neurons are scaled and colored by their average firing rate in the dataset, which is a pretty intuitive way of representing the data!
Note that the “plural” functions you used each have a “singular” version as well, that can be called directly from the Neuron objects, for example by doing: neurons[0].set_size(3.0)
Materials
There are only three options right now for neuron materials, we’ll add more soon! The current options are “gaussian”, “circle”, and “circle-lit”. The lit particles are affected by the scene lighting, while the unlit ones will have the exact color you set them to. If you are coloring neurons by a colormap you shouldn’t use the -lit variants!
[17]:
psystem.set_material('circle')
[41]:
await urchin.camera.main.screenshot(size=[600,400])
(Camera receive) Camera CameraMain received an image
(Camera receive) CameraMain complete
[41]:
